You add a portable air conditioner to the sunroom, run a space heater in the finished attic, and still find one bedroom sweating while another stays cold. The central system runs longer, energy bills climb, and the rooms you use never feel right. That isn't a thermostat problem. It's usually a distribution, ductwork, or zoning problem.
Ductless mini split systems can fix that, but only when they're designed for the building instead of sold as oversized boxes on a wall. They're excellent for targeted retrofits, additions, older homes, and rooms that central HVAC misses. They aren't automatically the right replacement for a whole-home system, and refrigerant changes now make long-term serviceability part of the buying decision.
Table of Contents
- Why Ductless Mini Split Systems Are Changing Home Comfort
- How the Technology Actually Works
- Decoding Efficiency Ratings and Real-World Performance
- Sizing Your Space – Single-Zone vs Multi-Zone Retrofits
- The Refrigerant Transition and Long-Term Serviceability
- Installation Requirements and Electrical Limits
- Final Decision Checklist and Next Steps
Why Ductless Mini Split Systems Are Changing Home Comfort
A ductless system earns its keep in the room that your existing HVAC can't handle. Consider a home with a shaded first floor, a west-facing upstairs bedroom, and a sunroom added years after the original furnace and air conditioner. A single central thermostat reads the hallway temperature and assumes the rest of the home feels the same. It doesn't.
A ductless mini split puts conditioning where the load occurs. The indoor unit in the sunroom can respond to afternoon solar heat without forcing the entire house to cool. A head in the upstairs bedroom can provide comfort there without sending conditioned air through ducts that may be poorly sized, poorly insulated, or routed through unconditioned spaces.
The basic setup has an outdoor compressor and condenser connected to one or more indoor air handlers by refrigerant lines. There are no supply ducts carrying air from a central blower to every room. That eliminates the duct-related distribution problem, but it doesn't eliminate the need for proper design.
The strongest use cases
Ductless systems make particular sense when:
- You have a problem room: A bedroom, attic, garage, workshop, or sunroom can get independent heating and cooling without remodeling the entire home.
- The building has no practical duct route: Historic homes and older additions often can't accommodate large supply and return runs without sacrificing finished space.
- You want room-level control: Each indoor unit can be set independently, so an occupied living area doesn't have to match an unused guest room.
- Your existing system still has useful life: A targeted retrofit can address comfort failures without replacing equipment that still serves the rest of the building adequately.
A ductless system is less compelling if your central equipment and ductwork already deliver even comfort throughout the home. In that case, adding several indoor heads may create unnecessary equipment, maintenance, and visual clutter.
Practical rule: Fix the room that needs help first. Don't replace a functioning whole-home system just because a mini split looks more efficient on a product page.
The format has matured from a specialized answer for unusual buildings into a mainstream HVAC option. Historical accounts commonly identify the Twin Pac, developed for Sears in 1969, as the first true mini split, with early systems using only 8 feet of refrigerant line and quick-connect fittings. Separate industry history places early development in Japan during the 1970s, followed by advances such as Toshiba's first inverter-based air conditioner in 1981 and Daikin's first R32 mini split in 2012. Those milestones are summarized in this history of ductless heat pump development.
If you're deciding whether to repair or replace your existing equipment, compare the ductless option with the broader choices in this HVAC repair or replacement guide. The right answer depends on which parts of the home need a change.
How the Technology Actually Works
A ductless mini split moves heat rather than just creating cold or hot air. In cooling mode, the indoor coil absorbs heat from room air. Refrigerant carries that heat through the line set to the outdoor unit, where the condenser releases it outside.
The indoor and outdoor components are connected by a bundle that typically contains refrigerant piping, electrical conductors, and a condensate drain. The line set is the system's physical link. Its route, length, elevation changes, and insulation all affect whether the installation follows the manufacturer's requirements.

What happens during operation
- The indoor coil absorbs heat. A fan moves room air across the cold evaporator coil.
- The compressor raises refrigerant pressure. The outdoor compressor uses electricity to compress the refrigerant and prepare it to reject heat.
- The outdoor coil releases heat. The outdoor fan moves ambient air across the condenser coil.
- The refrigerant expands and cools. An expansion device lowers its pressure before it returns indoors.
- The cycle continues. Sensors and controls adjust capacity as room conditions change.
In heating mode, the refrigeration cycle reverses. The outdoor unit extracts heat from outside air and transfers it indoors. The exact cold-weather capability depends on the model, so don't assume every ductless heat pump can handle the same climate.
Why inverter compressors matter
Fixed-speed equipment behaves like stop-and-go traffic. It starts at full capacity, runs until the thermostat is satisfied, shuts off, and then repeats. That pattern can create temperature swings and waste energy during mild conditions when the home needs only a small amount of heating or cooling.
An inverter compressor works more like cruise control. It changes speed continuously instead of treating every demand as an on-or-off command. The compressor can ramp up after a door opens or the sun hits a room, then reduce output once the space approaches its setpoint.
That modulation produces three useful effects:
- Fewer start-stop losses: The system doesn't repeatedly restart at full output.
- More stable coil temperatures: The indoor coil stays closer to the condition required to maintain the setpoint.
- Better part-load behavior: The equipment can operate efficiently during the many hours when the room needs less than its maximum capacity.
Daikin's explanation of ductless system components and single-zone versus multi-zone operation is useful for checking how indoor units connect to outdoor equipment. The key point is simple. The compressor isn't just a powerful motor, and the indoor head isn't just a fan. The controls, sensors, refrigerant circuit, and installation all determine whether the system performs as intended.
Decoding Efficiency Ratings and Real-World Performance
A ductless system can post an excellent efficiency rating and still perform poorly in a partial-home retrofit. The rating describes tested equipment, while your electricity use depends on sizing, placement, insulation, controls, and installation.
SEER2 measures seasonal cooling efficiency. HSPF2 measures seasonal heating efficiency. Higher ratings generally indicate better seasonal performance, but they do not guarantee that every installation will use the same amount of electricity.
An oversized indoor unit, poor placement, weak insulation, or a refrigerant line installed beyond the permitted limits can erase the practical benefit of a high rating. Efficiency is a system result, not just a number printed on the carton.
ENERGY STAR provides a useful baseline for ductless heat pumps. Qualification requires independently verified minimum ratings of 18.7 SEER2, 12.0 EER2, and 8.5 HSPF2, as summarized in this ENERGY STAR mini split efficiency guide.
Efficiency benchmarks for ductless systems
| Metric | ENERGY STAR Minimum | Top-Tier Models (2026) |
|---|---|---|
| SEER2, cooling | 18.7 | Up to 35.1 |
| EER2, cooling | 12.0 | Not specified in the cited product examples |
| HSPF2, heating | 8.5 | Up to 30 |
The top-tier examples come from current manufacturer listings. Carrier and Bryant list systems reaching 35.1 SEER2 and 30 HSPF2, while Daikin lists systems reaching 27.4 SEER2. Review the Carrier ductless mini split product information for the cited manufacturer ratings.
Fast pull-down isn't the whole story
A unit that cools a hot room quickly can look impressive during a short demonstration. That result says little about full-day temperature stability or electricity use.
Independent lab evaluation measures how quickly a unit lowers room temperature by 10°F, how well it holds 75°F over 12 hours, and how many kilowatt-hours it consumes during that period. The Consumer Reports mini split testing overview explains why pull-down speed, temperature stability, and electricity use belong in the same comparison.
Use that distinction when reviewing a retrofit proposal. Do not select the largest BTU capacity or highest advertised cooling output automatically. A correctly sized inverter system that maintains the setpoint with minimal cycling can outperform a larger unit that repeatedly overshoots the room.
What to compare on a proposal
Request the exact model number, not only the brand and nominal capacity. Check:
- SEER2 and HSPF2: Compare the seasonal ratings with ENERGY STAR thresholds and your heating needs.
- Operating behavior: Ask how the unit performs at low loads, not only at maximum output.
- Room-specific design: Confirm that the indoor head matches the room's load and layout.
- Installation assumptions: Verify line length, voltage, refrigerant limits, and outdoor-unit placement for the selected model.
The proposal should explain why the equipment fits the rooms being retrofitted. A high rating cannot fix a poor design.
Sizing Your Space – Single-Zone vs Multi-Zone Retrofits
The most common mistake in a ductless retrofit is treating the home as one simple box. A south-facing bedroom, a shaded office, and an open kitchen-living area don't have the same heating or cooling demand. Mixed insulation, multiple floors, large windows, and air leakage make square-foot guesses especially unreliable.
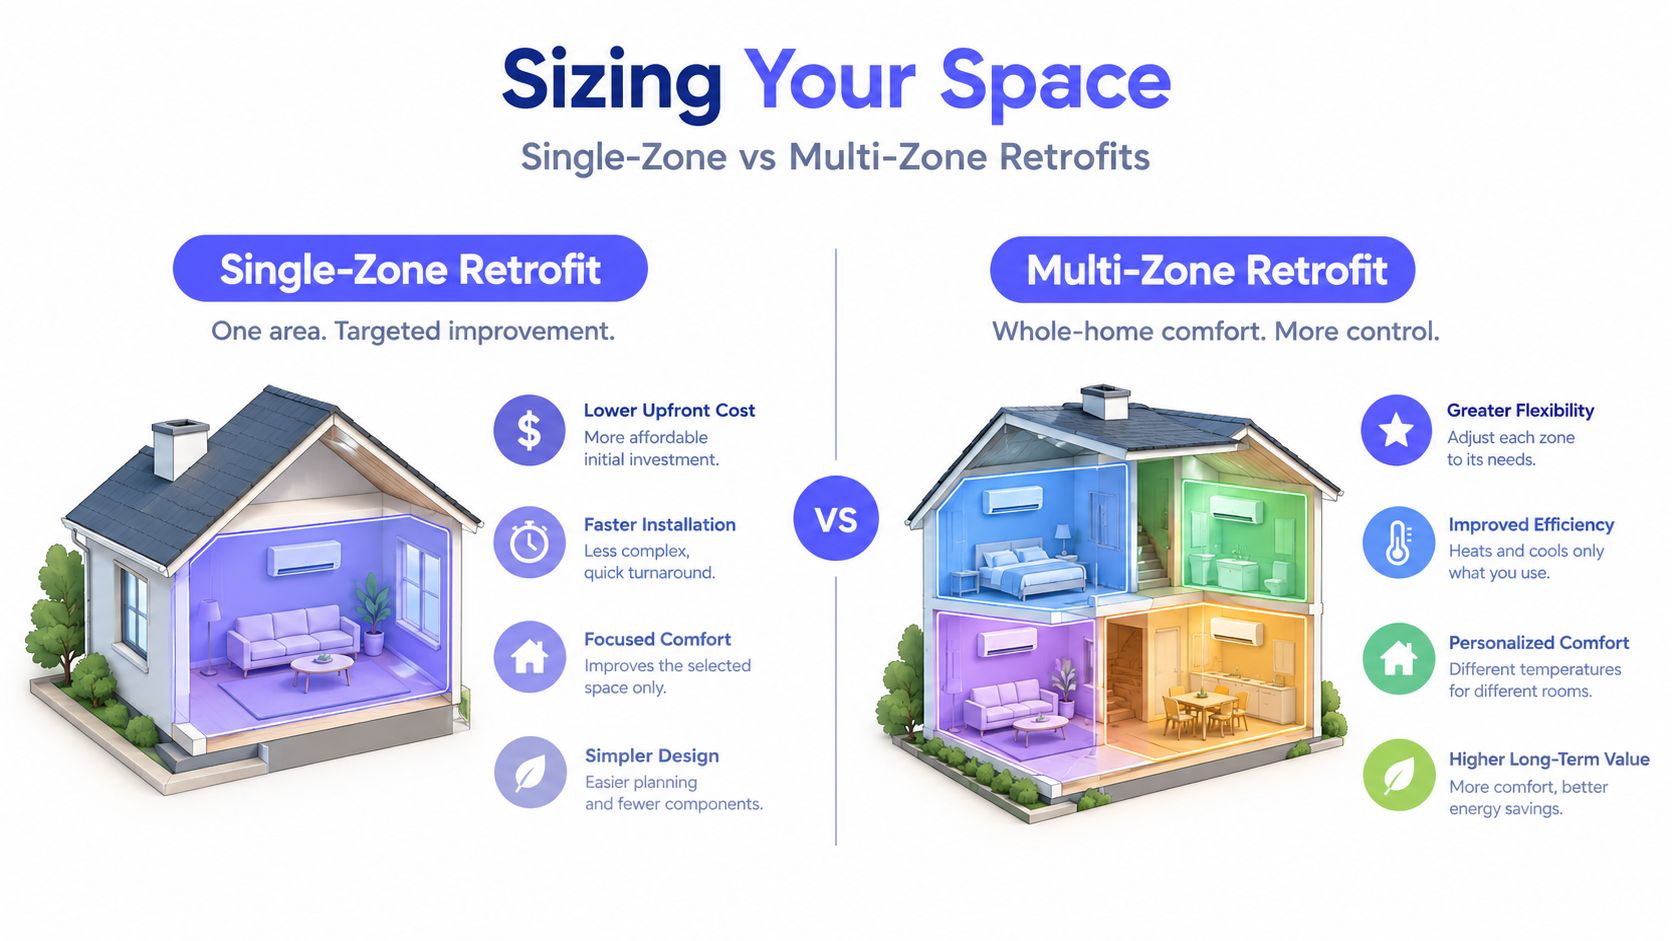
Single-zone and multi-zone systems solve different problems. A single-zone system connects one indoor unit to one outdoor unit. It's a focused tool for one room or one open area. A multi-zone system connects several indoor units to one outdoor unit, with independent controls for each indoor space.
Single-zone is usually the cleaner retrofit
Choose single-zone when one area is clearly underperforming. Typical examples include:
- A finished attic: The attic may gain heat faster than the rest of the home and may not have adequate duct capacity.
- A sunroom: Glass and solar exposure can create a cooling load that the original HVAC design never anticipated.
- An addition: The new room may sit beyond the practical reach of existing ducts.
- A bedroom over a garage: The floor assembly and exterior exposure can create a different heating demand from adjacent rooms.
The outdoor unit, line route, electrical work, and maintenance are limited to one zone. That keeps the design easier to inspect and makes it less likely that you install capacity you won't use.
Multi-zone can work, but it isn't a shortcut
A multi-zone layout becomes reasonable when several rooms lack adequate conditioning and the home has no practical duct solution. It can provide independent control across floors or rooms, but every indoor head needs a sensible location, a drain strategy, and a line route back to the outdoor unit.
Market data shows that single-zone systems represented 68.8% of North American mini split revenue in 2025, according to this North America mini split market outlook. That doesn't prove single-zone is always better. It does show that room-by-room retrofits remain the dominant buying pattern, rather than full-home replacement.
Don't ask, “How many indoor heads can this outdoor unit support?” Ask, “Which rooms need conditioning, and can this layout deliver it without awkward routing or oversized capacity?”
A whole-home ductless design may compete with a ducted system in a new build or a major renovation. For a partial retrofit, though, it often makes more sense to leave a sound central system in place and target the rooms it misses.
Before approving work, request a room-by-room load calculation and a line-routing sketch. Compare equipment and labor assumptions with this ductless mini split installation cost guide, but don't treat a generic cost range as a substitute for a site-specific proposal.
The Refrigerant Transition and Long-Term Serviceability
The refrigerant in a ductless system affects environmental performance, technician training, recovery equipment, parts availability, installation procedures, and future service costs. Those issues matter even more in a partial-home retrofit, where the new mini split may need support from a different service network than the existing central system.
Most ductless mini split systems sold in 2026 use R-32 or R-454B, according to this industry coverage of the ductless refrigerant transition. These lower-global-warming-potential A2L refrigerants require handling and safety procedures for mildly flammable refrigerants. The installer must have the right training, tools, and documentation.
Questions to ask before buying
Ask these questions before approving the equipment:
- Which refrigerant does the exact model use?
- Is your team trained and equipped to service it?
- Will replacement boards, sensors, valves, and other parts remain available through normal distribution?
- Does the installation meet current refrigerant and electrical requirements?
- Can another local company service the system later if your installer is unavailable?
A cheaper older unit can cost more over its life if nearby technicians do not stock its parts or support its refrigerant platform. Older equipment will not stop working overnight, but serviceability deserves the same attention as efficiency. Get the model number and refrigerant type in writing, not just in a sales presentation.
The category is expanding. North American mini split revenue was estimated at USD 4.6 billion in 2025 and projected to reach USD 10.5 billion by 2035, per the same industry coverage noted above. Greater adoption should make trained service more accessible, while the rapid product changes make platform selection more important.
Buy for the service call you may need later. Choose a recognized refrigerant platform, require a documented installation, and confirm that a trained local technician can support it. A small showroom-price difference is not worth an uncertain repair path.
Put the refrigerant, model number, warranty conditions, and installer qualifications in the written proposal. If the salesperson cannot answer basic service questions, choose another installer.
Installation Requirements and Electrical Limits
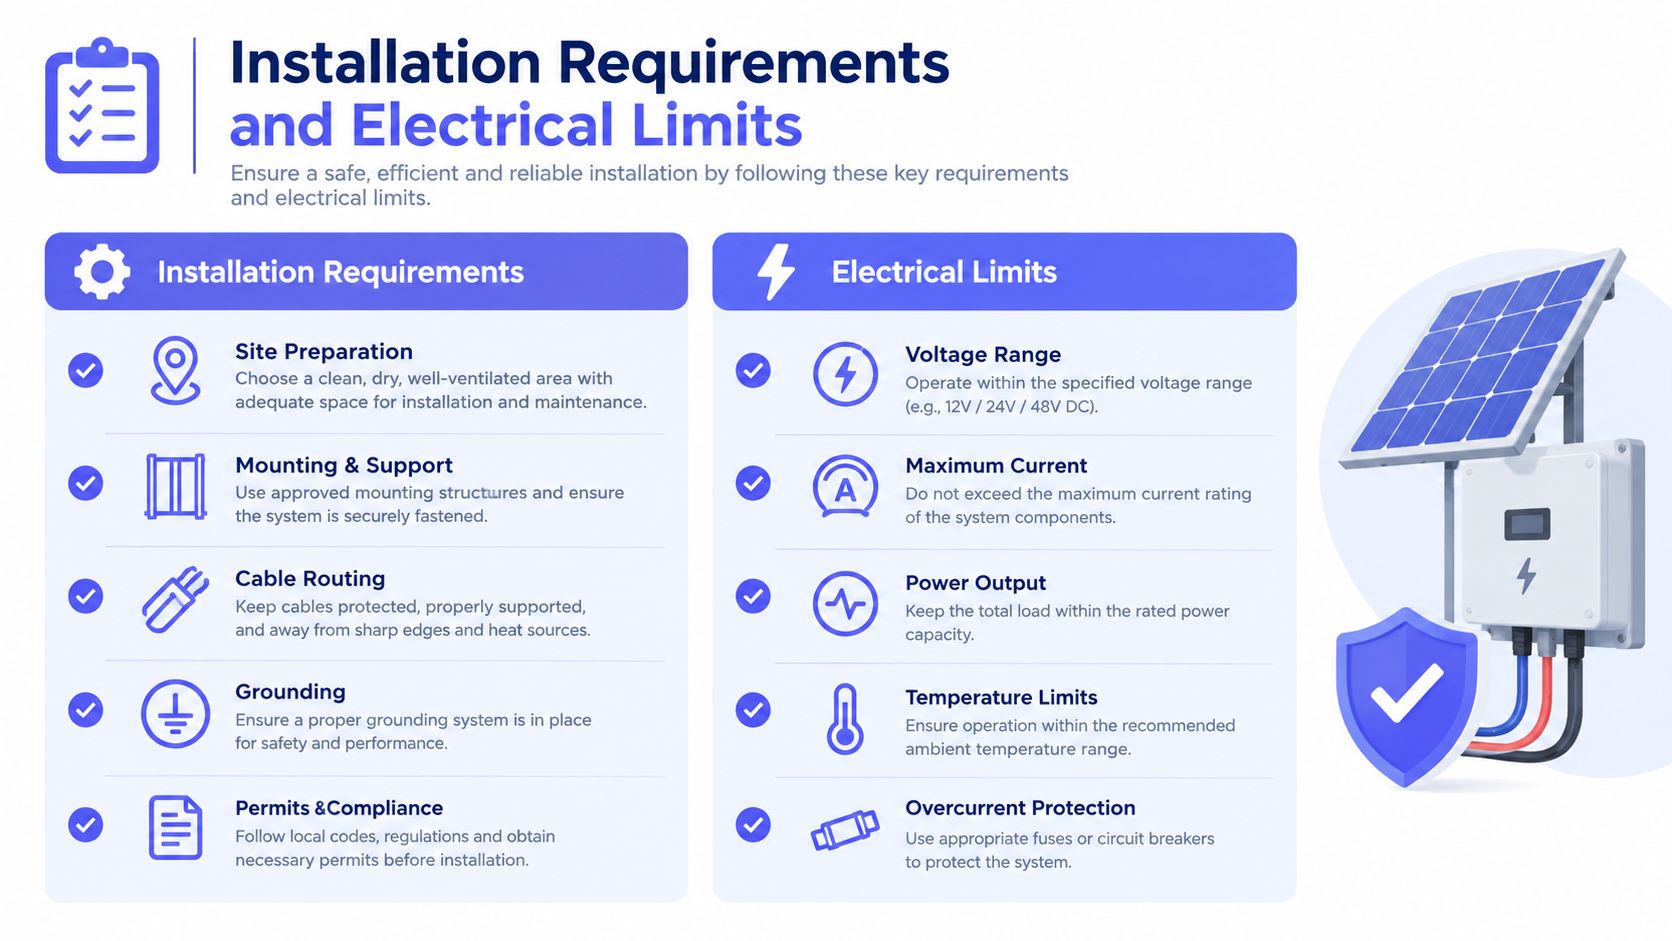
A mini split isn't a plug-in appliance. The indoor head may look simple, but the outdoor unit requires a correctly sized electrical supply, the refrigerant circuit must be installed and tested properly, and condensate must drain without damaging the building.
Manufacturer limits vary by model. Product listings commonly show 208/230V operation and bundled line-set lengths of 16, 25, or 35 feet, while the permitted maximum line length can differ by equipment. The Carrier guide to mini split installation requirements explains why the selected equipment and the physical installation must match.
Check the job in this order
- Confirm the electrical service. Identify the required voltage, breaker, disconnect, wire size, and circuit configuration from the installation manual. Don't let anyone assume that an existing outdoor receptacle is suitable.
- Map the line-set route. Measure the actual path, not the straight-line distance between the indoor and outdoor units. Include bends, vertical rises, concealment, and access for future service.
- Choose indoor-head locations deliberately. Avoid placing a head where furniture blocks airflow or where condensate drainage becomes difficult.
- Plan the drain. Cooling creates condensate. The drain must have proper slope or a suitable pump, and it must discharge where water won't damage siding, foundations, or finished interiors.
- Document commissioning. The installer should follow the manufacturer's evacuation, leak-checking, electrical, and startup procedures, then provide model and serial information.
Don't separate HVAC design from electrical work
A multi-zone project can require more coordination than a single-room retrofit. The outdoor unit, indoor heads, controls, condensate pumps, and service access all need to work together. If the electrical panel has limited capacity or the proposed route crosses finished areas, resolve those constraints before equipment arrives.
Use a licensed HVAC professional for the refrigeration work and involve a qualified electrician where the installation requires new circuits, disconnects, or panel changes. If you need electrical help, a verified electrician matching service can be one way to start the search, but verify licensing and permit responsibility before signing.
A clean installation should include the model-specific documentation, permit information where required, warranty terms, and a clear explanation of filter cleaning and service intervals. If a contractor refuses to identify the equipment limits or skips commissioning details, don't accept the low bid.
Final Decision Checklist and Next Steps
A ductless mini split works well for targeted comfort, rooms without usable ductwork, and spaces with different heating or cooling loads. It is a poor fix when one oversized indoor head must serve several closed-off rooms. A small multi-zone outdoor unit also cannot replace whole-home design.
Use this checklist before requesting quotes.
Confirm the building problem
- List the uncomfortable rooms: Record when each room is too hot or cold, and whether the problem occurs during heating, cooling, or both.
- Describe the construction: Note insulation condition, window exposure, ceiling height, additions, finished attics, and rooms over garages.
- Decide whether the retrofit is partial: If the central system serves most rooms adequately, address the problem area instead of replacing equipment throughout the house.
Partial-home retrofits deserve separate load decisions. A comfortable hallway does not justify adding capacity for it, and a closed bedroom may need its own indoor unit rather than a larger head in the adjacent room.
Compare equipment intelligently
- Request exact model numbers: A brand name does not identify capacity, controls, or service requirements.
- Review SEER2 and HSPF2: Compare the proposal with the ENERGY STAR minimums of 18.7 SEER2, 12.0 EER2, and 8.5 HSPF2, using the published efficiency benchmark.
- Ask about refrigerant: Confirm whether the system uses R-32 or R-454B, and whether the installing company services that refrigerant platform.
- Check physical limits: Match voltage, line-set length, drain requirements, and clearances to the installation manual.
Demand a real proposal
A credible quote should identify indoor-unit locations, the outdoor-unit location, line routing, electrical scope, condensate handling, model numbers, warranty conditions, permits, and startup procedures. It should explain the sizing method. Square footage alone cannot account for multiple floors, mixed insulation, solar exposure, or a partial retrofit.
Ask who will perform the work, who handles refrigerant commissioning, and what documents you will receive. Confirm future service access before approving a route through finished walls or ceilings.
Do not buy equipment first and force the installation to fit. Choose the rooms, load, refrigerant platform, line route, and service plan first. Then select equipment that matches those facts.
Hand Vetted Co. connects you with one licensed, background-checked HVAC professional for a ductless mini split project. Visit Hand Vetted Co. to request a verified match and discuss your installation needs.