You walk downstairs, step onto a wet floor, and feel that drop in your stomach. Maybe it's a burst pipe, a failed sump pump, or water creeping in after a storm. The first mistake is losing time. The second is assuming that if the floor looks dry later, the problem is over.
That's not how this works. Water damage accounts for nearly 24% of all insurance claims in the United States, and the cost swings hard based on how fast the response starts. Mold can start growing in as little as 24 to 72 hours, typical restoration costs run from $1,342 to $6,044, and severe losses can exceed $20,000 if the response is delayed, according to Rainbow Restoration's water damage statistics overview.
The right response is simple in principle. Make the space safe. Stop the water. Limit spread. Get the structure dry. Prove it's dry. Document every step so your insurance carrier can't say the drying work was vague or incomplete.
Table of Contents
- Water in Your Home? Here's Your Game Plan
- Your First Hour Emergency Mitigation Checklist
- The Full Restoration Process Explained
- Proving It's Dry The Key to Preventing Mold
- Navigating Your Insurance Claim Without Errors
- Hiring a Pro vs DIY and Final Repairs
Water in Your Home? Here's Your Game Plan
The first few hours decide whether this stays a cleanup job or turns into demolition, mold work, and a bigger insurance fight. Don't try to solve everything at once. Focus on triage.
Start with safety, not salvage. If water is near outlets, appliances, extension cords, or a finished ceiling that looks swollen, treat the space as unsafe until power is isolated. If the water source is still active, stopping it matters more than mopping.
Your order of operations
- Stop the water source if you can do it safely.
- Shut off electricity to the affected area.
- Call your insurance carrier and report the loss.
- Call a restoration professional to begin mitigation.
- Move vulnerable items like paper records, electronics, rugs, and soft goods out of the wet zone.
- Take photos and video before anything major gets moved, if it's safe to do so.
That order works because water doesn't wait. It keeps traveling through drywall, trim, subfloor, insulation, and framing cavities long after the visible puddle is gone.
Practical rule: If water touched materials you can't fully see into, such as wall cavities, under flooring, or behind baseboards, assume the visible mess is only part of the problem.
What to expect over the next day
A professional crew will usually separate the job into two phases. First comes mitigation, which means stopping further damage through extraction, controlled demolition when needed, and drying setup. Then comes repair, which is the rebuild side.
That distinction matters. People often get frustrated because drywall gets opened or baseboards come off before anyone talks about paint or flooring. That's normal. A good crew has to expose trapped moisture before any cosmetic repair conversation means anything.
If you keep your focus on the actual water damage restoration steps, the process gets less chaotic. Safe access first. Moisture control second. Rebuild last.
Your First Hour Emergency Mitigation Checklist
The first hour is about limiting spread and avoiding injuries. You're not trying to finish the job. You're trying to keep a bad situation from getting worse.
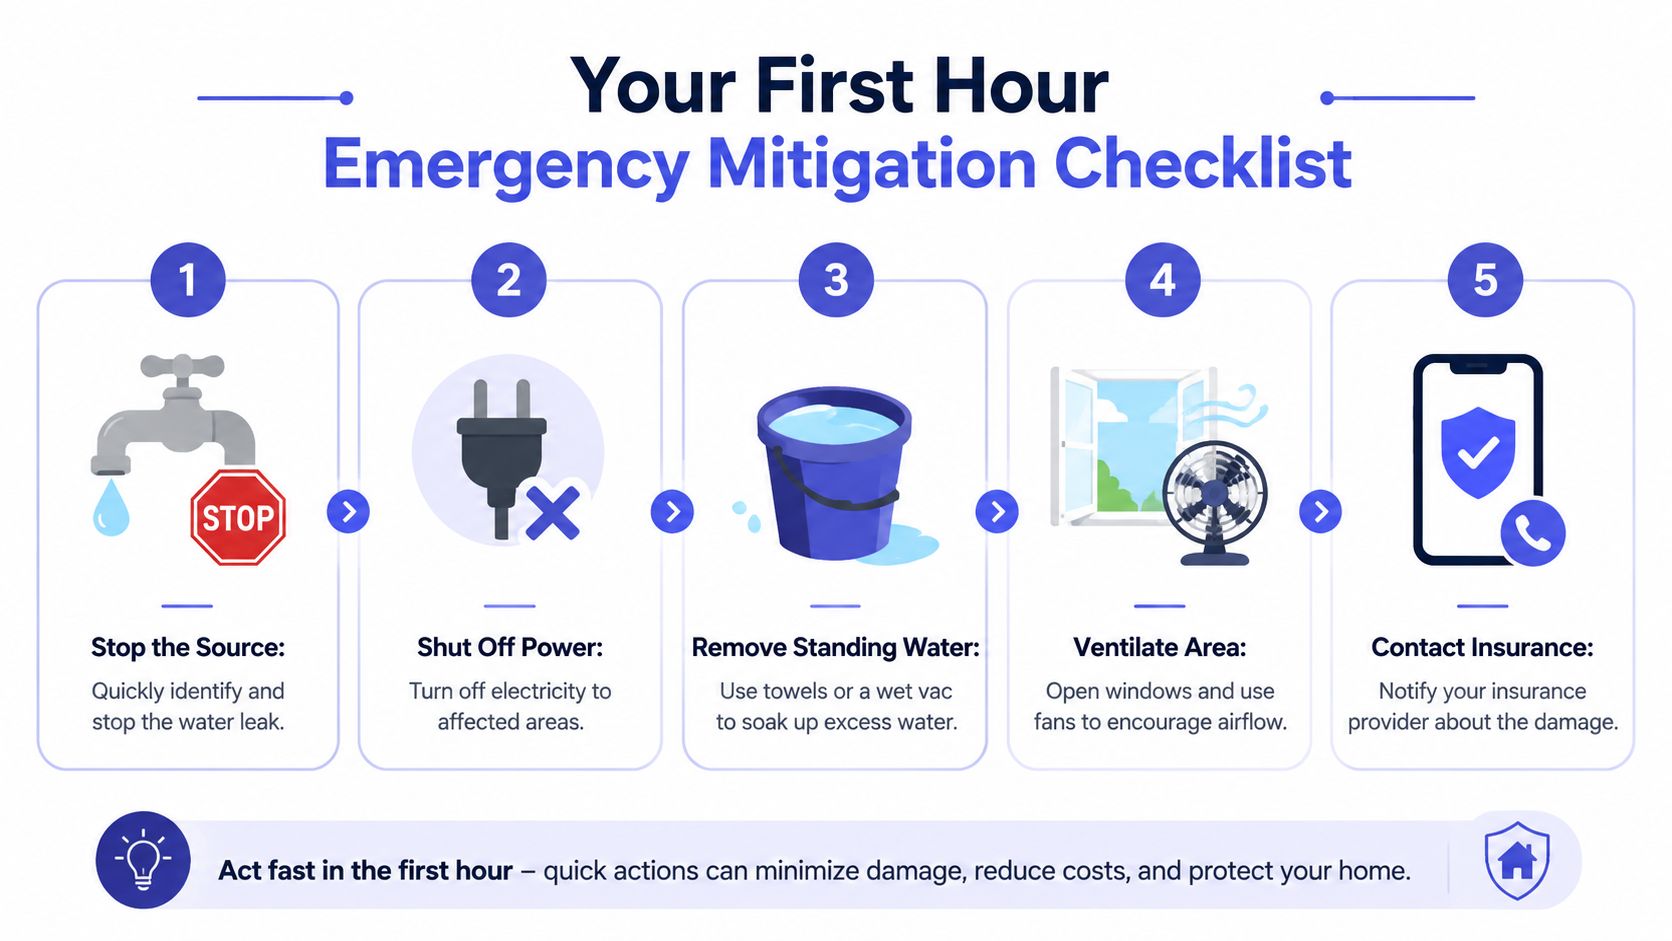
Do these in order
- Stop the source: If it's a broken supply line, appliance hose, or running fixture, shut the nearest valve first. If you can't isolate it fast, use the main shutoff.
- Kill power to the wet area: Use the breaker panel. If you'd have to stand in water to reach anything risky, wait for qualified help.
- Protect what you can move quickly: Pick up boxes, loose textiles, electronics, photos, and anything sitting directly on the floor.
- Start removing obvious surface water: Towels, a mop, or a wet vac can help with minor clean-water pooling. Don't use a household vacuum.
- Call your insurance carrier and a restoration company: Open the claim early and ask what documentation they want from day one.
What you should say on those calls
Keep it short and factual. Tell them:
- Where the water is: basement, kitchen, ceiling below a bathroom, and so on
- Whether the source is stopped: yes, no, or unknown
- Whether power has been shut off: only if you know it has
- What materials are wet: carpet, drywall, wood floor, insulation, contents
- Whether the water may be contaminated: sewage backup, outside floodwater, or appliance overflow
This helps the restoration crew bring the right equipment. It also creates a cleaner claim record from the beginning.
What not to do
Some mistakes cost people far more than the original leak.
- Don't assume clear-looking water is safe: Water from outside entry, sewage, or unknown sources needs a different response.
- Don't run standard fans into hidden wet cavities and call it done: Moving air across a wet room is not the same as controlled structural drying.
- Don't leave wet carpet padding in place if the area is significantly saturated: Padding traps water and slows everything down.
- Don't wait overnight to “see if it dries out”: That delay is where a manageable loss starts turning into a larger one.
If the water came from sewage, floodwater, or any source you can't confidently call clean, stay out and let a professional handle it.
A calm first hour beats a frantic six hours later.
The Full Restoration Process Explained
Professional water damage restoration steps are standardized for a reason. The sequence works. Skip one part, do it in the wrong order, or rush the dry-out, and the job often circles back as odor, staining, or mold.
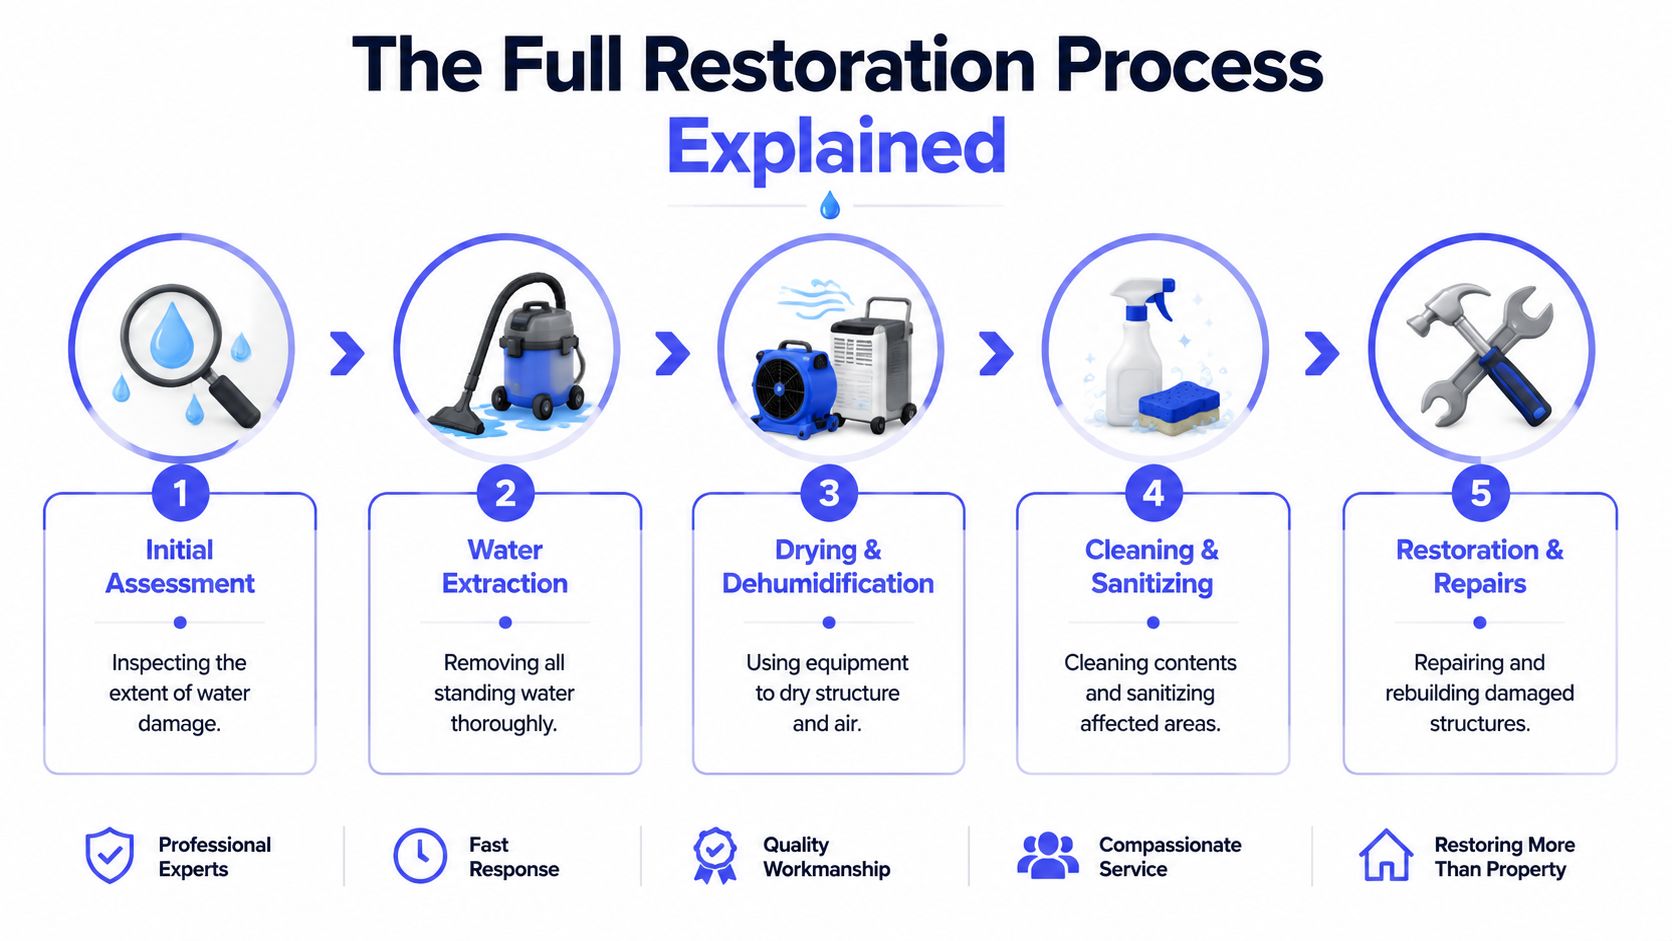
Professionals follow a 5-step process involving inspection, extraction, drying, cleaning, and repair. They monitor moisture for 24-72 hours until materials reach equilibrium moisture content. For Category 3 water, all surfaces require an antimicrobial solution, as mold can colonize within 24 hours if moisture stays above 15-20%, based on COIT's water damage restoration and repair guide.
If you're trying to understand what a qualified restoration company should do, this is the benchmark. You can compare what's happening in your home to the typical process used by damage restoration professionals.
Inspection comes first for a reason
A crew shouldn't start by randomly pulling out equipment. They need to inspect the site and classify the loss.
A proper inspection identifies the water source, the contamination category such as clean, gray, or black water, and the damage class, which tells the team how far water has moved into materials. WB Arthur's overview of the inspection-to-recovery process lays out that first assessment clearly.
That classification controls almost every trade-off that follows. Clean water from a supply line is one thing. Black water from sewage or flood intrusion is another. The salvage decisions, cleaning methods, and safety protocols are not the same.
Extraction and drying are different jobs
Once the scope is clear, the next move is water removal. During this stage, crews use industrial pumps and high-capacity wet vacuums to remove standing water. When carpet is involved, specialized extractors pull water from the fibers and padding in a way ordinary equipment can't, as described in Blackridge Restoration's explanation of the extraction stage.
After that comes the part people underestimate. Drying and dehumidification aren't just “set up a few fans.” Air movers push airflow across wet surfaces. Dehumidifiers remove moisture from the air so materials can keep releasing trapped water instead of staying loaded.
Here's the practical difference:
| Stage | What it does | What it does not do |
|---|---|---|
| Extraction | Removes standing and accessible water | Doesn't finish the dry-out inside materials |
| Drying | Pulls moisture out of framing, drywall, flooring, and air | Doesn't sanitize contamination by itself |
| Dehumidification | Lowers ambient moisture so drying can continue | Doesn't replace extraction |
A basement can look dramatically better after extraction and still be wet behind walls, under flooring, and inside trim assemblies.
Cleaning and repair happen after drying is verified
Cleaning isn't just cosmetic. For contaminated losses, especially Category 3 water, surfaces need to be cleaned with the right antimicrobial approach before the project moves toward reconstruction.
Then comes repair. This might be as small as reinstalling baseboards and repainting, or as large as replacing sections of drywall, insulation, trim, flooring, and cabinetry. The right crew doesn't guess when to rebuild. They wait until the dry standard has been met and documented.
Drying equipment solves the moisture problem. Reconstruction solves the appearance problem. If you reverse that order, you hide moisture instead of removing it.
That's the logic behind the full process. Assess first. Extract hard. Dry methodically. Clean appropriately. Repair only after the structure is ready.
Proving It's Dry The Key to Preventing Mold
The most misunderstood part of water damage restoration is the finish line. People want a simple answer. Does it feel dry? Does it smell better? Did the fans run for a few days?
None of those prove the structure is ready.
A 2025-2026 survey found that 42% of mold outbreaks in restored homes happened because people re-entered before equilibrium moisture content goals were met, according to Michaelis Corp's discussion of EMC and safe re-entry.
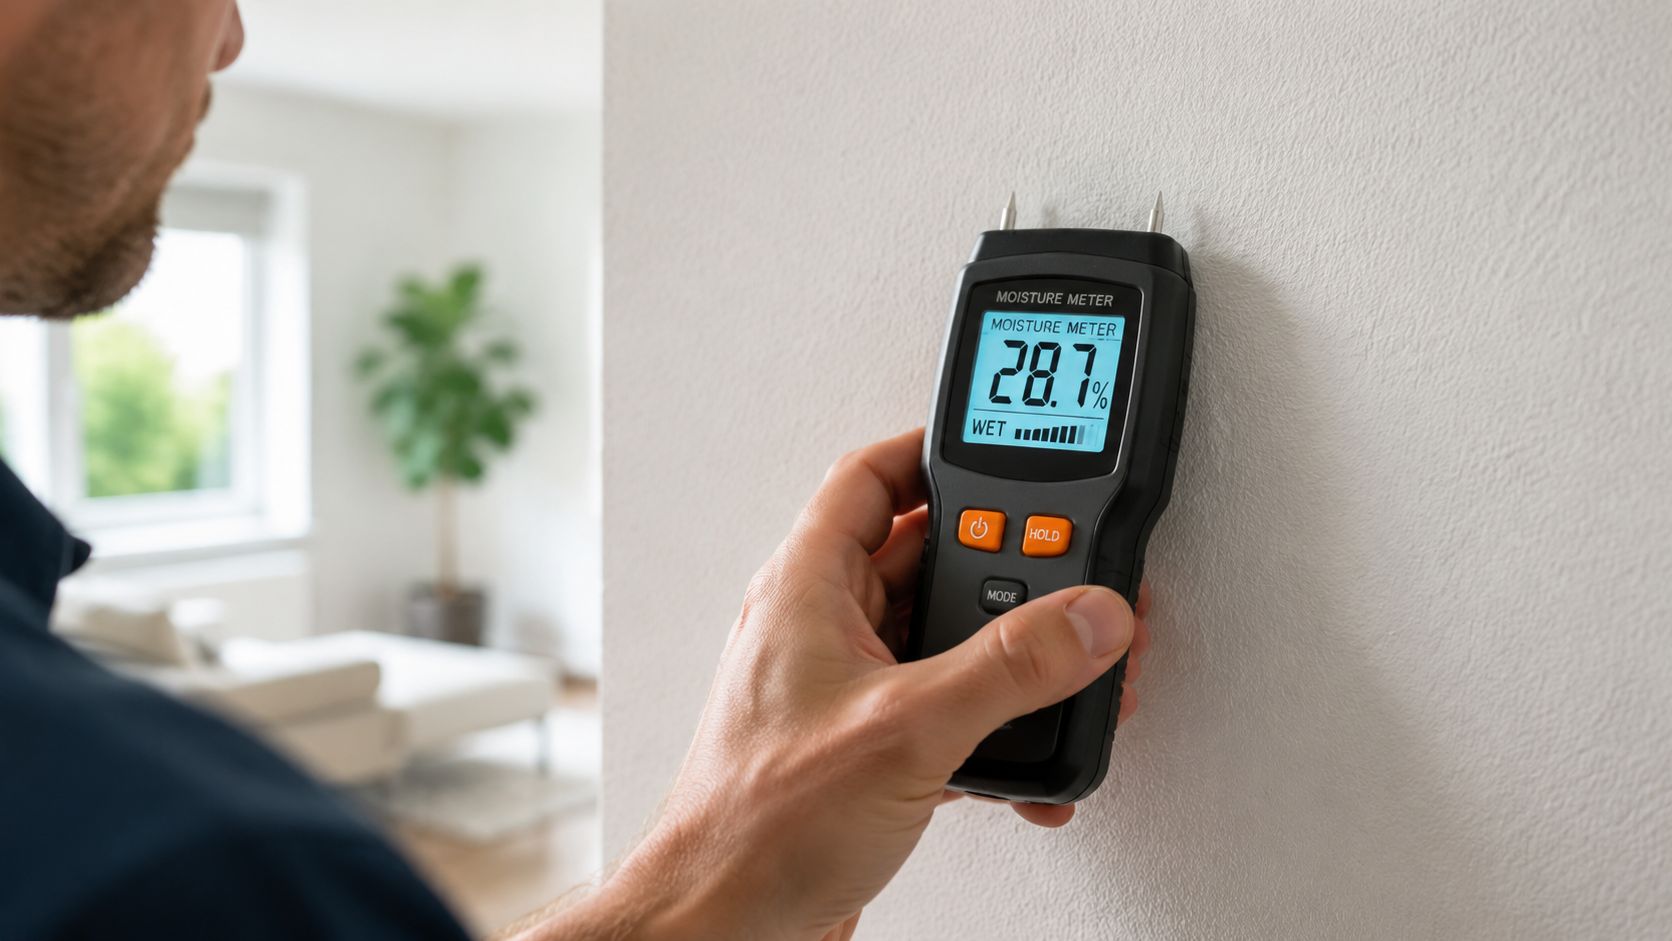
Dry to the touch means almost nothing
A painted wall can feel dry on the surface while the drywall core, insulation, sill plate, or framing behind it is still carrying moisture. That's why professionals use equilibrium moisture content, usually shortened to EMC.
In plain English, EMC is the target moisture condition where the material has dried back to a safe, stable level for that environment. Not “less wet.” Not “probably okay.” Stable.
Technicians also use psychrometric readings, which means they track air temperature, humidity, and related drying conditions to see whether the equipment setup is moving the job toward that target. You don't need to do the math yourself, but you do need to know this data should exist.
What data to ask your restoration company for
Ask for the drying proof in writing. If a company says “trust us, it's dry” but can't show the readings, that's not enough.
Request these items:
- Initial moisture map: Which rooms, wall sections, flooring areas, and contents tested wet at the start
- Daily moisture readings: Material readings taken over the course of drying, not just one beginning and one ending snapshot
- Daily psychrometric logs: Air condition readings that show the drying environment was being monitored and adjusted
- Equipment log: What air movers, dehumidifiers, and other gear were placed, and where
- Final dry standard confirmation: A record showing the affected materials reached the agreed dry goal or equilibrium level
If the crew opened walls or removed baseboards, ask what they found inside those cavities and whether the hidden sections were tested again before close-up.
A good restoration company doesn't get annoyed when you ask for moisture data. They expect the question.
The questions that reveal whether the job is being run well
Use simple language. Ask:
- How are you deciding when the structure is dry enough to rebuild?
- What readings are you taking every day?
- Can I get your moisture logs and final dry report for my records?
- Which materials are being saved, and why are they considered salvageable?
- Are there any hidden cavities that still concern you?
These questions do two things. They protect you from hidden mold risk, and they make it clear the project needs to be documented to a professional standard.
If you remember one thing from this section, remember this. The house is dry when the readings say it's dry, not when it looks better.
Navigating Your Insurance Claim Without Errors
People lose money on water claims in boring ways. Not because the loss wasn't real. Because the documentation was thin, inconsistent, or missing the exact records the carrier wanted.
A 2025 Insurance Information Institute report found that 38% of water damage claims were partially denied because homeowners failed to provide continuous data, such as daily psychrometric logs, to prove proper drying mitigation, even when the work was done correctly. Insurers increasingly require IICRC S500-compliant drying logs for claims over $15,000, according to Allied Public Adjusters' write-up on restoration documentation.
Why photos alone often fail
Photos matter. Keep taking them. But a few before-and-after shots don't prove the drying phase was managed correctly.
Insurance carriers want a chain of evidence. They want to see what was wet, what was removed, what equipment was used, how the environment was monitored, and how the team knew the structure had reached the dry target. If your file only contains images of a wet basement and later images of a cleaner basement, there's a gap.
That's where people get hit with partial denials or reduced mitigation reimbursement. The work may have been done. The proof wasn't.
Your documentation checklist
Build one folder for the loss and keep everything in it. Cloud storage is fine. So is a shared folder plus a paper backup.
Collect these items:
- Claim intake notes: Date discovered, likely source, rooms affected, and who you spoke with at the insurance company
- Photo and video record: Wide shots of each room, close-ups of damaged materials, contents, baseboards, flooring transitions, and any visible source point
- Mitigation scope: The restoration company's written plan for extraction, demolition, drying, cleaning, and monitoring
- Equipment placement records: Photos and written notes showing where dehumidifiers, air movers, and other equipment were set
- Daily logs: Moisture readings, psychrometric logs, and notes about any equipment changes
- Material removal record: What was removed, when it was removed, and why it was considered unsalvageable
- Invoices and change orders: Every bill, approval, and adjustment
- Final completion packet: Final moisture documentation, dry standard confirmation, and repair estimates if reconstruction follows
If your policy questions start getting complicated, it also helps to understand the basics of homeowners insurance coverage, especially around mitigation, rebuild scope, and what the carrier may ask you to prove.
The best claim files read like a timeline, not a pile of random photos.
One habit that saves headaches later
Ask for the day's readings before the crew leaves, or ask when they'll email them. Don't wait until the end of the job and hope all the records were organized well. Jobs move fast. Files get messy. Daily collection is cleaner and easier.
This isn't paperwork for the sake of paperwork. It's how you protect reimbursement for work that already happened.
Hiring a Pro vs DIY and Final Repairs
Some water losses are manageable. Some aren't. The hard part is that people often misjudge which one they're dealing with.

When DIY is reasonable and when it isn't
If the water is clearly clean, the affected area is small, the materials are non-porous or minimally affected, and you caught it immediately, a limited cleanup may be reasonable. Think a small appliance leak on a hard surface where water didn't sit long and didn't wick into walls or under flooring.
DIY stops making sense fast when any of these are true:
- The source is contaminated or uncertain: sewage backups, outside floodwater, toilet overflows with waste, or unknown standing water
- Water reached hidden assemblies: behind baseboards, into drywall, under laminate, under hardwood, or into insulation
- You have significant saturation: not just a wet surface, but materials holding water
- You can't document the dry-out: no moisture meter, no daily readings, no way to show progress
- There are safety concerns: electrical exposure, sagging ceilings, compromised flooring, or possible structural damage
The biggest DIY failure isn't the cleanup. It's the false finish. People dry what they can see and leave the rest behind.
How to vet a restoration company
Don't hire based on the first truck that answers the phone. Ask a few pointed questions.
Use this checklist:
| What to verify | Why it matters |
|---|---|
| Licensing and insurance | Confirms the business is operating legitimately and can handle liability properly |
| Moisture documentation process | Shows whether they manage drying scientifically or by guesswork |
| Experience with insurance documentation | Affects how cleanly your claim file comes together |
| Category-specific handling | Matters if the loss involves gray or black water |
| Background screening standards | Helps you know who you're letting into your home |
If you want to check how a platform screens professionals before matching them, review the contractor background check standards.
What final repairs usually look like
Final repairs depend on what the water did to each material, not what you'd prefer to save. One clear example is drywall. A verifiable threshold for drywall replacement is when it swells or sags 3/8 inch from its baseline. Most professionals will replace the entire sheet at that point, as the structural integrity is compromised beyond salvageable limits, based on The Home Depot's guide to water damage restoration.
That's a useful reality check. Restoration isn't about heroically saving every material. It's about making the right salvage call before bad material gets covered back up.
For final repairs, expect decisions around:
- Drywall and insulation: remove or retain based on saturation and integrity
- Baseboards and trim: often removed to access wall cavities and then replaced
- Flooring: some surfaces can be dried and saved, others can't
- Cabinet toe kicks and built-ins: often need inspection in concealed spaces
- Paint and finish work: always last, never first
Your best next move is simple. If the loss is more than surface-deep, bring in a qualified restoration professional early, insist on moisture documentation, and keep your insurance file organized from day one.
If you need help finding the right company without getting passed around to a dozen businesses, Hand Vetted Co. matches you with one licensed, background-checked, 4.5+ star rated professional for your project. The match is exclusive, not sold to multiple companies, which makes it a cleaner way to get qualified help fast.