You're probably staring at a pallet, a stove manual, and a living room wall, trying to figure out whether this is a solid weekend project or the start of an expensive mistake. That's the right question. A pellet stove can heat well and run clean, but only if the install is planned like a venting job first and a furniture-placement job second.
Most bad installs fail for predictable reasons. The stove gets shoved where it looks good, the vent run gets improvised, the outlet gets treated like an afterthought, and nobody thinks through what happens when the power drops during the kind of weather that makes the stove matter most. If you want to know how to install a pellet stove the right way, start before the box is open.
Table of Contents
- Before You Unbox Anything Plan Your Install
- Gathering Your Tools and Materials
- Understanding Vents and Clearances
- The Core Installation Process
- Your First Fire and System Checks
- Maintenance and When to Hire a Pro
Before You Unbox Anything Plan Your Install
A clean pellet stove install is mostly planning. The physical work matters, but the job is won or lost before the first hole gets cut.
Pellet stoves aren't some fringe product anymore. By the early 2010s, pellet stoves held about a 30% market share in the U.S., which helped standardize installation practices around freestanding stoves and inserts, especially for venting, hearth-pad, and clearance requirements, as reported by Biomass Magazine citing HPBA data. That matters because most of the parts, methods, and inspections you'll run into follow established patterns.
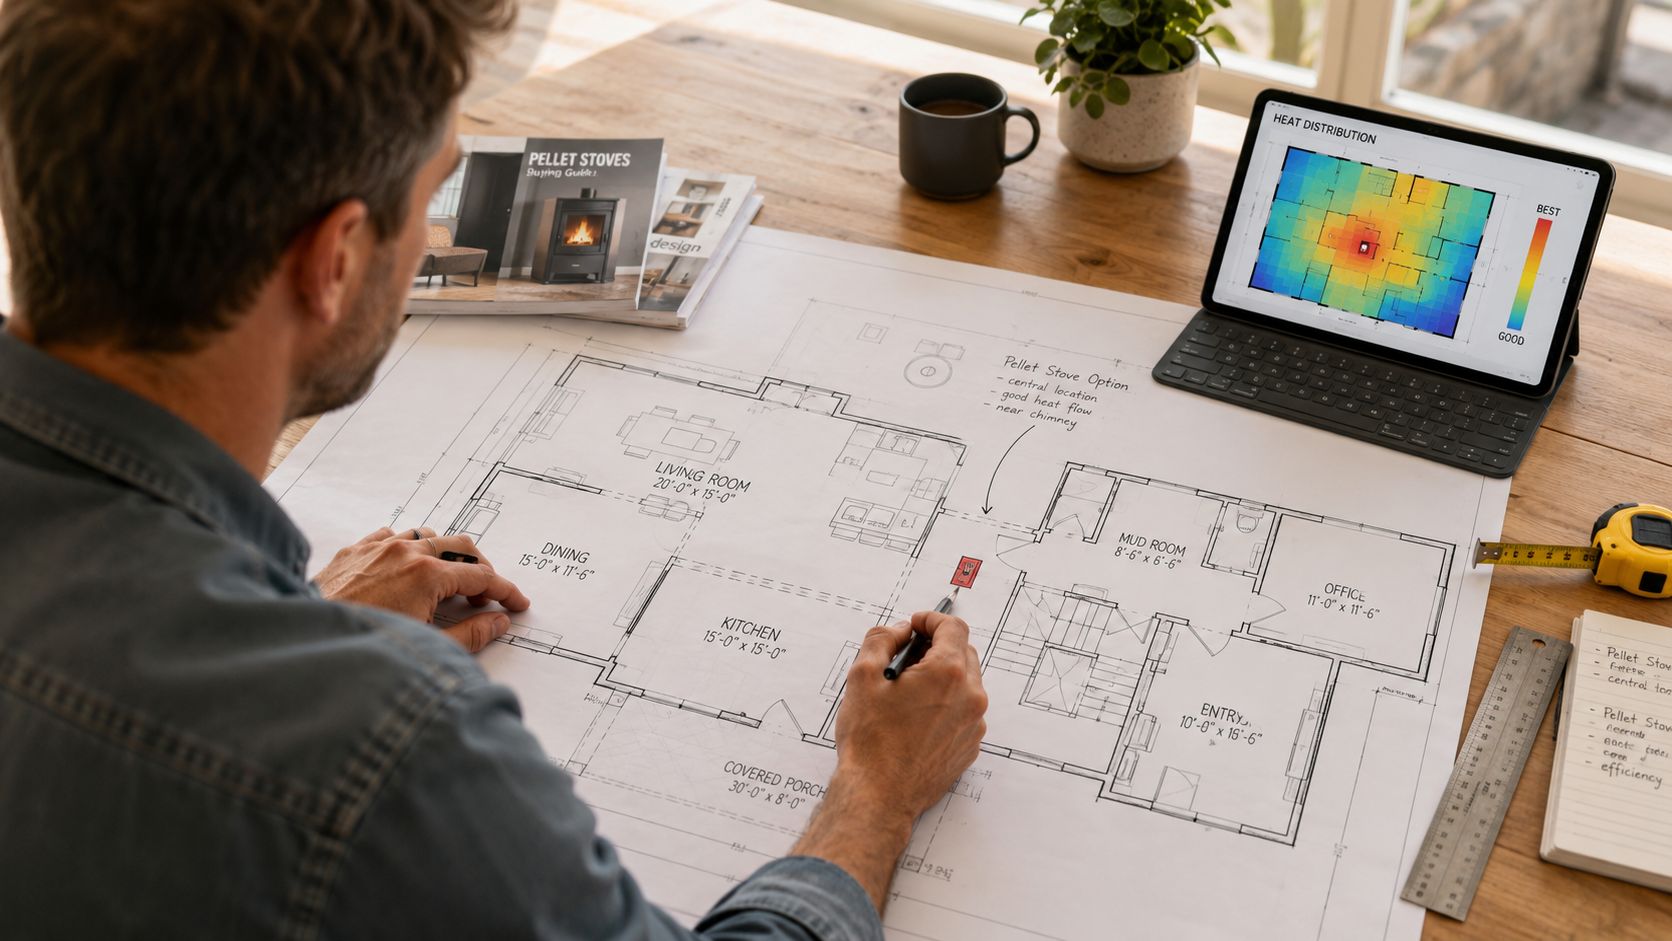
Start with the room, not the stove
The best location isn't always the prettiest corner. Put the stove where heat can move, where you can load pellets without fighting furniture, and where the vent path to the exterior is direct and practical.
Look at the room with three questions in mind:
- Can heat spread from here: A stove trapped in a dead-end room won't perform the way people expect, even if the unit itself is sized well.
- Can you service it easily: You need room to load pellets, remove panels, clean ash, and reach the venting later.
- Can the vent exit cleanly: A short, sensible run usually beats a complicated route with awkward turns.
Practical rule: If the location works for décor but makes venting awkward, it's the wrong location.
Before you buy anything, read the stove's manual and listing label. That label controls the actual clearance requirements for that model. General advice helps you plan, but the appliance listing is what the inspector and installer should be following.
Local permits matter too. Some areas are strict about wall penetrations, hearth protection, vent terminations, and final inspection. Don't treat permit questions as paperwork you'll sort out later. They affect location, materials, and whether your finished job passes.
If budget is part of the decision, sort that out now instead of halfway through the project. People often underestimate the full install package, especially once venting components and floor protection are added. If you're weighing options, home improvement financing choices can help you plan the project before materials start arriving.
Map the vent path and the electrical plan together
This particular step causes many DIY installs to go awry. People think, “It plugs into a standard outlet, so I'm covered.” That's only the first layer.
A pellet stove depends on electricity for the auger, fans, and controls. If power drops, the stove doesn't keep operating like a basic radiant heater. That makes electrical planning and outage planning part of the install, not an accessory decision for later. Many guides mention the grounded 120-volt outlet and stop there, but the critical question is whether your setup will still be usable when winter weather knocks power out.
Here's the practical approach:
- Identify the exact outlet location so the cord doesn't create a trip hazard or force the stove into a bad position.
- Avoid sharing the circuit with nuisance loads if possible. A pellet stove runs better when it isn't competing with whatever else people keep plugging in nearby.
- Decide on outage backup before installation day. If you want battery backup, a UPS, an inverter-generator, or a standby solution, plan space and access now.
- Add surge protection if the manufacturer allows it. Sensitive control boards don't love dirty power.
If your whole reason for buying the stove is heating resilience, but you never planned for an outage, you didn't finish the install on paper.
A good plan leaves you with one clear sketch: stove position, hearth location, vent route, wall penetration point, outside termination area, nearby outlet, and backup-power strategy. Once that's settled, the rest of the job gets much easier.
Gathering Your Tools and Materials
Nothing wastes time like stopping mid-install because you forgot a thimble, sealant, or the right fasteners. Lay everything out before you start. If a part isn't on the floor, assume you don't have it.
The non-negotiables
You need basic layout and cutting tools, safety gear, and the full venting package specified for the stove. That usually means your stove, its manual, the listed vent pipe system the manufacturer allows, the wall thimble, the termination cap, sealant rated for the application, and floor protection if the unit requires a hearth pad.
A solid basic kit includes:
- Safety gear: Gloves, safety glasses, hearing protection, dust mask or respirator for drilling and cutting.
- Layout tools: Tape measure, torpedo level, marker, framing square.
- Cutting and fastening tools: Drill/driver, bits, hole saws where appropriate, reciprocating saw or jigsaw depending on wall material, screwdrivers, nut drivers.
- Sealing materials: High-temperature silicone or the sealant specified by the vent manufacturer.
- Support and finish items: Screws, brackets, exterior-grade sealant for weatherproofing around penetrations, and trim pieces.
If your venting system is pieced together from mixed brands or “close enough” components, stop. Pellet vent systems are designed to work as listed systems. The fit, lock-up, and sealing method matter.
The parts people forget
The forgotten items are usually small, cheap, and job-stopping.
Common misses include:
- A listed wall thimble: You can't just run vent pipe through a rough hole and call it good.
- Outside support hardware: Exterior runs need to stay aligned and secure.
- A proper hearth pad: Floor protection isn't decorative. It's part of the install.
- Extra sealant and screws: You'll use more than you think.
- Shop vacuum for cleanup: You want a clean work area before startup and during maintenance later.
Lay the entire bill of materials on a tarp before you begin. If you can't point to every component from stove collar to termination cap, you're not ready to install.
Keep the manufacturer's manual open the whole time. The tool list gets you through the work. The manual keeps the work from becoming a callback.
Understanding Vents and Clearances
This is the part that keeps the install safe. It also decides whether the stove drafts well, stays clean, and performs without constant fuss.
People often treat clearance rules as arbitrary. They're not. Heat has to stay away from combustible material, and flue gases have to leave the house without cooking the wall, staining the siding, or cycling back into the structure.
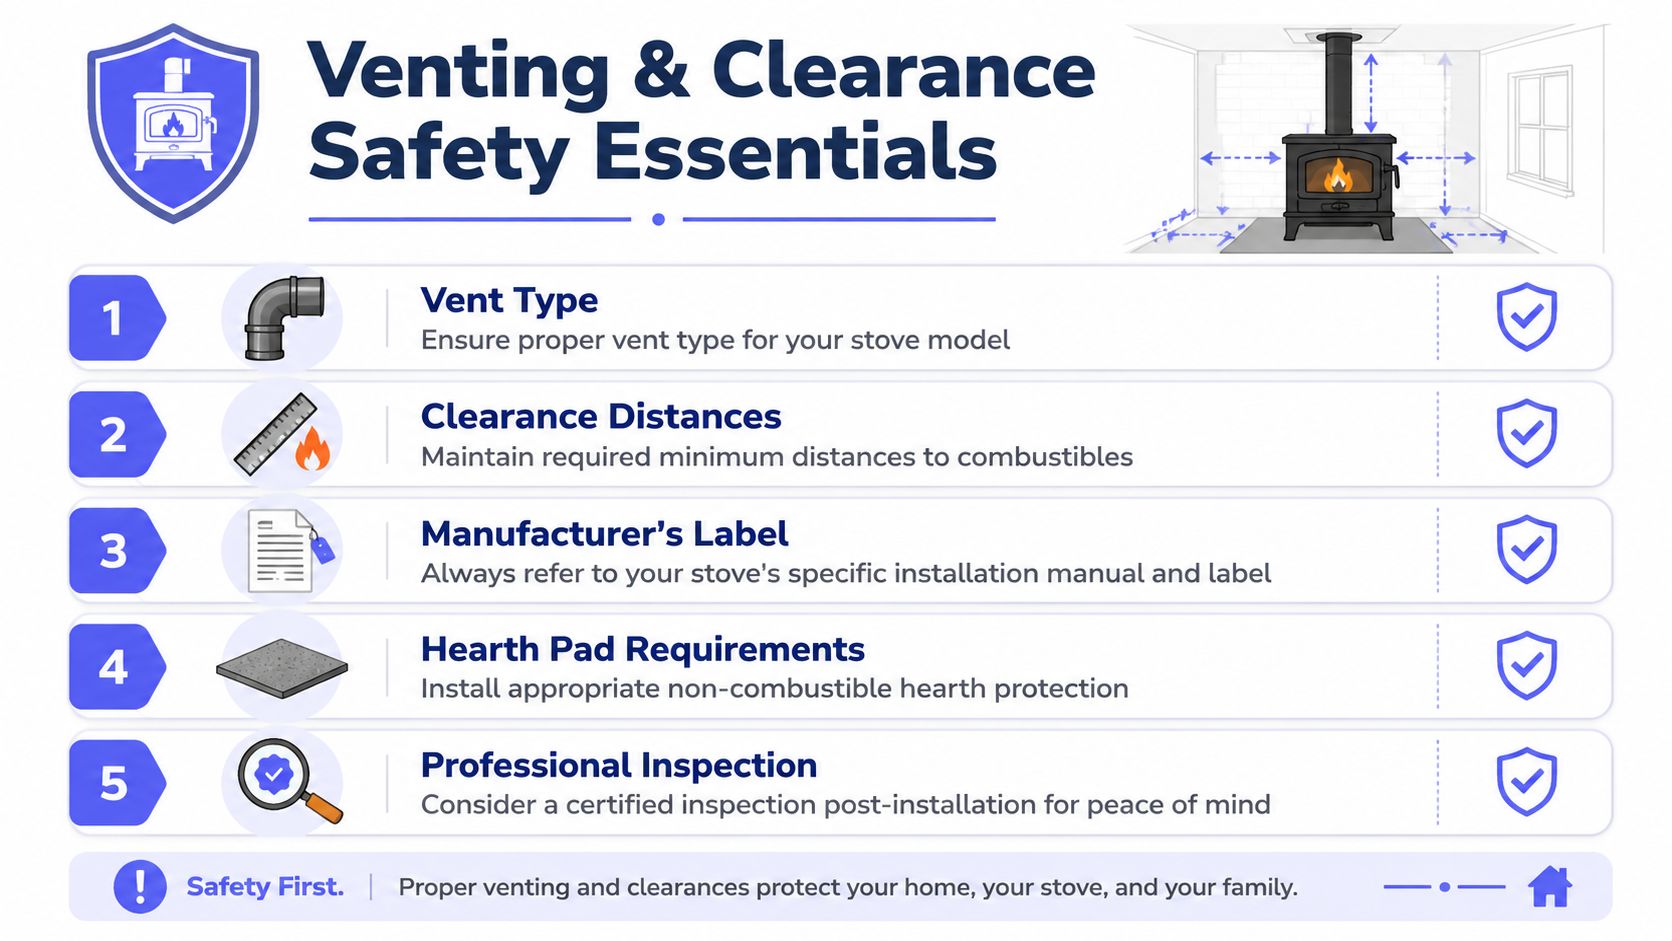
For exterior termination, two measurements are strictly required in the referenced installation requirements. The exhaust vent pipe must extend a minimum of 12 inches horizontally past the exterior wall, and you must keep at least 36 inches of clearance from the center of the outlet to exterior combustibles like vegetation or mulch, as shown in the pellet stove requirements document.
Why the outside termination rules matter
That 12-inch horizontal extension isn't random. It moves hot exhaust away from the wall surface so the wall assembly and nearby finishes aren't taking the brunt of the heat.
The 36-inch clearance to combustibles matters for the same reason. Shrubs, mulch, stored items, and dry debris don't belong near a hot termination. The outside of the house counts too. People remember clearances in the room and forget the yard side of the wall.
Use the stove's manual for the appliance-specific clearances at the back, sides, top, and front. Those vary by model. Furniture, curtains, trim, built-ins, and decorative wall finishes all count if they're combustible.
If this is the point where you want another set of eyes on the vent design, HVAC professionals familiar with vented heating systems are worth talking to before holes are cut.
What works and what causes problems
A good pellet vent run is simple, supported, and sealed correctly. It should look deliberate, not improvised.
What tends to work well:
| Situation | What works |
|---|---|
| Short horizontal exit | Straight run to a properly placed wall thimble and listed cap |
| Tight room layout | Careful stove placement that protects service access and keeps the vent path clean |
| Exterior wall penetration | Clean cut, proper thimble, weather-sealed outside finish |
| Long-term serviceability | Visible joints, accessible cleanout points, and enough room to inspect later |
What causes headaches:
- Too many turns: Every extra change of direction makes the vent path less forgiving.
- Sloppy wall penetrations: If the thimble isn't installed square and secure, the whole run can fight alignment.
- Ignoring the label: Generic spacing advice is never a substitute for the listed appliance requirements.
- Bad exterior placement: Don't terminate where landscaping, stored firewood, or routine foot traffic will create problems.
A pellet stove doesn't forgive lazy venting. It may still light, but poor layout usually shows up later as smoke smell, maintenance issues, or nuisance shutdowns.
One more point people miss. Clearances aren't only about preventing a house fire today. They also reduce long-term heat stress on nearby materials. Wood trim and wall framing can dry out and degrade after repeated exposure to heat, even when nothing dramatic happens at first. That's why a clean, code-aware install matters more than getting the stove in place fast.
The Core Installation Process
Once the location, vent route, and materials are locked in, the install becomes a sequence. Don't freestyle it. Dry-fit, mark, confirm, then assemble.
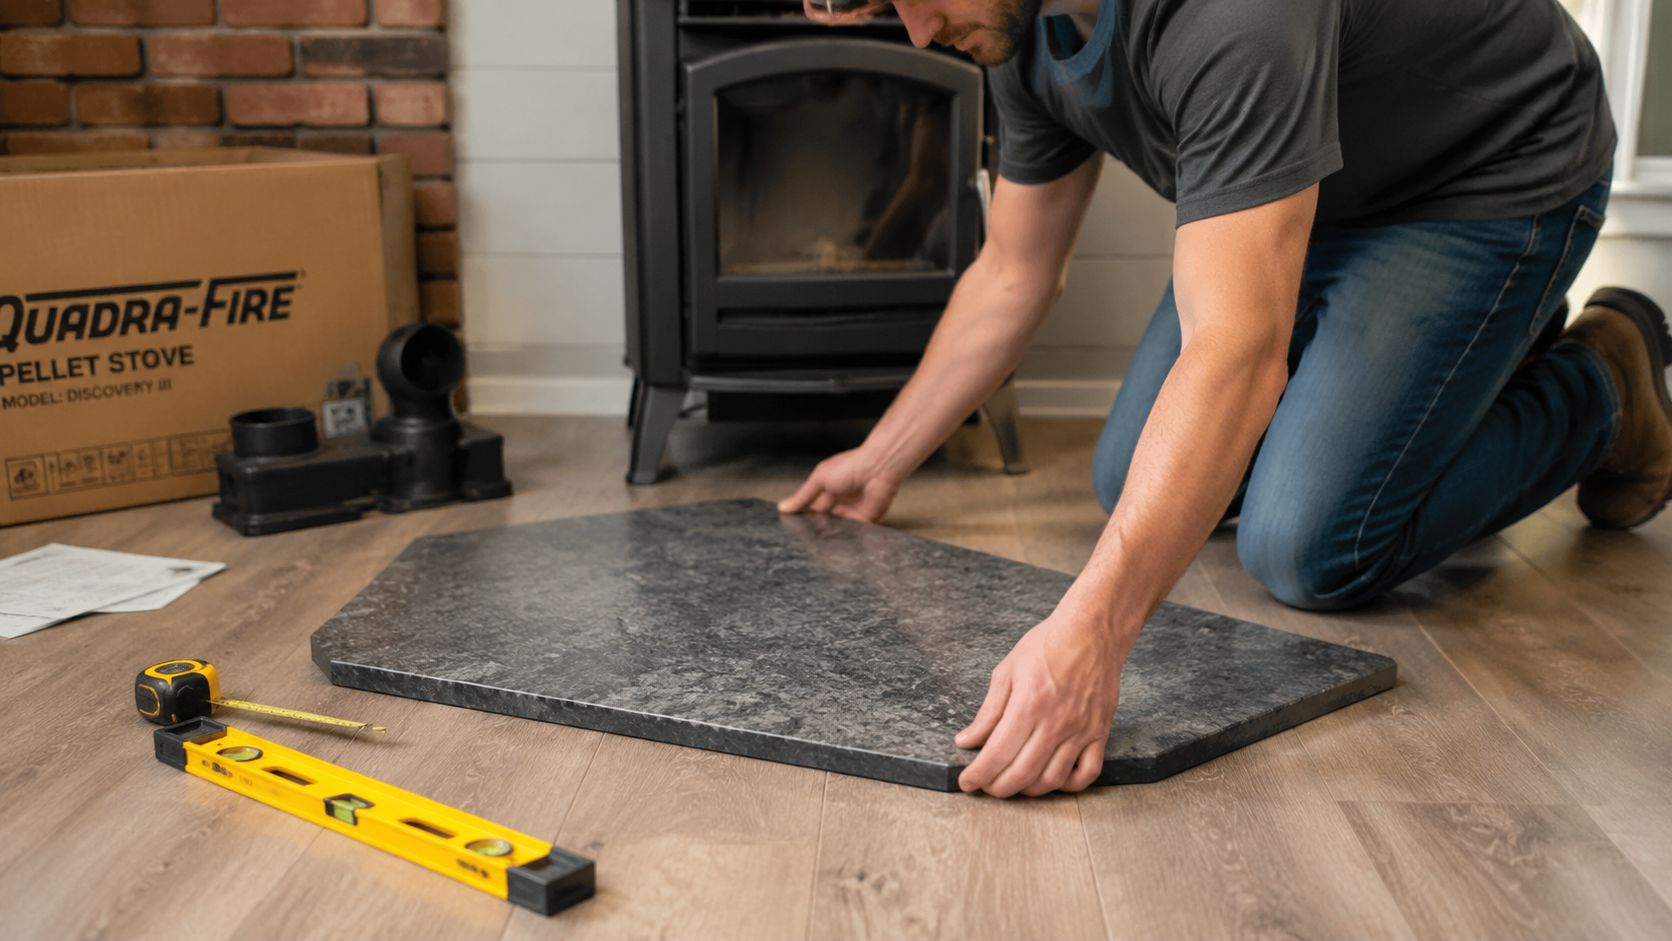
Set the stove and mark everything first
Start with the hearth pad or floor protector if your model requires one. Set it exactly where it belongs, not “close enough for now.” The stove position, wall mark, and vent alignment all depend on that first placement.
Move the stove onto the pad and place it according to the manufacturer's listed clearances. Then check three things before you mark the wall:
- Level: The stove should sit properly so internal components and feed systems operate as intended.
- Access: Make sure you can open doors, load fuel, and remove panels for cleaning.
- Vent alignment: Confirm the exhaust collar lines up with the planned wall penetration.
Use a level and careful measurement to transfer the vent centerline to the wall. Check the inside and outside conditions before cutting. You don't want to discover trim conflicts, utilities, or a bad exterior landing point after the hole is open.
Build the vent run like a system
After marking the wall, cut the opening required for the listed wall thimble and install the thimble assembly according to the vent manufacturer's instructions. The thimble protects the wall structure and preserves the required separation where the vent passes through combustible construction.
Then assemble the vent from the stove outward. Dry-fit first if needed. Once you know the run is correct, lock the sections together and apply sealant where the manufacturer requires it.
A clean sequence looks like this:
- Attach the first vent section to the stove collar using the approved connection method.
- Run the pipe to the wall thimble without forcing alignment.
- Pass through the thimble cleanly so the vent stays centered and supported.
- Complete the outside section and cap with the listed termination components.
- Seal the exterior weather exposure points so water stays out of the wall assembly.
A few trade notes matter here. Support the vent so it doesn't sag or put stress on the stove collar. Keep joints accessible when possible. Don't bury a mistake behind trim and hope the startup test won't notice.
If the vent only fits when you push the stove out of level or torque the pipe sideways, stop and rework the layout.
Make the electrical connection last, after the stove is fully assembled and stable in its final spot. Route the cord neatly. Don't pinch it under the stove, stretch it across the hearth area, or leave it where ash tools and pellet bags will snag it.
At this point, the job should look finished but still feel unproven. That's exactly where you want to be before startup.
Your First Fire and System Checks
The first burn is a test, not a victory lap. Stay with the stove, keep the manual nearby, and watch how the whole system behaves.
What's normal on startup
New stoves often give off an odor during the initial burn as factory coatings and paint cure. That can be normal. Open a window if the manual suggests it and expect the first run to smell different from regular operation.
You're looking for a steady, controlled startup sequence. The igniter should do its job, the auger should feed pellets consistently, and the fans should come online without odd surging or scraping sounds.
A few things are worth paying attention to right away:
- Flame behavior: You want a stable burn, not a lazy, struggling fire or an obviously erratic one.
- Air movement: Room-air and exhaust fans should sound purposeful, not weak or obstructed.
- Control response: The stove should react normally to its startup settings and commands.
What to inspect before regular use
Use a flashlight and inspect every reachable vent joint while the stove is operating. You're checking for smoke leakage, smell, vibration, and any sign that a joint didn't seat correctly.
Then verify the basics:
- Pellet feed: The auger should deliver fuel smoothly without obvious hesitation.
- Door seal and ash areas: Look for smoke or odor escaping where it shouldn't.
- Exterior termination: Step outside and confirm exhaust is leaving where expected and the area around the cap remains clear.
A first burn tells you more than the install itself. If something is off, the stove usually says so early.
If the stove throws an error, smokes indoors, shuts down unexpectedly, or smells sharply wrong instead of “new appliance normal,” stop using it until you find the cause. Startup problems are easier to fix now than after repeated use.
Maintenance and When to Hire a Pro
A pellet stove isn't install-and-forget equipment. If you want steady heat and safe operation, you have to keep it clean and keep the venting serviceable.
Professional installation often averages around $2,339, with a common range of $1,013 to $3,668, and labor alone can run about $40 to $60 per hour, according to HomeAdvisor's pellet stove cost guide. That matters because people sometimes focus on saving labor dollars while underestimating how much of the job's safety depends on layout, venting, and code-aware execution.
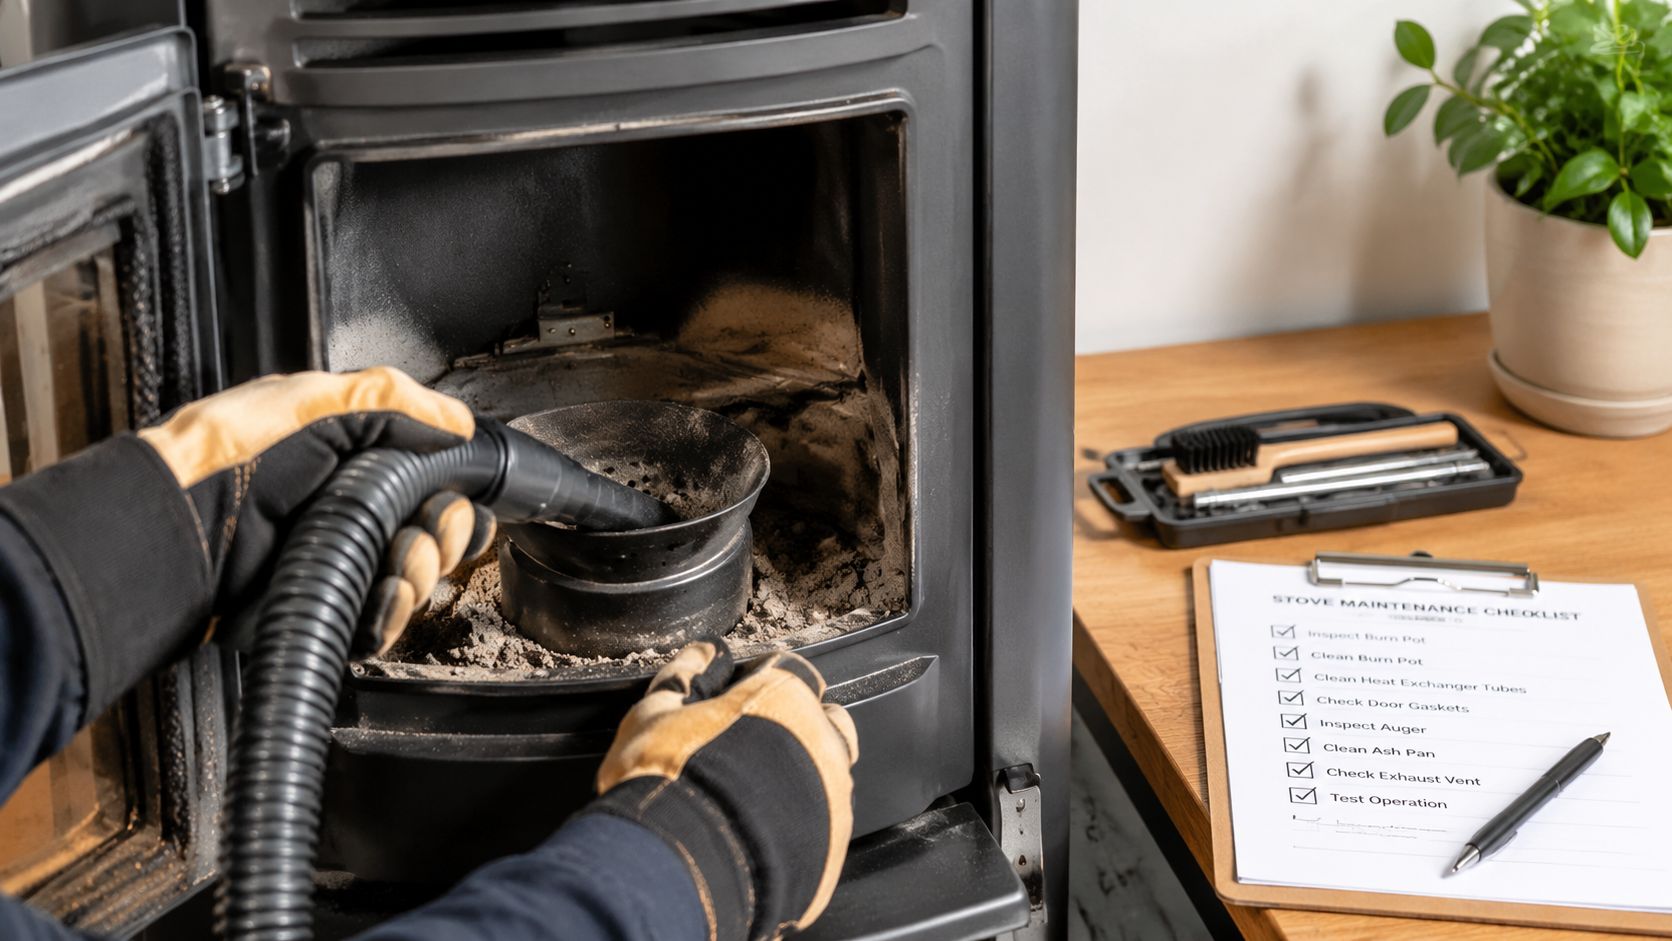
The routine that keeps the stove reliable
Pellet stoves reward regular attention. They don't reward neglect.
Your routine should include:
- Burn pot cleaning: Keep the burn area free of buildup so ignition and combustion stay consistent.
- Ash removal: Empty the ash pan as needed and don't let fine ash accumulate where it can affect airflow.
- Glass and interior wipe-down: A quick visual clean helps you spot changes in burn quality.
- Vent inspection: Check for buildup, loose joints, and anything outside that has crept too close to the termination.
- Seasonal deep service: Before heavy-use weather, inspect gaskets, fans, feed components, and venting thoroughly.
If your stove starts getting fussier, dirtier, or less consistent, maintenance is usually the first place to look. Performance complaints often trace back to cleaning and airflow, not the stove being “bad.”
The point where DIY stops making sense
Some people can absolutely install a pellet stove themselves. Some shouldn't. The dividing line is usually not confidence. It's whether you can read the manual accurately, follow the listing exactly, cut and flash a clean wall penetration, build a proper vent run, and judge your own work critically.
Hire a pro if any of these apply:
- You're unsure about clearances or vent design
- The wall penetration is more complicated than expected
- The electrical side raises questions, especially for outage planning
- Your local permit or inspection requirements aren't crystal clear
- You want the install documented and professionally signed off
A background check and license check matter here because this isn't cosmetic work. It's a heating appliance with combustion, exhaust, and electrical components. If you do bring someone in, it's smart to review what goes into a proper contractor background check before you hire.
The practical takeaway is simple. DIY makes sense when the install is straightforward and you're meticulous. The minute you're guessing, the “savings” can disappear fast.
If you'd rather skip the search and get matched with one qualified pro, Hand Vetted Co. connects you with a single licensed, background-checked, highly rated professional for your project. You won't get bounced between multiple businesses, and you can review How It Works, Our Standards, and the FAQ before you decide.