Before you pick out a single tile, ask yourself a less exciting question. How are you going to keep this project on budget, on schedule, and livable while your bathroom is torn apart?
That gap is where most bathroom remodels go sideways. People spend hours choosing fixtures and almost no time planning for dust, downtime, permit delays, material lead times, or what happens when demo exposes a plumbing problem inside the wall. A solid bathroom remodel checklist isn't just a shopping list. It's a sequence for making decisions in the right order, before those decisions get expensive.
Cost is the reason this matters. One independent construction source estimates a mid-range bathroom remodel at $20,000 to $40,000, while Bath Fitter cites Angi data showing a national average of $12,118 and a broader range of $6,639 to $17,621 in the U.S. in that same source. Those numbers vary because scope varies. Swapping visible finishes is one project. Opening walls, moving plumbing, and updating ventilation is a different project entirely.
This guide walks through the remodel in order, from first budget draft to final walkthrough, and explains why each step matters. If you handle the sequence well, the project becomes manageable. If you don't, even a small bathroom can turn into a mess.
Table of Contents
- 1. Establish Your Budget and Financing
- 2. Design Planning and Layout Decisions
- 3. Hire a Vetted Licensed Contractor
- 4. Secure Necessary Permits and Inspections
- 5. Select Quality Materials and Fixtures
- 6. Plan Plumbing and Electrical Updates
- 7. Prepare for Dust, Noise, and Logistics
- 8. Manage Unexpected Issues and Change Orders
- 9. Ensure Proper Waterproofing and Ventilation
- 10. Monitor Quality and Progress During Construction
- 10-Point Bathroom Remodel Checklist Comparison
- Your Remodel Is Complete. What Now?
1. Establish Your Budget and Financing
How much can you spend before this remodel starts competing with the rest of your house priorities?
Answer that first. A bathroom budget shapes every decision that follows, from whether you keep the existing layout to how aggressively you replace old plumbing inside the walls. If the number is vague, the project gets expensive in small, easy-to-miss ways. Demo runs longer than expected. Tile waste adds up. An outlet needs to move. The vanity you liked now needs a different countertop because the stock top is backordered.
Know Your Real Budget Ceiling
Start with the all-in number, not the finish selections. Then split that number into three buckets: core construction, materials and fixtures, and contingency. This order matters because the parts you do not see often decide whether the bathroom performs well five years from now.
Put money into the work that is hard to redo later. That means plumbing corrections, electrical upgrades, waterproofing, ventilation, substrate repair, and code-related fixes. Mirrors, cabinet hardware, and upgraded light fixtures are easier to scale up or down if the budget tightens.
I usually tell homeowners to stress-test the budget before they approve a design. If the plan only works when demo reveals perfect framing, flat floors, and no plumbing surprises, it is underfunded.
Use a simple checklist while you set the ceiling:
- Set a hard maximum: Choose the number you can carry without counting on best-case outcomes.
- Break out a contingency fund: Keep a separate reserve for hidden damage, code updates, or product substitutions.
- Define scope before pricing: Ask every contractor to bid the same layout, fixture assumptions, and finish level.
- Match financing to the project: Savings, a HELOC, and fixed-rate financing each change your risk if costs climb mid-project.
- Rank priorities early: Decide what gets protected if you need to cut. Waterproofing and proper venting stay. Decorative upgrades can wait.
Financing affects scope more than homeowners expect. A project paid from savings usually leads to tighter decisions and clearer trade-offs. Borrowed money can create breathing room, but it also raises the cost of every change order. If you are comparing this remodel against other major home expenses, this breakdown of how homeowners weigh roof repair vs replacement costs is a useful model for thinking through repair, replacement, and timing.
Practical rule: If your bathroom remodel budget only works when nothing goes wrong, the budget does not work.
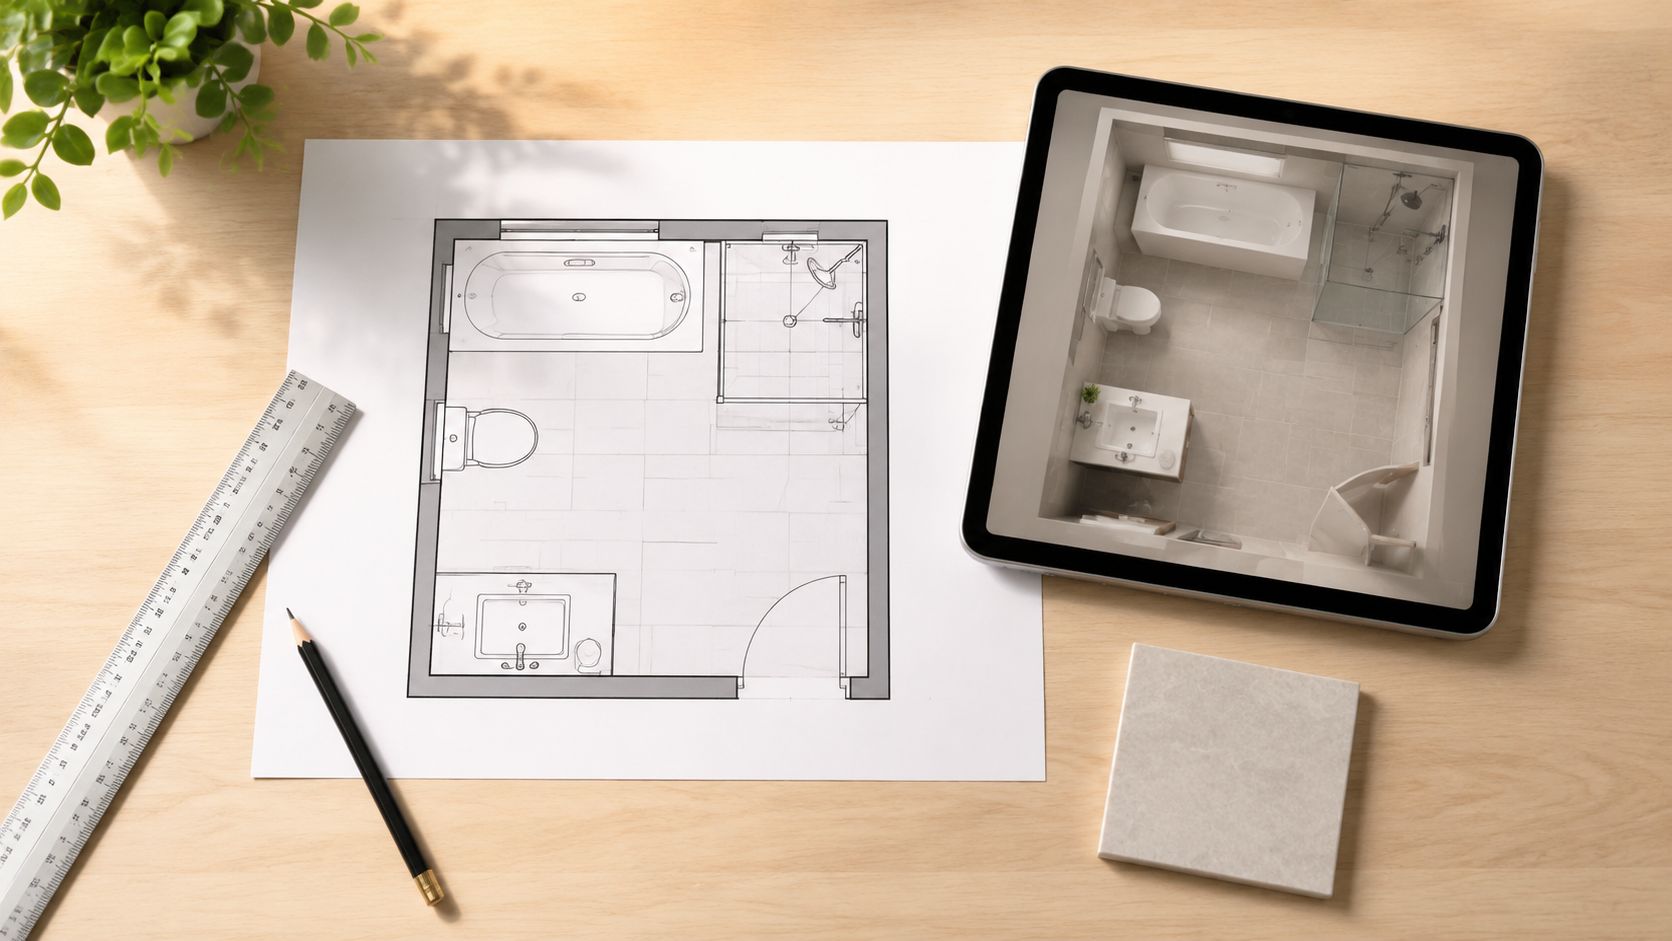
2. Design Planning and Layout Decisions
Good design starts with constraints, not inspiration photos. Before you choose paint colors or tile patterns, figure out what the room can realistically support.
The biggest design mistake is forcing a layout that looks good on paper but creates expensive field changes later. A floating vanity, a larger shower, or moving the toilet for privacy can all be worth it. But each one has consequences behind the walls.
Start With What Must Stay Put
Map the room around the things that are hardest to move. Toilet drain location, existing supply lines, vent path, door swing, and usable clearance matter more than whether the shower niche is centered on a grout line.
One planning guide recommends a 15 to 20 percent contingency and ordering custom materials 8 to 12 weeks ahead. That's not design fluff. That's layout discipline. The moment you choose custom glass, a special-order vanity, or a nonstandard tub, you're now managing lead times as part of the design.
Use a rough plan that answers these questions early:
- Who uses the room daily: A primary bath needs different storage and flow than a powder room.
- What can stay in place: Keeping the existing layout often saves money and reduces disruption.
- Where clutter will go: Recessed medicine cabinets, vanity drawers, and linen storage beat adding baskets later.
- What will still look good years from now: Trendy accent tile is easier to replace than a trendy vanity in an awkward size.
Keep the layout only if it works. Change it only if the improvement is worth the plumbing, electrical, and schedule consequences.
3. Hire a Vetted Licensed Contractor
A bathroom remodel is too dense with trades to treat contractor selection casually. You need someone who can coordinate plumbing, electrical, waterproofing, tile work, inspections, and finish carpentry without losing control of the sequence.
This is also where people get burned. A nice estimate and a friendly meeting don't tell you whether someone is licensed, insured, responsive under pressure, or capable of managing change when walls open up.
What Good Vetting Actually Looks Like
Check the basics yourself, even if the referral came from a friend. Verify active licensing, ask who is supervising the work, and confirm who is pulling permits. Then ask for recent bathroom-specific project references, not general remodeling references from years ago.
If you want a shortcut, Handvetted matches you with one exclusive professional who has already gone through licensing, background, rating, and human review standards. Their contractor background check standards make a good baseline for what you should verify anywhere.
Look for these signs in the estimate and contract:
- Clear scope language: Demolition, disposal, rough-in work, finish work, and exclusions should all be listed.
- Allowance clarity: If tile, vanity, or fixture allowances are vague, expect confusion later.
- Payment schedule tied to progress: Avoid front-loading too much money before real milestones are complete.
- Communication expectations: You should know who answers questions and how fast.
One practical test works well. Ask what usually causes delays in bathroom remodels. A seasoned pro won't pretend delays never happen. They'll talk about inspections, lead times, hidden damage, and client-driven changes.
4. Secure Necessary Permits and Inspections
People often think permits are just red tape. They're not. They're the paper trail that proves the work was done to code, inspected, and signed off.
That matters more in bathrooms because even simple-looking changes can involve plumbing vents, electrical protection, exhaust requirements, and concealed waterproofing details. If you skip this step and something fails later, you may be the one left arguing with insurers, buyers, or the next professional who has to fix it.
Permits Protect You Later
Moving a toilet, rewiring lighting, adding heated floors, or changing ventilation often triggers permit requirements. Even if your professional handles the filing, ask what permits are being pulled and what inspections are expected at rough-in and final.
The bathroom remodeling category is large enough that process discipline isn't a minor issue. One market forecast projects the bathroom remodeling market at USD 200.2 billion in 2025, rising to USD 315.9 billion by 2035 at a 4.7% CAGR. In a market with that much activity, the projects that stay organized are the ones with clear scope, permit sequencing, and fewer midstream surprises.
A few habits make permit management easier:
- Ask early: Find out permit requirements before demolition starts.
- Keep copies: Save permit documents, inspection notes, and final approvals.
- Link payment to sign-off: Don't release the final payment before final inspection is complete.
- Confirm responsibility: The contract should state who is pulling permits and scheduling inspections.
If a professional suggests skipping permits for work that obviously changes systems in the wall, treat that as a warning sign, not a shortcut.
5. Select Quality Materials and Fixtures
Materials make or break the long-term feel of the room. Not because expensive always means better, but because bathrooms punish bad choices fast.
Many people overspend in visible areas and underspend where performance matters. A dramatic tile wall can look great. It won't compensate for a weak fan, a cheap valve, or a vanity finish that starts failing in a damp room.
Choose the Parts That Age Well
Buy for moisture, maintenance, and repairability first. Porcelain tile is usually easier to live with than a delicate natural stone. Quartz counters are easier to maintain than surfaces that need more care. Faucet and shower trim from established lines such as Kohler or Moen can also make future part replacement easier.
Order materials early and confirm everything in writing. That means model numbers, finish names, rough-in requirements, and whether all pieces have arrived. A beautiful faucet isn't helpful if the valve body is on backorder and the wall needs to close.
Use this filter when comparing products:
- Core surfaces should be durable: Floors, shower walls, and counters need to handle water and cleaning products.
- Fixtures should have parts support: Replacement cartridges and trim matter more than showroom wow factor.
- Maintenance should fit real life: If a finish shows every water spot, you'll notice it daily.
- Samples should be tested in your room: Lighting changes everything. White tile under showroom lights can look completely different at home.
A bathroom remodel checklist works best here when it forces decisions early enough that procurement doesn't stall the build.
6. Plan Plumbing and Electrical Updates
What happens if the vanity light, shower valve, or exhaust fan gets decided after the walls are open? Labor climbs fast, inspections get harder to pass, and a simple finish upgrade can turn into a rough-in change order.
Bathrooms ask a lot from a tight space. Supply lines, drains, venting, lighting, switches, GFCI outlets, fan ducting, and fixture clearances all have to work together. If one piece moves late, several trades may need to redo work you already paid for.
Hidden Systems Decide How Expensive Change Becomes
Good planning at this stage is less about picking products and more about confirming what the room can support before construction starts. Check the existing pipe material, drain locations, water pressure, vent path, electrical capacity, and code requirements before finalizing fixture placement. That is the reason a chronological bathroom remodel checklist matters. It catches the expensive decisions while they are still lines on paper.
I tell homeowners to review plumbing and electrical plans with the contractor before any wall closes. Ask direct questions. Can the new fan vent outside without a long, awkward duct run? Does the lighting plan leave dark spots at the mirror? Will the medicine cabinet or vanity block an outlet? If you want extras such as a heated floor, bidet outlet, towel warmer, or niche lighting, call them out now, not after rough-in.
The choices that usually add labor are predictable:
- Fixture relocation: Moving a toilet, tub, or shower valve can affect drains, venting, framing, and finished wall dimensions.
- Fan changes: A better fan only helps if it is ducted properly to the exterior.
- Outlet placement: Daily-use outlets should be convenient, code-compliant, and clear of mirrors and storage.
- Lighting coordination: Vanity, ceiling, and shower lighting need to be planned as one system, not as separate add-ons.
Keeping the existing layout is often the smartest cost-control move. Not because the old layout is always best, but because the budget usually gets tested in the walls, ceiling, and floor, where every small revision touches labor, inspections, and schedule.
7. Prepare for Dust, Noise, and Logistics
A bathroom remodel checklist usually tells you what to build. It rarely tells you how to live through the build.
That's a mistake. If your household only has one bathroom, or if this is the primary bath, logistics become part of the project scope. You need a routine for bathing, storage, dust control, and access before demo starts, not after.
If You Have One Bathroom Plan for Survival
One overlooked issue in mainstream guidance is temporary bathroom planning during construction. Most lists focus on budget and sequence but skip the practical reality of where people shower, how they manage dust, and how the rest of the home stays usable.
That changes how I plan the job. Demolition isn't just a construction event. It's the moment the room stops serving daily life. If you don't have a backup bathroom, you need a continuity plan.
Think through these details before day one:
- Daily routine: Decide where toiletries, towels, medication, and personal care items will live.
- Dust containment: Ask for plastic barriers, floor protection, and daily cleanup expectations.
- Work hours: Confirm when crews arrive, where they park, and how materials enter the house.
- Material staging: Store your vanity, tile, and fixtures somewhere dry and protected.
If you only have one working bathroom in the home, don't start demolition until you've answered the question, "How do we function tomorrow morning?"
This isn't glamorous planning, but it prevents avoidable stress better than almost anything else on the list.
8. Manage Unexpected Issues and Change Orders
Once demolition starts, the house gets a vote. Old leaks, damaged subfloors, bad wiring, failed venting, and out-of-code plumbing don't care what the original estimate said.
What matters isn't whether problems appear. It's how you handle them when they do. That's where a bathroom remodel checklist needs rules, not just steps.
Change Orders Need Rules
The earlier planning guidance that recommended a contingency also gave the right mindset. Hidden costs are common once walls and floors are open. That's why your reserve money should stay untouched until there's a real reason to use it.
Every change order should answer four questions in writing. What was found. Why it matters. What fix is being proposed. What it will do to cost and schedule. If any of that is missing, slow down.
A clean process looks like this:
- Require written approval: No verbal add-ons, even for small items.
- Ask for photos: You should see the issue before approving the fix.
- Separate necessary fixes from optional upgrades: Rotten framing isn't the same as deciding to upgrade to better sconces mid-project.
- Check insurance implications: If hidden damage connects to a larger loss question, this overview of homeowners insurance coverage can help you frame the conversation.
People usually regret rushed change-order decisions. Taking one evening to review a problem is better than signing off under pressure and sorting out the cost later.
9. Ensure Proper Waterproofing and Ventilation
This is the least visible work and some of the most important. If waterproofing is sloppy, the bathroom can look perfect at handoff and still fail where you can't see it.
A lot of checklist articles mention waterproofing as a box to tick. That's not enough. You need to know what system is being used, where it starts and stops, and how moisture leaves the room after a shower.
This Is Where Shortcuts Become Damage
Ask direct questions. What membrane is being used in the shower area. How are corners and penetrations sealed. How is the shower pan sloped. Where does the exhaust fan terminate. If the answers are vague, keep asking.
A few essential elements matter in almost every bathroom:
- Wet areas need a complete system: Surface prep, membrane, transitions, drain details, and sealants all need to work together.
- The fan must vent outside: Venting into an attic or concealed space creates a new problem.
- Caulk and grout are not the waterproofing system: They're finish details, not the primary defense.
- Documentation helps later: Save product info and warranty details before surfaces get covered.
You can replace a faucet later. You do not want to reopen a shower because someone treated waterproofing like a line item instead of a system.
If you have to choose where to be picky, choose here.
10. Monitor Quality and Progress During Construction
You don't need to hover over the crew. You do need to pay attention.
Quality issues are cheapest to fix before the next layer goes on. A crooked valve, uneven niche, wrong fixture finish, or bad tile layout is manageable early. After trim, grout, and paint, the same fix gets harder, slower, and more expensive.
Catch Problems Before They Get Covered Up
Walk the job regularly and compare what you see to the contract, drawings, and material selections. Take photos after demolition, rough-in, waterproofing, tile prep, and final installation. Those photos become useful if questions come up later.
Keep your review focused on a few things:
- Scope match: Are the right materials and fixture models showing up on site?
- Workmanship: Check tile alignment, spacing, transitions, and finish quality in natural light.
- Sequence: Make sure inspections and rough work happen before surfaces close up.
- Communication: Raise concerns quickly and calmly so they can be fixed without drama.
A good professional won't mind reasonable oversight. They should expect questions, especially at milestone moments. If you're still looking for the right fit, Handvetted can help you start with someone who understands that clear communication is part of the job, not a nuisance.
10-Point Bathroom Remodel Checklist Comparison
| Item | 🔄 Implementation Complexity | ⚡ Resource Requirements | ⭐ Expected Outcomes | 💡 Ideal Use Cases | 📊 Key Advantages |
|---|---|---|---|---|---|
| Establish Your Budget and Financing | Low–Moderate: planning and quoting tasks | Money (project + contingency), time for estimates | Clear scope and cost control; fewer overruns | Initial project phase; setting realistic scope for mid–large remodels | Prevents surprises; enables accurate contractor matching |
| Design Planning and Layout Decisions | High: requires design tools and iteration | Designer time/software, mockups, material samples | Functional, buildable layout; reduced mid‑job changes | Reconfigurations, small-space optimization, style decisions | Visualizes outcome; improves contractor accuracy |
| Hire a Vetted Licensed Contractor | Moderate: vetting and verification process | Higher labor cost, time for interviews/references | Code‑compliant, insured work with warranties | Full remodels, structural or permit‑required work | Professional reliability, permits handled, warranty protection |
| Secure Necessary Permits and Inspections | Moderate–High: bureaucratic and scheduling steps | Permit fees, time for approvals and inspections | Legal compliance, inspection sign‑offs, protected insurance | Any plumbing/electrical/structural changes | Protects liability and resale value; catches code issues early |
| Select Quality Materials and Fixtures | Moderate: research and sampling required | Increased material cost, showroom visits, lead times | Durable finishes, improved longevity and resale value | Long‑term investments and high‑use bathrooms | Better warranties, durability, aesthetic options |
| Plan Plumbing and Electrical Updates | High: technical trades and code compliance | Licensed plumbers/electricians, higher labor/material cost | Safe, functional systems and code‑approved installations | Moving fixtures, adding circuits, heated floors | Prevents leaks/electrical hazards; improves performance |
| Prepare for Dust, Noise, and Logistics | Low–Moderate: coordination and site prep | Dust barriers/HEPA, temporary facilities, scheduling | Minimized household disruption and protected adjacent areas | Occupied homes or multi‑week projects | Maintains livability; improves jobsite safety and cleanliness |
| Manage Unexpected Issues and Change Orders | High: decision‑making, documentation, revisions | Contingency funds (10–20%), inspection/repair costs | Project continuity with documented adjustments | Older homes or extensive demolition projects | Prevents stalls; formal change control and transparency |
| Ensure Proper Waterproofing and Ventilation | Moderate–High: specialized installation details | Waterproof membranes, fans, skilled installers, added cost | Long‑term moisture protection and better indoor air quality | Showers, tubs, wet zones, climate‑sensitive regions | Prevents mold/water damage; extends finish life |
| Monitor Quality and Progress During Construction | Moderate: ongoing oversight and documentation | Time for visits, photo logs, inspection checklists | Early detection of defects; adherence to schedule/specs | Projects with detailed finishes or high budgets | Maintains accountability; ensures correct materials/workmanship |
Your Remodel Is Complete. What Now?
What closes out a bathroom remodel. The pretty photos, or the last round of checks that keep small misses from turning into call-backs and warranty fights?
Start with the final walkthrough before the last payment is released. Run every faucet and the shower. Flush the toilet several times. Test the fan, lights, GFCIs, switches, drawers, doors, and any added outlets. Look hard at tile cuts, grout lines, caulk joints, paint edges, trim, and hardware alignment. If something is off, write it on a punch list while the crew can still address it without remobilizing.
Then organize the job file. Keep the signed contract, estimate revisions, approved change orders, fixture and finish list, care instructions, warranties, permit paperwork, inspection sign-offs, and final invoice in one place. A simple folder saves time later when you need a replacement part, a warranty claim, or proof that the work was permitted.
Save the details you will forget first. Paint colors. Tile brand and series. Grout color. Faucet model numbers. Fan model. Vanity finish. These are the notes that make a repair six months from now much easier.
Use the bathroom for a week or two, then inspect it again. Daily use exposes issues a walkthrough can miss. Mirrors that fog because the fan is undersized or awkwardly switched. Shower spray that escapes the curb. Drawer fronts that look fine until the door is fully open. A remodel is not fully successful until it works well under normal use, not just under inspection lighting.
If you are still planning your project, pay attention to what this final stage teaches you. Good remodels do not finish strong by accident. They finish strong because the budget was realistic, the scope was documented, the contractor was vetted, the materials were ordered on time, and changes were handled in writing. That is the true value of a chronological checklist. It gives each decision a reason and puts the risky items, contractor screening, hidden waterproofing details, permits, and contingency planning, in the right order.
A bathroom remodel wraps up cleanly when the closeout is treated like part of the project, not an afterthought. That is how you protect the money you just spent.