Most homeowners pay $1,300 to $6,500 for water damage restoration, with the national average near $3,900. Severe losses can cross $25,000, because the final bill depends mainly on severity, affected square footage, and water contamination.
You may be looking at a soaked floor, a stained ceiling, or water spreading beneath cabinets right now. The visible puddle is only the beginning of the estimate. Your real water damage repair cost depends on what absorbed the water, how far it traveled, how contaminated it is, and how quickly you start drying.
A small clean-water leak can stay manageable if you act fast. A delayed sewage backup can require demolition, sanitation, structural drying, and reconstruction. The right decision is rarely “find the cheapest quote.” It's “choose the response that prevents a larger scope.”
Table of Contents
- What Most Homeowners Actually Pay for Water Damage
- How the Three Water Categories Drive Your Bill
- Why Loss Class Matters More Than Square Footage
- The Line Items Hiding Inside a Restoration Quote
- Filing an Insurance Claim Without Losing Money
- When DIY Drying Makes Sense and When It Backfires
- How to Read a Quote and Find the Right Pro
- Your First 48 Hours After the Leak Starts
What Most Homeowners Actually Pay for Water Damage
Most restoration projects land between $1,300 and $6,500, with an average close to $3,900, according to Modernize's water damage restoration cost guide. Other national estimates place the average around $3,868 to $3,869, with project ranges extending from $450 to $16,000, as reported by HomeAdvisor and Angi.
The number on your estimate is controlled by three factors:
- Severity: Water that stays on a finished floor is cheaper to address than water inside walls, ceilings, insulation, or subfloors.
- Square footage: Restoration commonly runs about $3 to $7.50 per square foot, before every rebuild expense is included, according to HomeAdvisor's pricing data.
- Contamination: Clean water is the least expensive path. Gray water costs more. Sewage or floodwater demands the most containment, removal, and sanitation.
Use your situation to find the likely tier
| Scenario | Affected Area | Typical Cost Range | Severity Tier |
|---|---|---|---|
| Clean upstairs supply-line leak | Under 100 sq. ft. | $800 to $2,200 | Limited, clean-water loss |
| Main-floor dishwasher overflow | About 300 sq. ft. | $2,800 to $5,500 | Moderate, potentially gray water |
| Basement sewage backup | 800+ sq. ft. | $8,000 to $20,000+ | Severe, contaminated loss |
These scenario ranges are practical planning brackets, not fixed national averages. A clean leak under a sink may need extraction and targeted drying. A dishwasher overflow can spread beneath cabinets and flooring, while a sewage backup may force removal of porous materials across the basement.
Practical rule: Price the materials you can't see, not just the water you can.
Hardwood subfloor saturation, contaminated HVAC components, and discovery after 48 hours can all expand the scope. FEMA has warned that 1 inch of water can cause about $25,000 in damage to a home, which shows why a modest-looking intrusion can become a reconstruction project. The Insurance Information Institute data summarized by Flume also places the average water or freezing claim at about $13,954 over the 2018 to 2022 period.
How the Three Water Categories Drive Your Bill
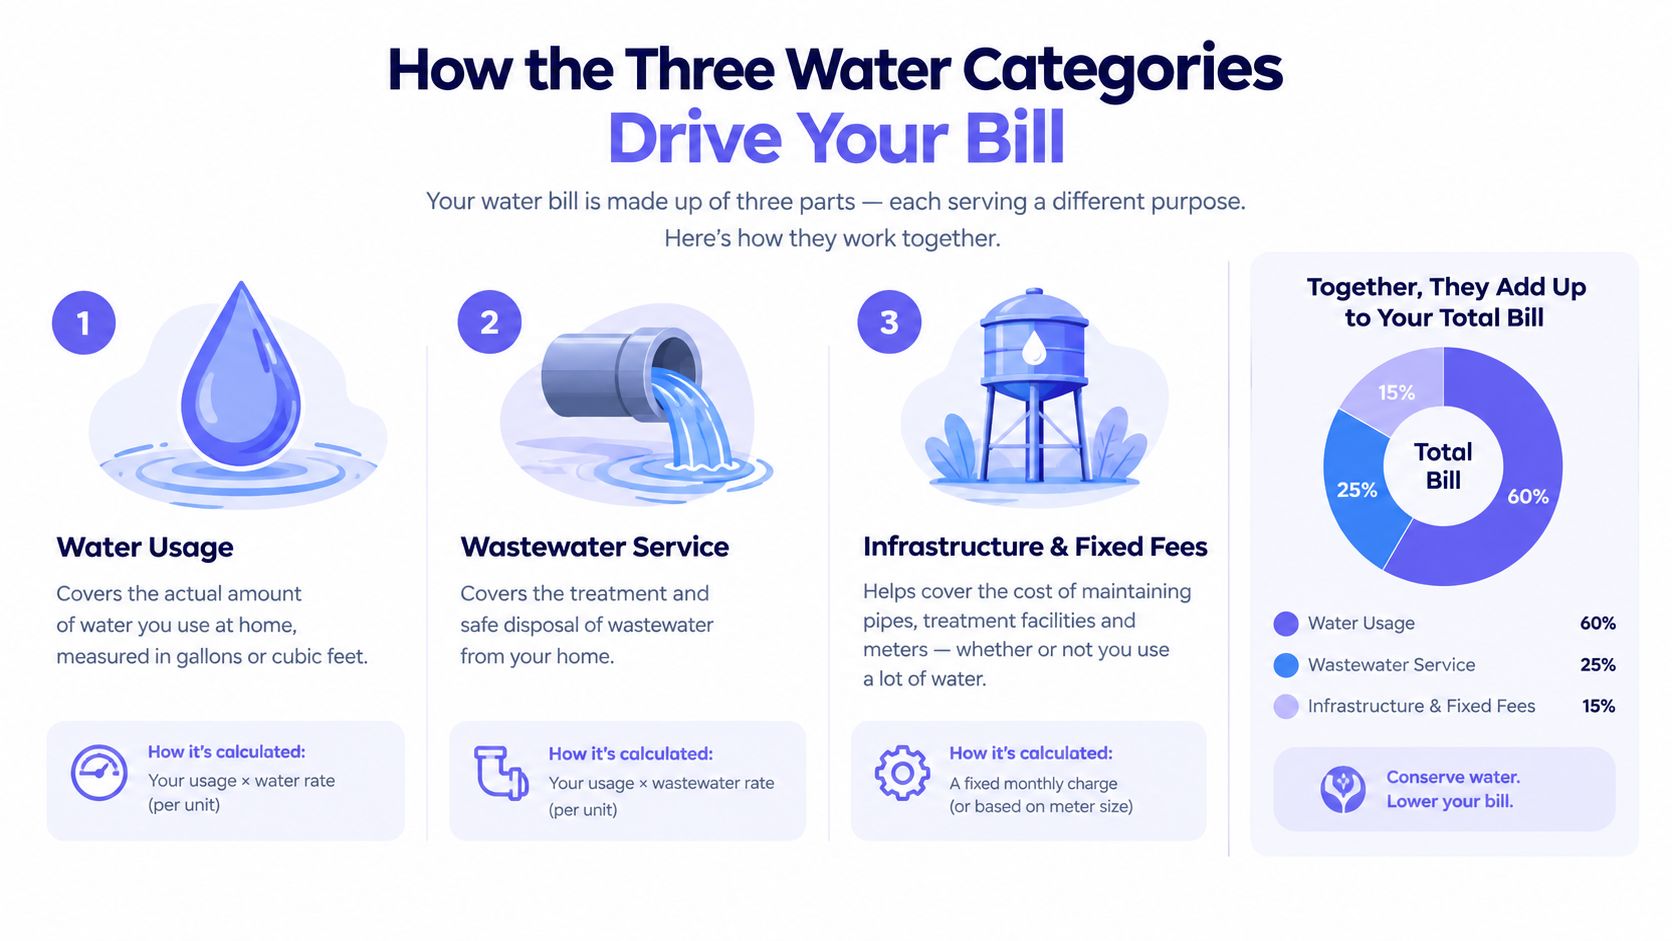
The water's source determines the work, not its appearance. Restoration crews sort losses into three categories, and each one changes the equipment, protective measures, disposal requirements, and materials that can stay in place. That classification should guide your first decision: dry the area, remove materials, or call a professional immediately.
Category 1 clean water
Category 1 water comes from a sanitary supply source, such as a broken supply line or faucet. Typical restoration pricing runs about $3 to $4.50 per square foot, according to industry category pricing. This is usually the least expensive tier because crews are not handling sewage or other significant contaminants.
For a 200-square-foot laundry room, drying at roughly $4 per square foot puts the restoration portion near $1,600. That estimate covers drying work, not replacement flooring, cabinetry, paint, or other rebuilding. If the leak is contained and materials are still sound, paying out of pocket for targeted drying may make more sense than filing a small claim.
Category 2 gray water
Category 2 water carries meaningful contamination. Washing-machine discharge, dishwasher water, and a toilet overflow without feces fall into this group. Pricing commonly rises to about $4.50 to $9 per square foot because drywall, carpet pad, insulation, and other porous materials may require removal.
The decision is whether materials can be dried safely or must be demolished. If gray water reaches cabinetry or sits beneath flooring, drying in place can leave contamination trapped behind the finished surface. Remove the affected material when access is limited. The added demolition cost is often lower than correcting a concealed problem later.
Category 3 black water
Category 3 water includes sewage, floodwater, and other heavily contaminated sources. Restoration commonly reaches about $7 to $15 per square foot, according to the same industry pricing guide. Containment, biohazard precautions, antimicrobial treatment, disposal, and more intensive drying can all enter the estimate.
The same 200-square-foot room affected by sewage can exceed $3,000 before rebuilding, even though the floor area has not changed. Here, call a qualified professional rather than attempting DIY drying. Contaminated porous materials may not be salvageable, and improper handling can spread the problem through the home.
Contamination grade is often the biggest cost accelerator because it determines whether crews can extract and dry materials or must remove, contain, sanitize, and replace them.
Why Loss Class Matters More Than Square Footage
Two losses covering the same floor area can produce very different estimates. The reason is loss class, which describes how far water has penetrated materials and assemblies.
A limited Class 1 loss may remain around $150 to $500, while severe Class 3 and Class 4 losses can reach $5,000 to $15,000 or $15,000 to $100,000, according to HomeGuide's restoration cost benchmarks. These aren't competing prices for the same job. They reflect different drying and reconstruction problems.
The four classes in practical terms
| Class | Affected Materials | Typical Drying Time | Cost Range |
|---|---|---|---|
| Class 1 | Limited finished materials with minimal absorption | About 3 days | $1,200 to $2,800 |
| Class 2 | Whole-room materials, carpet pad, and lower wall areas | Several days | $2,500 to $5,000 |
| Class 3 | Ceilings, insulation, cavities, and broad wall saturation | Extended drying | $5,000 to $12,000 |
| Class 4 | Hardwood, plaster, stone, concrete, or deeply bound moisture | 2+ weeks | $10,000 to $25,000+ |
Class 1 is the limited event. Water may affect part of one room, with little absorption into structural materials. Class 2 reaches more of the room and often wicks up walls, soaking carpet pad and baseboards.
Class 3 usually involves water entering from above or spreading through ceilings, insulation, wall cavities, and subflooring. Demolition becomes more likely because technicians need access to trapped moisture. Class 4 involves materials that hold water tightly, including hardwood, plaster, stone, or concrete. Those assemblies may require specialty desiccant or low-grain refrigerant drying.
The class follows the material response. It isn't a judgment about how carefully you maintained the property.
A 300-square-foot loss over sealed flooring may be relatively straightforward. The same area involving saturated hardwood, plaster, or insulation can demand prolonged equipment use and selective demolition. Square footage starts the estimate. Material porosity determines where it ends.
The Line Items Hiding Inside a Restoration Quote
A restoration invoice should read like a work plan, not a single unexplained total. The common charges include extraction, drying equipment, monitoring, demolition, antimicrobial treatment, mold work where necessary, and reconstruction.
What each charge should show
| Line Item | Typical Cost Range | How It's Calculated | Common Markup Risk |
|---|---|---|---|
| Water extraction | $500 to $1,500 | Labor, pumps, vacuums, and water removal | Charging for equipment or labor not used |
| Air movers and dehumidifiers | $200 to $900 per week | Equipment type and rental days | Leaving equipment longer than moisture readings require |
| Moisture monitoring | $75 to $150 per visit | Site visits and recorded readings | Repeated visits without documented changes |
| Demolition | $2 to $6 per sq. ft. | Materials removed, labor, hauling | Removing salvageable finishes without evidence |
| Mold containment and remediation | $500 to $4,000 | Containment, cleaning, removal, and disposal | Adding mold work without testing or visible justification |
| Antimicrobial treatment | Varies by scope | Product, application, and affected materials | Bundled treatment with no application detail |
| Rebuild | Varies by materials and labor | Drywall, flooring, trim, paint, and installation | Combining mitigation and reconstruction into one lump sum |
A kitchen flood might show $1,200 for extraction, $1,400 for seven days of drying equipment, and $3,200 for demolition and rebuilding. Those charges total $5,800 before any additional treatment or hidden-material work. A contaminated basement can use the same basic categories but require more disposal, containment, and replacement.
The equipment timeline deserves special attention. A contractor may quote by project, while the invoice still grows with each dehumidifier day. Ask what moisture readings must show before equipment is removed. Crew hours matter, but dehumidifier days often control the moving portion of the bill.
Questions that expose weak estimates
Ask for the affected rooms, materials, equipment count, daily rate, monitoring schedule, demolition boundaries, disposal fees, and rebuild assumptions. If the quote says “demo as needed,” require a written explanation of what triggers additional removal.
Hourly pricing isn't automatically bad. Per-job pricing isn't automatically better. The defensible quote is the one that connects every charge to a condition the crew can document.
Filing an Insurance Claim Without Losing Money
Start with evidence, not cleanup. Stop the water source if it's safe, shut off power to affected circuits, photograph every room and damaged item, and preserve receipts for emergency supplies, temporary protection, extraction, and repairs.
Call your insurer promptly to open a claim. A short delay can make secondary damage harder to defend, especially if the carrier believes you failed to take reasonable mitigation steps.
Follow the claim sequence
- Document first: Photograph walls, ceilings, flooring, cabinets, appliances, contents, and the source of the leak before moving items.
- Stop further damage: Shut off the supply, protect openings, and avoid unsafe electrical areas.
- Open the claim: Get a claim number and ask about emergency mitigation procedures.
- Get a written scope: Require separate entries for extraction, drying, demolition, treatment, disposal, and rebuilding.
- Track changes: Save moisture readings, invoices, photos, equipment logs, and every adjuster communication.
Adjusters generally evaluate the cause of loss, contamination category, loss class, affected materials, and the promptness of mitigation. Your policy also controls whether payment reflects Actual Cash Value or Replacement Cost. A depreciated payment could turn a $9,000 covered scope into a $6,200 check, while replacement-cost coverage could support the full $9,000 after policy conditions are met. Confirm the terms with your insurer, because coverage varies.
Before the adjuster arrives, gather your policy details, claim number, dated photos, videos, inventory, receipts, plumbing or appliance information, contractor estimates, and moisture documentation.
Use precise language if hidden damage appears later:
- “The moisture readings show affected material outside the original scope.”
- “Please add the newly documented wall cavity or subfloor damage as a supplemental claim.”
- “The revised scope reflects documented conditions discovered during authorized mitigation.”
- “Please identify the policy basis for excluding this newly documented damage.”
Don't sign off on the first scope sheet without reviewing every line. If the drying crew finds more saturated material, request updated photos, readings, and a supplemental estimate.
A clear, exclusive professional quote can also strengthen a negotiation because it provides a defined scope and fair-market reference. Use this homeowner insurance claims resource to organize the claim process, then verify every coverage decision against your own policy.
When DIY Drying Makes Sense and When It Backfires
DIY drying is appropriate only when the water is clean, the area is small, and you can confirm that moisture hasn't entered hidden materials. The cheap option stops being cheap as soon as water moves under cabinets, behind walls, or into padding.
Three decisions with different break-even points
A small clean-water spill under one sink is the clear DIY case. Fans and a wet-dry vacuum may cost under $150, while professional extraction alone can run about $500. If the spill is under 10 square feet, limited to one room, and dry within 24 hours, handling it yourself is reasonable.
A dishwasher supply-line failure affecting 200 square feet of flooring is different. Water can travel beneath cabinets and into the subfloor, and DIY drying may leave moisture behind. Professional drying at roughly $1,800 can prevent a $6,000 rebuild, according to the scenario guidance provided for this decision. Here, the pro wins because moisture verification matters more than the price of a few fans.
A sump pump backup involving gray water should not become a home cleanup project. Category 2 and Category 3 water requires antimicrobial treatment, containment, disposal procedures, and protective equipment. Handling contaminated water without appropriate protection can expose you to health hazards and can spread contamination into clean areas.
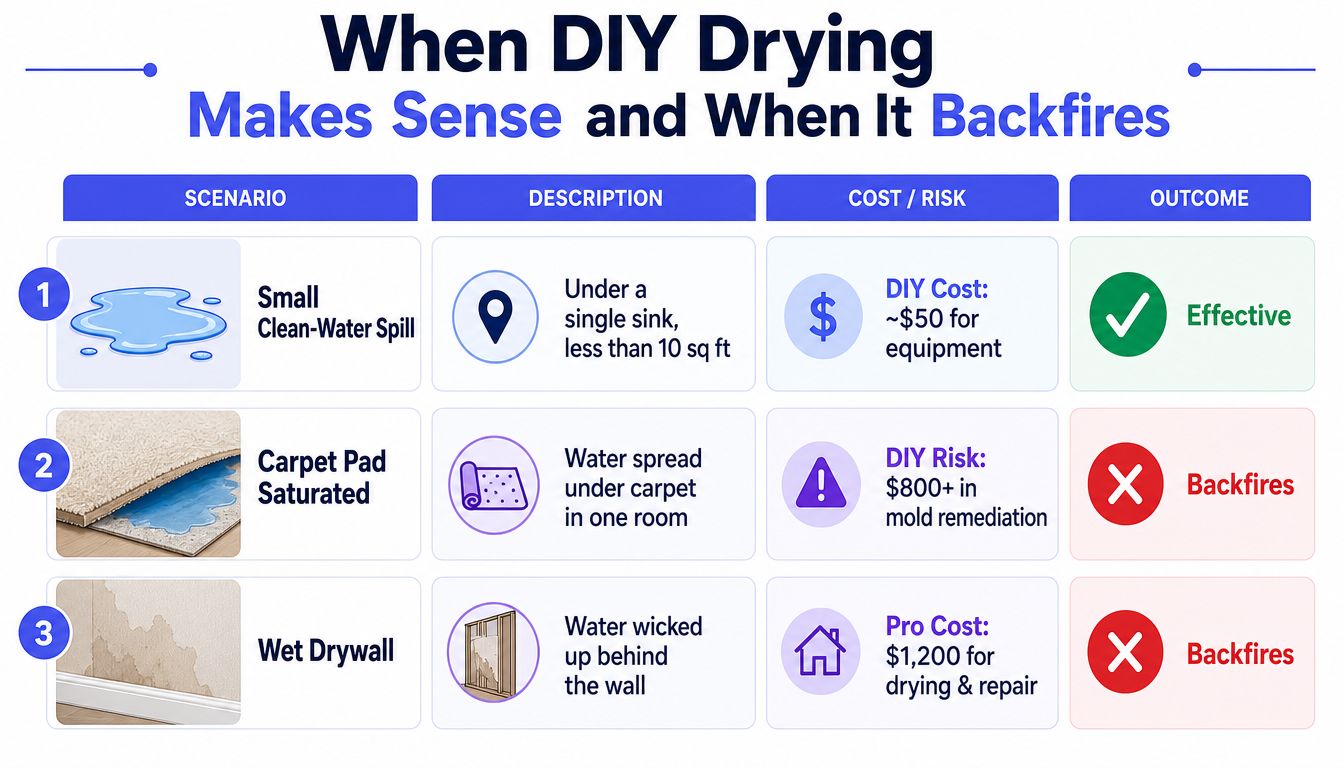
The useful drying window is roughly 24 to 72 hours in these practical decisions. If you can't inspect beneath flooring, inside walls, or under cabinets, you can't prove the structure is dry. For concerns about possible microbial growth, use this professional mold testing cost guide to understand the separate evaluation and remediation questions.
DIY rule: Under 10 square feet, one room, clean water, and drying within 24 hours can be manageable. Everything else deserves a certified restoration assessment.
How to Read a Quote and Find the Right Pro
A credible restoration quote separates extraction hours, equipment days, monitoring visits, demolition, antimicrobial work, disposal, and rebuilding. A single lump sum prevents you from checking whether the scope matches the damage.
Suppose the estimate totals $4,200. Ask how much covers extraction, how many air movers and dehumidifiers are included, how many monitoring visits are planned, which materials will be removed, and what rebuild work is included. Monitoring visits and equipment days may be negotiable if moisture readings support an earlier finish. Dump fees and purchased materials are usually more fixed.
The biggest red flag is vague demolition. “Remove as needed” can become an open-ended authorization. Require boundaries, moisture evidence, and approval before the crew expands the removal area.
| Method | Typical Time to First Bid | Bids Received | Average Price Variance |
|---|---|---|---|
| Calling three local firms | Varies by availability | Several | Varies by scope and response |
| Lead-generation directory | Varies by routing | May send your details to multiple contractors | Varies by competing scopes |
| Exclusive professional match | Varies by location and urgency | One matched professional | Depends on the documented scope |
Cold-calling firms gives you direct control but creates a sales-call loop during a time-sensitive loss. A lead directory may provide more contacts, but some platforms distribute your information to several businesses, which can create competing pitches before anyone has reviewed the actual moisture conditions.
The exclusive-match model trades multiple bids for a faster, less pressured start. The key question isn't how many contractors call. It's whether the professional understands the category, class, affected materials, and insurance documentation before work begins.
Your First 48 Hours After the Leak Starts
The first 48 hours shape the scope. Your job is to stop the source, protect people, preserve evidence, and get qualified drying started before hidden moisture becomes a reconstruction problem.
Hour 0 to 2
Stop the water if you can do so safely. Shut off power to affected circuits, keep people away from unsafe areas, and photograph everything before moving furniture, lifting flooring, or throwing anything away.
Hour 2 to 6
Open an insurance claim and request a claim number. Then contact a restoration company for an assessment, with particular attention to contamination category, material saturation, and hidden moisture.
Hour 6 to 24
Begin extraction and professional drying as soon as practical. Crews should document moisture readings, place air movers and dehumidifiers based on the affected materials, and identify porous contents that can't remain in place.
Hour 24 to 48
Meet the adjuster onsite if possible, with the restoration professional present. Resolve scope questions in real time, review demolition boundaries, and keep records of every reading, photo, equipment log, receipt, and revised estimate.
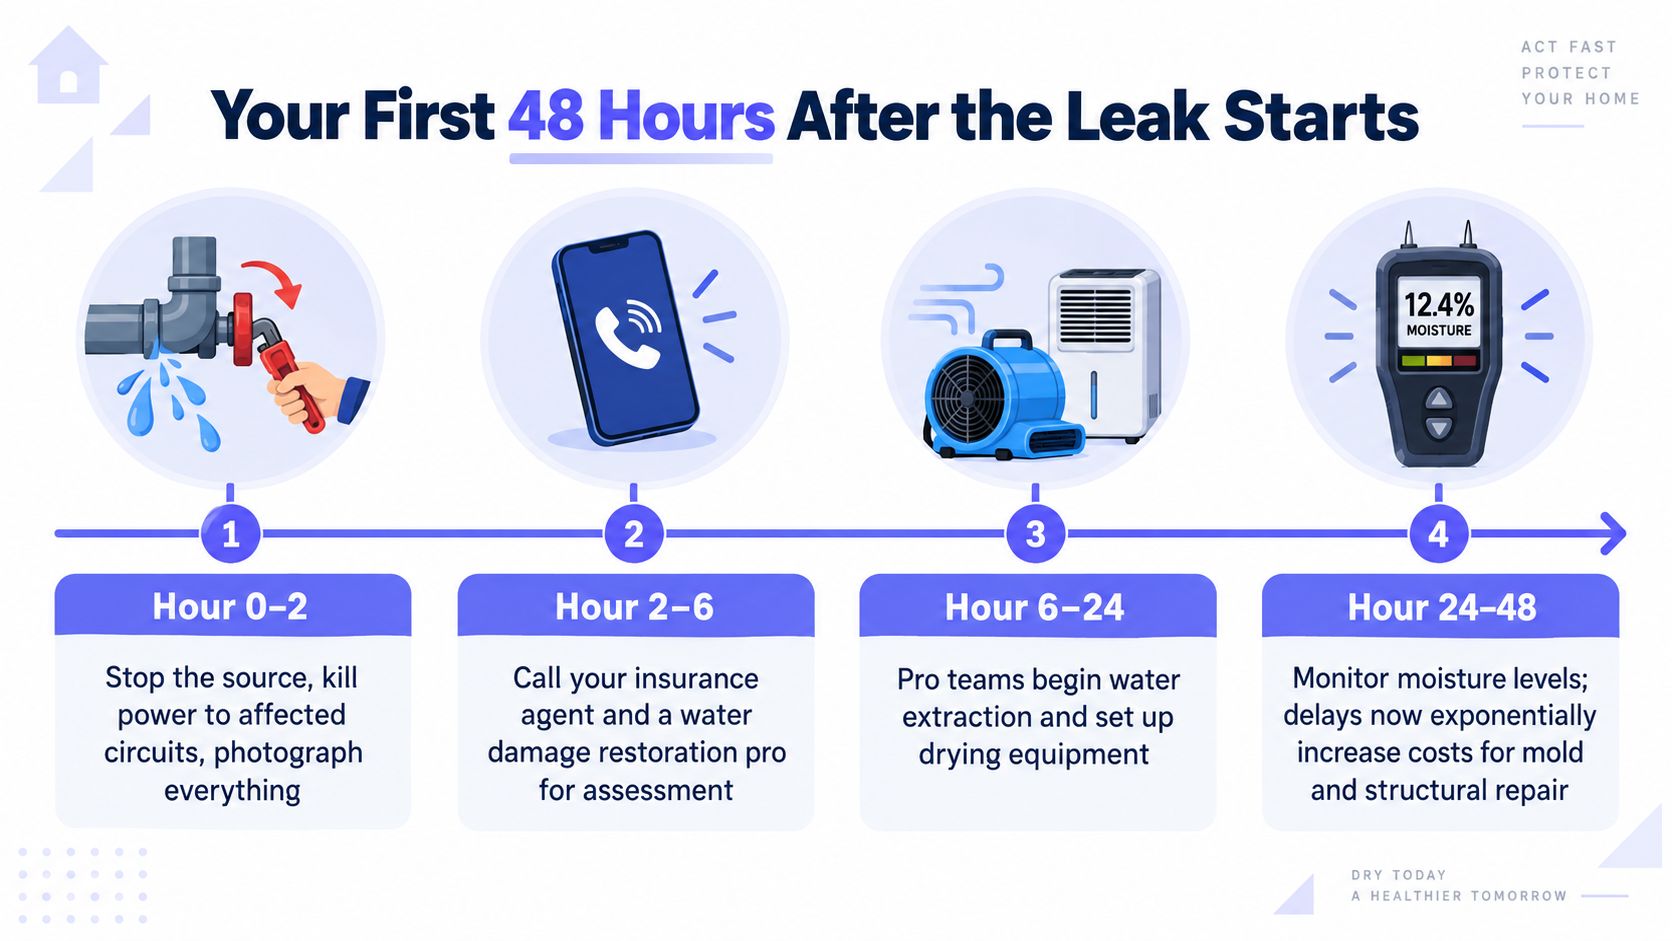
A delay can change a drying job into a demolition and rebuild project. Use this emergency water damage repair resource when you need immediate help, and don't authorize reconstruction until moisture readings support a dry, stable structure.
Hand Vetted Co. connects you with one exclusive, verified professional for water damage restoration, rather than sending your information to multiple businesses. Visit Hand Vetted Co. to request a match based on your location, project scope, timing, and budget, then use the written estimate to move quickly and protect your claim.