Your dryer runs. The drum turns. Clothes come out cold and damp. That's the point where a lot of people order a heating element and hope for the best.
That shortcut causes a lot of wasted repairs. A dryer with no heat doesn't automatically need dryer element replacement. The smarter move is to test the entire heating circuit first, then replace parts only after the readings tell you what failed.
Table of Contents
- Is It Really Your Dryer Element
- Gathering Your Tools and the Right Part
- The Step-by-Step Replacement Process
- Testing Your Work and Preventing Future Failures
- Troubleshooting Common DIY Replacement Issues
- When to Skip the DIY and Call a Professional
Is It Really Your Dryer Element
You pull wet clothes out of the drum, the dryer runs, and there's no heat. A lot of people jump straight to the element. That's how parts get ordered that never needed replacing.
A no-heat electric dryer often has a broken heating circuit, not just a bad heater coil. The thermal fuse is a common failure point, and replacing the element first can leave you with the same dead-heat complaint you started with, as shown in this thermal fuse diagnostic video.
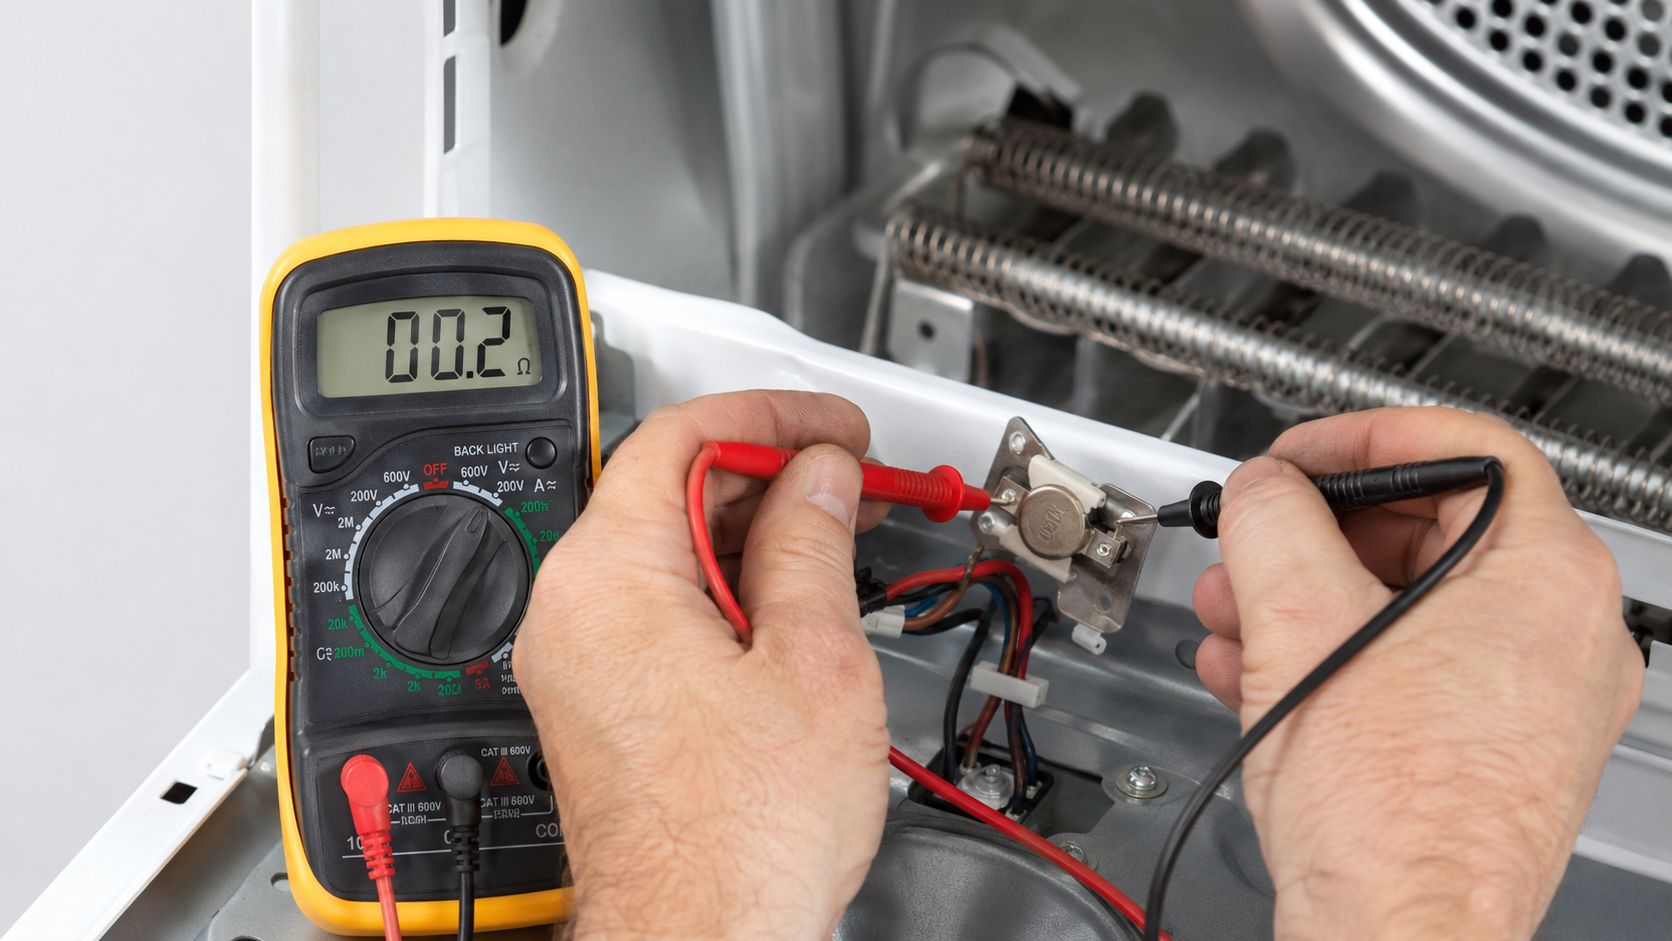
Start with the parts that fool people most often
On a no-heat call, I check the thermal fuse and high-limit thermostat before I blame the element. If either one is open, power to the heating circuit is interrupted and the element never gets a chance to work.
Airflow problems matter too. Restricted venting and lint buildup drive heat up inside the cabinet, and that heat can trip a fuse or cook an element. Internal lint cleaning is part of the repair, not an extra. The same mindset applies to any appliance that moves heat and air through a confined space, including work like installing a pellet stove safely and cleaning vent paths correctly.
Practical rule: Test the element, the thermal fuse, and the high-limit thermostat before buying parts.
Use a multimeter before you buy anything
Unplug the dryer first. Set the meter to continuity or resistance.
Use this order so you catch the common failures fast:
- Test the thermal fuse first. It should have continuity. If the meter shows open or OL, the fuse has failed.
- Test the high-limit thermostat. It should also have continuity at room temperature. If it reads open, the safety circuit is broken.
- Test the heating element. A good element usually shows measurable resistance. An open reading means the coil is broken. GE's dryer troubleshooting and continuity guidance matches that basic test logic.
You usually do not need to tear the whole machine apart just to sort this out. On many dryers, one service panel gives access to the heater housing and the safety parts mounted on or near it.
Here's the reading logic in plain terms:
| Component | Good reading | Bad reading |
|---|---|---|
| Heating element | Measurable resistance | Open or infinite resistance |
| Thermal fuse | Continuity | Open or infinite resistance |
| High-limit thermostat | Continuity | Open or infinite resistance |
Do not trust your eyes alone.
A coil can look intact and still be electrically open. A fuse can look normal and still be blown. If the fuse or thermostat fails the meter test, fix that problem and clean out the lint path before spending money on dryer element replacement. If the element reads open and the rest of the circuit checks out, then you have a solid reason to replace it.
Gathering Your Tools and the Right Part
Once the meter confirms the element is bad, the next mistake is buying the wrong replacement. Dryers can use similar-looking heater assemblies with different brackets, terminals, and safety-part layouts. Close enough isn't good enough here.
Professional dryer element replacement typically runs $150 to $350, with the part itself ranging from $15 for generic versions up to $200 for OEM parts, and labor adding $50 to $125 per hour, based on this dryer repair cost breakdown. That matters because if the full repair pushes past 40% of a new mid-range dryer priced at $800 to $1,200, replacement often makes more financial sense.
Buy the part by model number, not by appearance
Find your dryer's model number on the tag, usually just inside the door opening. Use that exact model number when you order the element assembly.
Generic parts can work. OEM parts usually fit more cleanly and reduce guesswork, especially around terminal layout and mounting brackets. If you've ever dealt with a part that almost fits, you know how much time that can burn.
Before installing anything, compare the old part and new part side by side:
- Match the terminals: The spade locations and shapes should line up.
- Match the bracket points: Screw holes and tabs need to sit the same way.
- Match the housing setup: Some models require transferring thermostats or other safety parts.
If you're used to mechanical DIY jobs, this is the same basic principle as matching a combustion part on another appliance. A guide like this pellet stove installation walkthrough shows the same pattern. Correct model match first, then clean assembly and careful reinstallation.
Tools and Parts Checklist
A simple setup is usually enough.
| Item | Purpose |
|---|---|
| Multimeter | Confirm the element, fuse, and thermostat readings before replacement |
| Phillips screwdriver | Remove access panels on many models |
| Nut driver set | Remove hex-head screws on panels and heater housings |
| Needle-nose pliers | Pull spade connectors off terminals without stressing the wire |
| Work gloves | Protect hands from sharp sheet metal edges |
| Vacuum with hose attachment | Remove lint from the heater area, blower area, and cabinet |
| Vent brush kit | Clean the exhaust run to the exterior |
| Replacement heating element assembly | Replace the failed heater with the correct model-specific part |
| Phone camera | Photograph wire locations before disconnecting anything |
A cheap part that fits badly can turn a straightforward repair into a callback on your own machine.
If the machine tag is missing, faded, or unreadable, that's one of the few times I'd slow down and consider whether this is still a good DIY project.
The Step-by-Step Replacement Process
A dryer element swap goes smoothly when the diagnosis was done first and the machine gets opened carefully. If you skipped circuit checks and bought an element on a hunch, this is the point where a lot of DIY jobs go sideways. I see plenty of dryers with a brand-new element and the original blown fuse still sitting in the circuit.
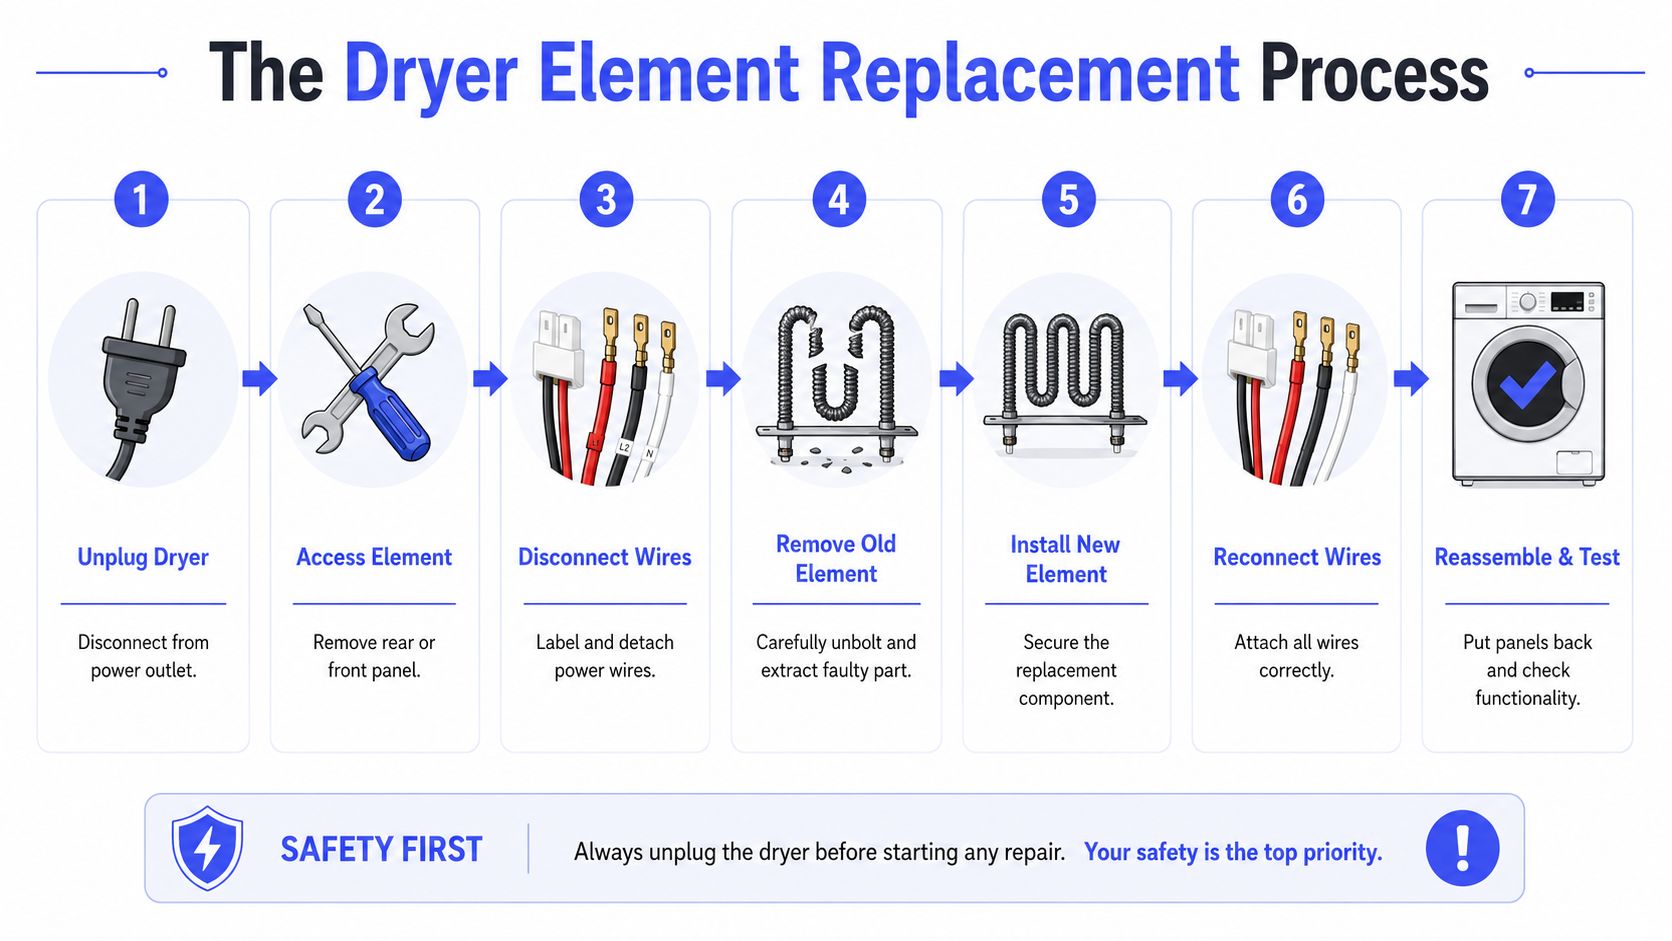
Get access without creating new problems
Unplug the dryer from the wall and pull it out far enough to work without straining the cord or crushing the vent. If the exhaust duct is short or stiff, disconnect it first so the cabinet can move freely.
Open the machine the way your model requires. Many dryers give access from the rear, but some need the front or lower panel removed first. Keep screws sorted by panel or set them in the pattern you removed them. That saves time on reassembly and keeps you from driving a long screw into the wrong spot.
Then work in a fixed order:
- Remove the access panel. Watch for sharp cabinet edges as the panel comes free.
- Find the heater housing. It usually sits near the blower or exhaust outlet and looks like a metal box or tube.
- Photograph the wire layout before disconnecting anything. Good photos beat memory every time, especially if two terminals look interchangeable.
- Remove the wire connectors by gripping the terminal, not the wire. Needle-nose pliers help here. Twisting or yanking the wire can loosen the crimp and create a bad connection later.
If a connector is already darkened, loose, or heat-damaged, stop and deal with that before installing the new part. A new element connected to a burnt terminal is a repeat failure waiting to happen.
Swap the element carefully and reassemble with intent
With the wiring clear, remove the screws holding the heater housing or element bracket in place and slide the assembly out. Some elements come out as a full housing. Others mount inside a canister and need to be transferred piece by piece.
Set the old and new parts side by side before you install anything. Check terminal location, mounting points, coil length, and whether the high-limit thermostat or thermal cutoff has to move over from the old assembly. Service instructions from manufacturers such as Whirlpool's dryer repair help pages show this model-to-model variation clearly, and it is one reason I tell people not to force a part that only looks close.
Install the new element so it sits flat and square.
- Transfer safety parts if your replacement did not include them: Move thermostats and cutoffs one at a time so nothing gets mixed up.
- Keep the coil and insulators undisturbed: If the coil gets bent into the housing, it can short to ground and fail the first time it heats.
- Reconnect each wire firmly: The terminal should seat fully and stay tight without wobble.
This is not a job to rush. A dryer can run with a misrouted wire or a half-seated connector long enough to fool you, then burn a terminal a week later.
Before the panel goes back on, make these checks:
| Check | What you want to see |
|---|---|
| Wire seating | Connectors fully seated on the correct terminals |
| Wire condition | No brittle insulation, scorch marks, or loose crimps |
| Housing position | Mounting screws snug, assembly aligned, nothing rubbing the coil or housing |
| Cabinet interior | Loose lint removed from the heater area before closing it up |
Reinstall the access panel and reconnect the exhaust duct without kinking it. If anything about the wiring, terminal condition, or fit of the new part still looks questionable, that is the time to stop and call for service, not after power is restored.
Testing Your Work and Preventing Future Failures
A lot of people treat cleaning as extra credit. It isn't. It's part of the repair.
Up to 80% of heating element failures are caused by restricted airflow from lint buildup, and installing a new element into a lint-clogged system can cause it to overheat and fail within weeks, as explained in this dryer heating element airflow guide.
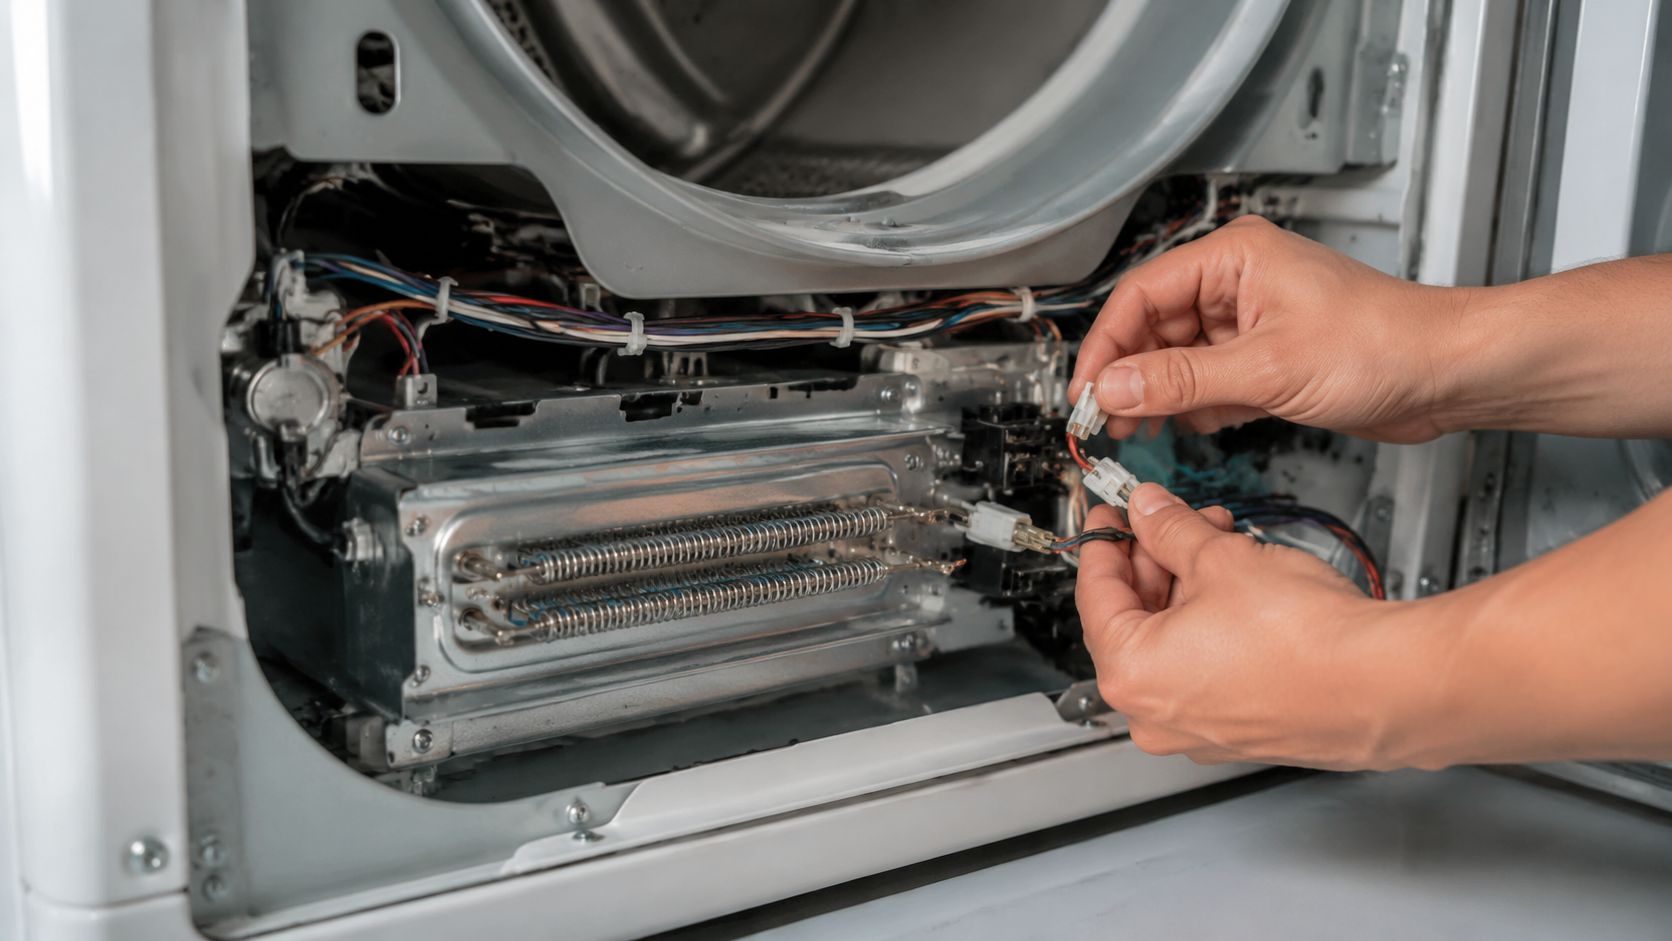
Clean first, then test
Before final power-up, vacuum the heater area, the cabinet floor, the blower housing entrance, and whatever duct path you can reach from the dryer side. Then clean the full exhaust vent run to the outside hood.
This is not optional. A dryer needs airflow to keep the element within a normal operating range. Restrict that airflow and the new coil runs hotter than it should.
Do these checks before the first heated cycle:
- Clear the lint screen housing: Lint packs into places the screen doesn't catch.
- Inspect the vent path: Look for crushed flex duct, heavy lint, or a stuck exterior flap.
- Make sure the blower path is open: Air has to move freely through the machine.
What a successful test looks like
Reattach the panel if it's still off. Plug the dryer in and run a heat cycle.
You're looking for simple signs:
- Warm air at the exhaust
- Normal cycle behavior with no burning smell beyond brief first-use residue
- A healthy element glow on models where it's visible through an opening
If the machine heats and airflow feels strong, the job likely landed where it should. If airflow is weak, don't call the repair done just because the heater came on. Poor venting is how repeat failures start.
A new element in a dirty dryer is still a bad repair.
Troubleshooting Common DIY Replacement Issues
If the dryer still doesn't heat after dryer element replacement, the problem is usually small, not mysterious. Most of the time it comes down to one of a few repeat mistakes.
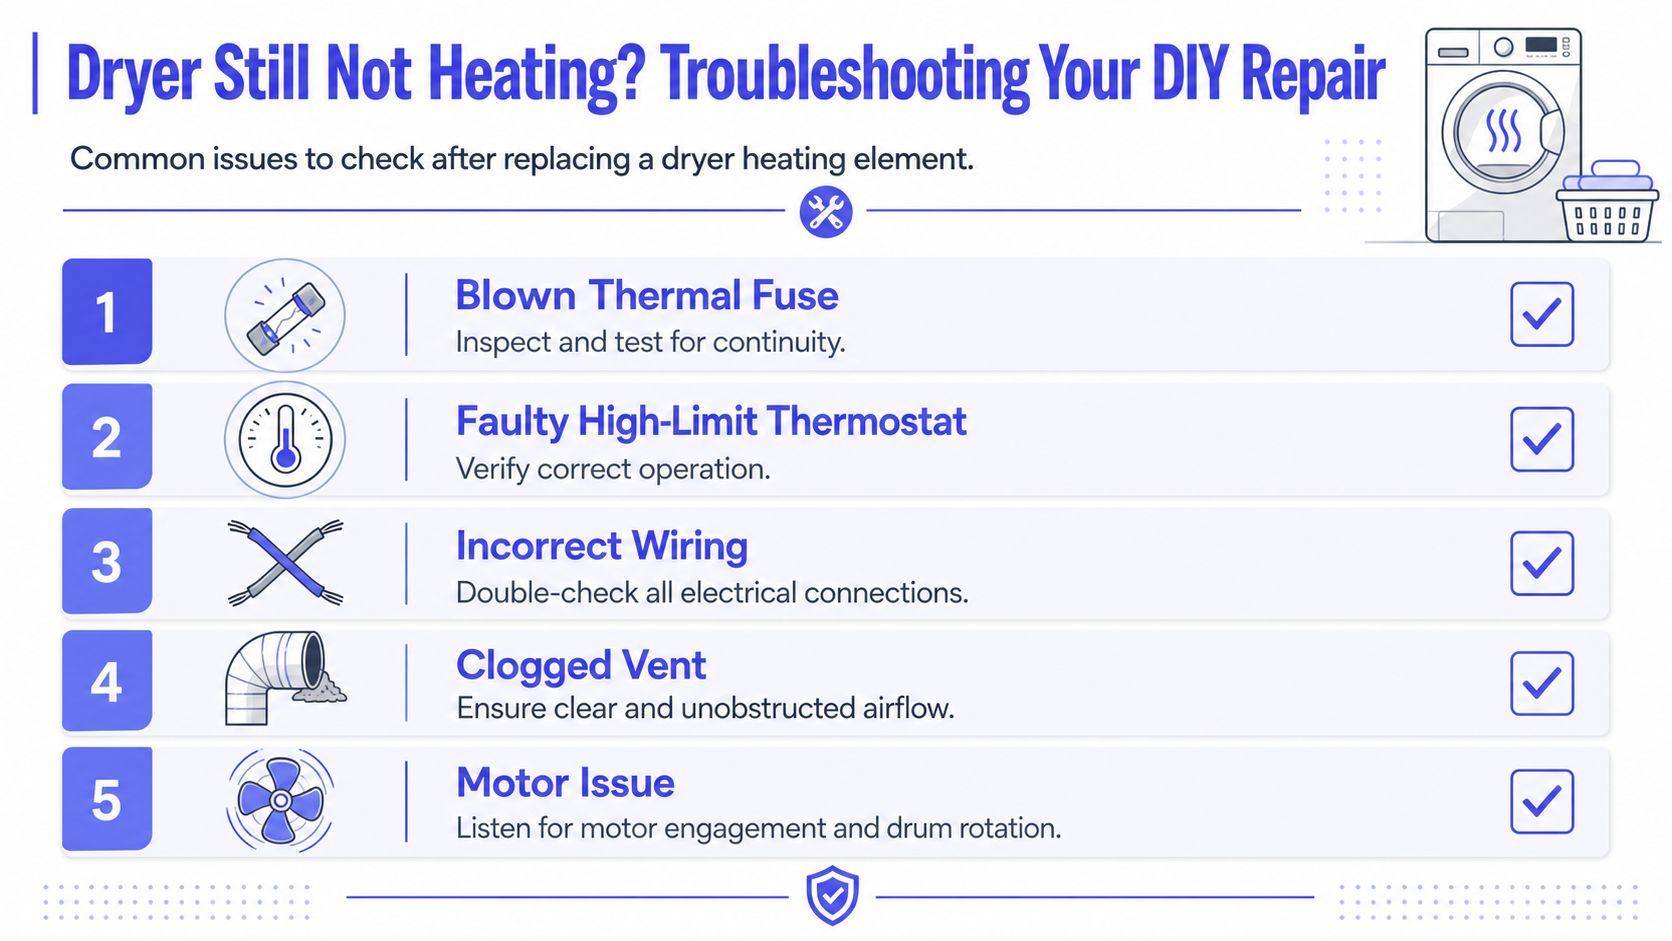
If the new element still doesn't heat
Start with the connections you touched.
A common technical pitfall is improper spade connector installation. Loose connections create micro-arcing that can destroy a new element's coil support in just 3 to 4 cycles, and elements installed without cleaning the vent system fail at 3.2 times the normal rate, with lifespan dropping from 8 to 10 years to 2 to 3 years, according to this LG dryer element replacement troubleshooting guide.
Check these first:
- Loose terminal fit: A connector can look attached but still not be fully seated.
- Missed thermostat transfer: If your model needed the high-limit thermostat moved over and you skipped it, the safety circuit may stay open.
- Bad diagnosis at the start: If the thermal fuse was the actual failure and never got tested, the new element won't fix anything.
A quick review of your wiring photos usually catches one wrong placement or one half-installed connector.
If it heats briefly, smells hot, or fails again fast
Rapid repeat failure usually points to heat stress, not a defective coil by itself.
Use this short checklist:
| Symptom | Likely issue |
|---|---|
| No heat at all after install | Open fuse, missed wiring connection, missing transferred safety part |
| Heats briefly then stops | Airflow restriction causing overheating |
| New part fails quickly | Loose spade connector, dirty vent system, poor fitment |
| Hot smell and odd operation | Lint left in cabinet or connection issue near the heater |
If you want to be methodical, inspect your work the same way a good pro would inspect a business before trusting it. Verify the basics, don't assume, and look for the failure point with evidence. That same mindset shows up in contractor screening too, which is why a checklist like this contractor background check guide is useful outside appliance work as well.
If you're on your second round of troubleshooting and the answer still isn't obvious, that's usually the point where DIY stops saving time.
When to Skip the DIY and Call a Professional
Not every no-heat dryer deserves a repair. Age and cost matter.
Most heating elements last five to ten years, machines under seven years old are usually better repair candidates, and for units over nine years old with a heating element failure, replacement is often the better move. If a repair costs more than 50% of a new dryer's price, replacement is statistically superior, and the average dryer lifespan is 13 to 15 years, based on this repair-versus-replace dryer guide.
The age and cost thresholds that matter
If your dryer is fairly young and the diagnosis is clear, a heating element repair can be reasonable. If it's older, the same repair starts looking like money spent on a machine that may be close to the end of its useful life.
That's especially true if the problem doesn't stop at the element. Burnt wiring, repeated blown fuses, or signs of control issues push the job out of the simple DIY category.
Call for help when the job stops being straightforward
Here's where I'd stop and hand it off:
- The dryer is older and already showing multiple failures
- You found damaged wiring or scorched terminals
- You're not comfortable working around appliance electrical components
- The diagnosis isn't clean after basic circuit testing
If you do hire someone, ask better questions than “What do you charge?” Start with diagnostic process, model familiarity, and what happens if the first repair doesn't solve the issue. This what to ask a contractor checklist is a useful way to frame that conversation.
If the readings are clear and the repair is straightforward, you can handle dryer element replacement yourself. If the diagnosis gets messy or the machine is old enough that the math no longer works, Hand Vetted Co. is a practical place to find one verified professional instead of chasing quotes from a long list of random businesses.