The 2026 average cost to insulate an attic is about $2,100 installed, with most projects landing between $1,700 and $2,500, or roughly $1 to $3 per square foot. Your final quote can fall well outside that range if you choose spray foam, need extensive air sealing, or require a higher R-value for your climate.
That national average is useful for setting a budget, but it isn't enough to judge a quote. Two decisions move the number more than anything else: the insulation material and the R-value your climate zone requires. A basic attic top-up is a different project from rebuilding the attic assembly around spray foam, and the price should reflect that difference.
Table of Contents
- What the Average Attic Insulation Job Costs
- Insulation Material Prices Side by Side
- What Really Drives Your Total Price
- DIY Versus Hiring a Pro
- How to Get Accurate Quotes Without the Guesswork
- Rebates, Tax Credits, and Payback Reality
- When Hiring a Vetted Pro Is Worth It
What the Average Attic Insulation Job Costs
A standard attic insulation project usually lands in the low thousands, not the tens of thousands. Major market guides report an installed range of $1,700 to $2,500, or approximately $1 to $3 per square foot, according to HomeAdvisor's attic insulation cost guide and Thumbtack's attic insulation pricing overview.
For an 1,800-square-foot attic, applying the per-square-foot range produces roughly $1,800 to $5,400, including labor and materials. A separate cost range from HomeAdvisor places many projects between $1,184 and $3,125, with a midpoint around $1,923. The spread is wide because “attic insulation” can mean adding loose-fill over an accessible floor, removing contaminated insulation, or insulating a difficult roof deck.
Start with these two inputs
Material choice sets the basic price structure. Blown-in cellulose and fiberglass generally cost less than spray foam. Spray foam costs more because it also provides air sealing when applied to the attic deck. Current pricing guides place standard blown-in insulation around $0.90 to $2.40 per square foot, while spray foam can reach $3,000 to $7,000 for a 1,000-square-foot attic, according to Fixup First's attic insulation cost analysis.
R-value determines the amount of insulation your attic needs. Department of Energy guidance commonly places attic targets at R-30 to R-49 in many U.S. areas, rising to R-49 to R-60 in colder zones, as explained in the Department of Energy home insulation guide. A higher target usually means more material, greater installation depth, and careful clearance around ventilation paths.
Practical rule: Treat the national average as a starting budget. Before comparing bids, require the proposed material, target R-value, attic square footage, and preparation work in writing.
For a straightforward attic-floor upgrade, plan on a low-thousands budget. The quote rises when access is difficult, old insulation requires removal, or the project shifts from insulating the floor to insulating the roof deck. Rebate eligibility can reduce your net cost, but it should be checked after you understand the full installed scope.
Insulation Material Prices Side by Side
Material choice and the required R-value set the first major difference between otherwise similar attic estimates. The table below compares installed pricing for a 1,000-square-foot attic. Ranges come from RealCostIQ's attic insulation calculator and related market guidance. The totals extend the listed per-square-foot prices.
| Material | Cost per Sq Ft Installed | Total for 1,000 Sq Ft | R-Value per Inch | Best For |
|---|---|---|---|---|
| Fiberglass batts | $1 to $1.50 | $1,000 to $1,500 | Varies by product | Accessible joist bays and careful DIY work |
| Blown-in cellulose | $1.50 to $2.50 | $1,500 to $2,500 | Varies by product and installed depth | Filling irregular spaces affordably |
| Blown-in fiberglass | $1.50 to $2.75 | $1,500 to $2,750 | Varies by product and installed depth | Loose-fill coverage around obstacles |
| Mineral wool | $1.75 to $3.50 | $1,750 to $3,500 | Varies by product | Fire resistance and dense, durable assemblies |
| Spray foam | $3 to $7 | $3,000 to $7,000 | Varies by product and thickness | Air sealing and roof-deck assemblies |
Fiberglass and loose-fill options
Fiberglass batts are the most straightforward option. Rolls or panels fit between joists, making them suitable for attic floors with regular spacing and few obstructions. They also suit careful DIY work. Installation quality determines the result: gaps around wiring, framing, and penetrations leave weak spots in the insulation layer.
Blown-in cellulose often delivers the best price for an irregular attic floor. It fills around pipes, wires, and framing more effectively than batts, but installation requires a blower and accurate depth control. Require the installer to mark the intended depth. That lets you check whether the material reaches the specified R-value instead of accepting a vague promise of “full coverage.”
Blown-in fiberglass uses the same loose-fill approach and handles uneven spaces efficiently. The estimate should name the product and state its coverage requirements. Product density and installed depth affect performance, so the material category alone does not tell you what the finished attic will deliver.
Mineral wool and spray foam
Mineral wool costs more than basic fiberglass and cellulose within the cited ranges. Choose it when the assembly calls for a dense, durable product and those properties justify the higher material cost.
Spray foam commands the highest price, and it earns that premium only when air sealing or roof-deck insulation is part of the plan. Open-cell and closed-cell products differ in density, moisture behavior, and air-sealing performance. Remodel Calculators' insulation pricing guide places open-cell spray foam around $2,200 to $4,100 and closed-cell foam around $3,000 to $6,000 for a 1,000-square-foot attic.
The installation method also affects your practical choice. Fiberglass batts can work for a capable DIY installer. Blown-in products generally require professional equipment for even coverage and controlled depth. Leave spray foam to trained installers because mixing, thickness, ventilation, and ignition-barrier requirements demand specialized handling.
Verdict: Choose batts for the lowest basic material cost, blown-in cellulose for strong value on irregular attic floors, and spray foam when whole-assembly air sealing justifies the premium. Compare each option at the target R-value, not by material price alone.
What Really Drives Your Total Price
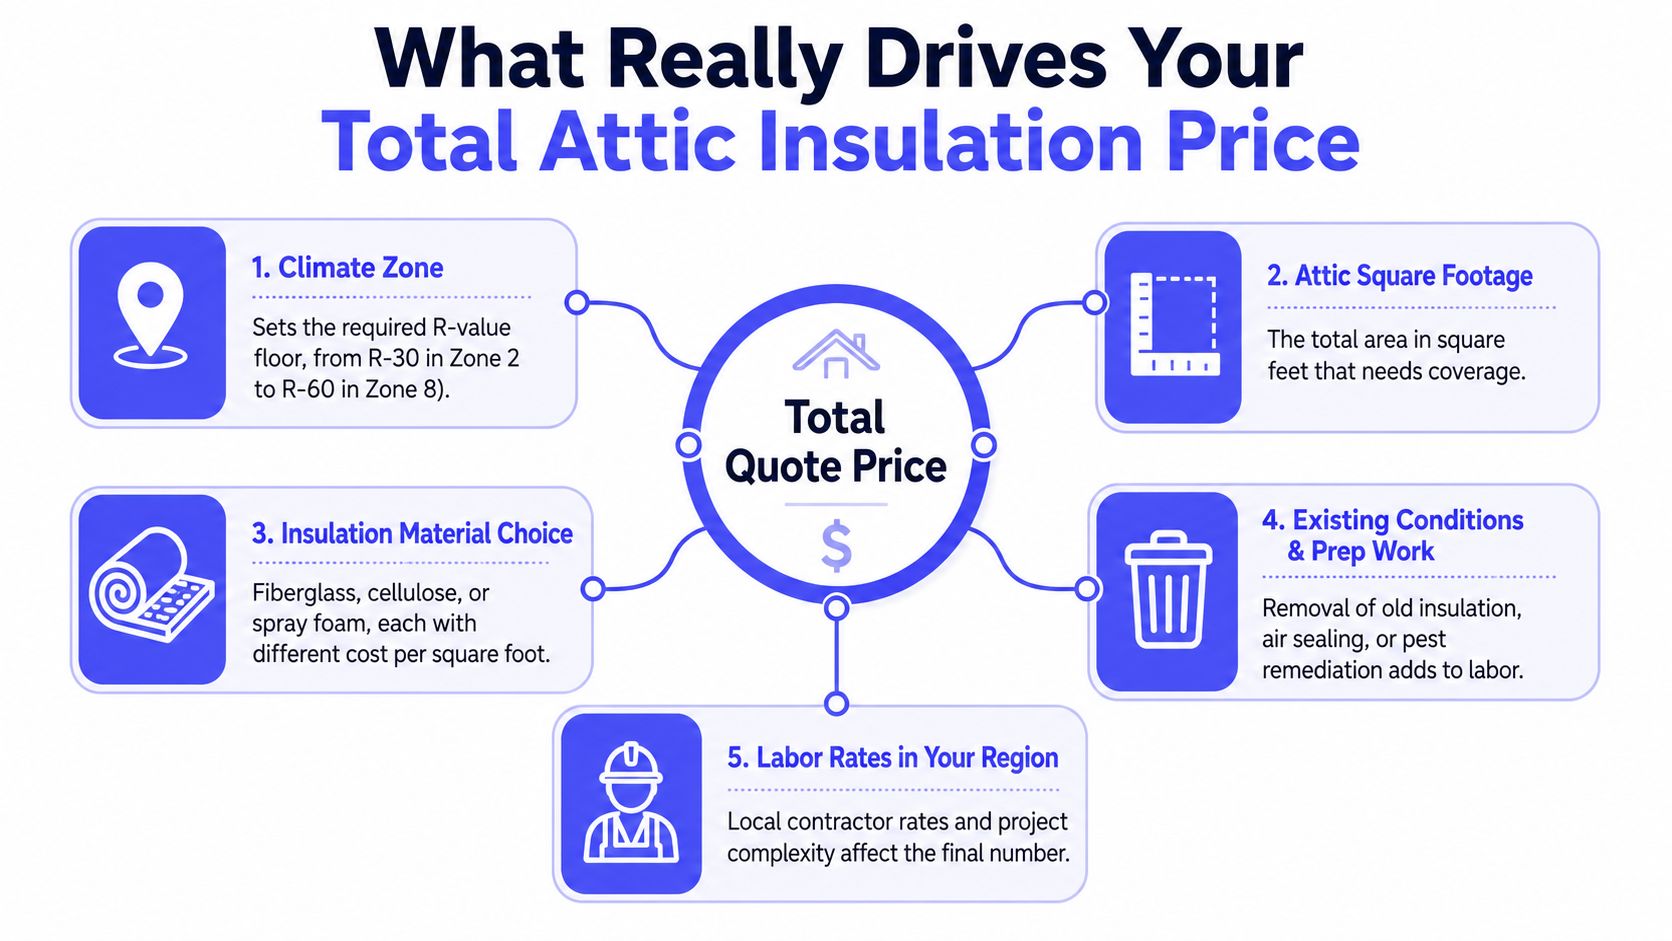
Once you've chosen a material and established the target R-value, five conditions determine whether your estimate stays near the average or moves sharply higher.
Climate zone sets the material requirement
Your climate zone establishes the R-value floor. Department of Energy guidance spans R-30 to R-49 in many areas and R-49 to R-60 in colder zones, so a warm-climate attic and a cold-climate attic of the same size may need different insulation depths. That added depth affects both material volume and labor, as documented in the Department of Energy insulation guidance.
Don't accept a quote that says only “install attic insulation.” It should state the target R-value and explain how the installer will achieve it.
Geometry and access change labor
Square footage is more complicated than the home's floor plan suggests. Vaulted sections, truss cavities, low-clearance areas, and obstructions can increase handling time even when the measured attic area looks ordinary.
Access matters just as much. A roomy attic with a pull-down stair is far easier to service than one that requires drywall removal, a larger hatch, or work around built-in structures.
Existing conditions determine preparation
Old insulation doesn't always need to come out. Removal becomes more likely when the material is wet, moldy, contaminated, or incompatible with the proposed installation. Current cost guidance places removal in the range of $1 to $3 per square foot, depending on conditions, as reported by Remodel Calculators.
Air sealing and ventilation work also belong in the estimate. Sealing penetrations, installing baffles, and preserving soffit and ridge airflow can add roughly $0.50 to $1.50 per square foot, according to Fixup First. Those aren't decorative upgrades. Insulation performs poorly if outside air bypasses it or soffit ventilation gets blocked.
Contractor's view: A cheap quote that skips air sealing, baffles, or condition checks isn't cheap if the assembly still leaks or traps moisture.
DIY Versus Hiring a Pro
DIY can reduce the labor portion, but it doesn't remove the technical work. Blown-in cellulose or fiberglass may cost about $0.50 to $1 per square foot in materials, with blower rental adding $150 to $300, according to the supplied cost guidance. For a 1,000-square-foot attic, that means approximately $500 to $1,000 in material plus the rental.
Batt material can run about $0.30 to $0.60 per square foot, but cutting and fitting around every penetration can turn a low material price into a long, uncomfortable project. The finished R-value depends on installation quality, not the label on the package.
| Insulation Type | DIY Materials | DIY Total With Rental | Professional Installed | DIY Savings |
|---|---|---|---|---|
| Blown-in cellulose | $500 to $1,000 | $650 to $1,300 | Material plus professional labor | Can be substantial |
| Blown-in fiberglass | $500 to $1,000 | $650 to $1,300 | Material plus professional labor | Can be substantial |
| Fiberglass batts | $300 to $600 | $300 to $600 | Material plus professional labor | Labor is avoided |
| Spray foam | Material varies | Equipment rental alone is $2,000 to $5,000 | Material plus specialized labor | Often limited |
The professional labor premium is commonly about $1 to $2 per square foot over material cost, based on the provided pricing guidance. A professional also handles baffles, air sealing, recessed-light clearances, and depth verification. DIY can save roughly $800 to $1,500 on a typical attic, but only when the space is safe, accessible, and free of serious existing-condition problems.
Where DIY makes sense
Choose DIY for a straightforward attic floor with safe access, no suspect wiring, no moisture damage, and a material you can install consistently. Wear proper respiratory and skin protection, protect light fixtures and electrical equipment, and keep ventilation paths clear.
Where the savings disappear
Spray foam is a poor DIY candidate. Equipment rental alone can cost $2,000 to $5,000, and incorrect mixing can ruin the installation. Professionals also identify air leaks that are easy to miss from above, especially around top plates, plumbing penetrations, chases, and recessed lights.
Safety first: If you can't confidently identify wiring, ventilation paths, moisture damage, and fixture clearances, hire the installer. Saving labor isn't worth creating a fire or moisture problem.
How to Get Accurate Quotes Without the Guesswork
A reliable estimate starts in the attic, not in a text message. The estimator should measure the actual area, inspect the current insulation, check the ceiling depth, look for air leakage around penetrations, and trace ventilation from soffits to ridge or roof vents.
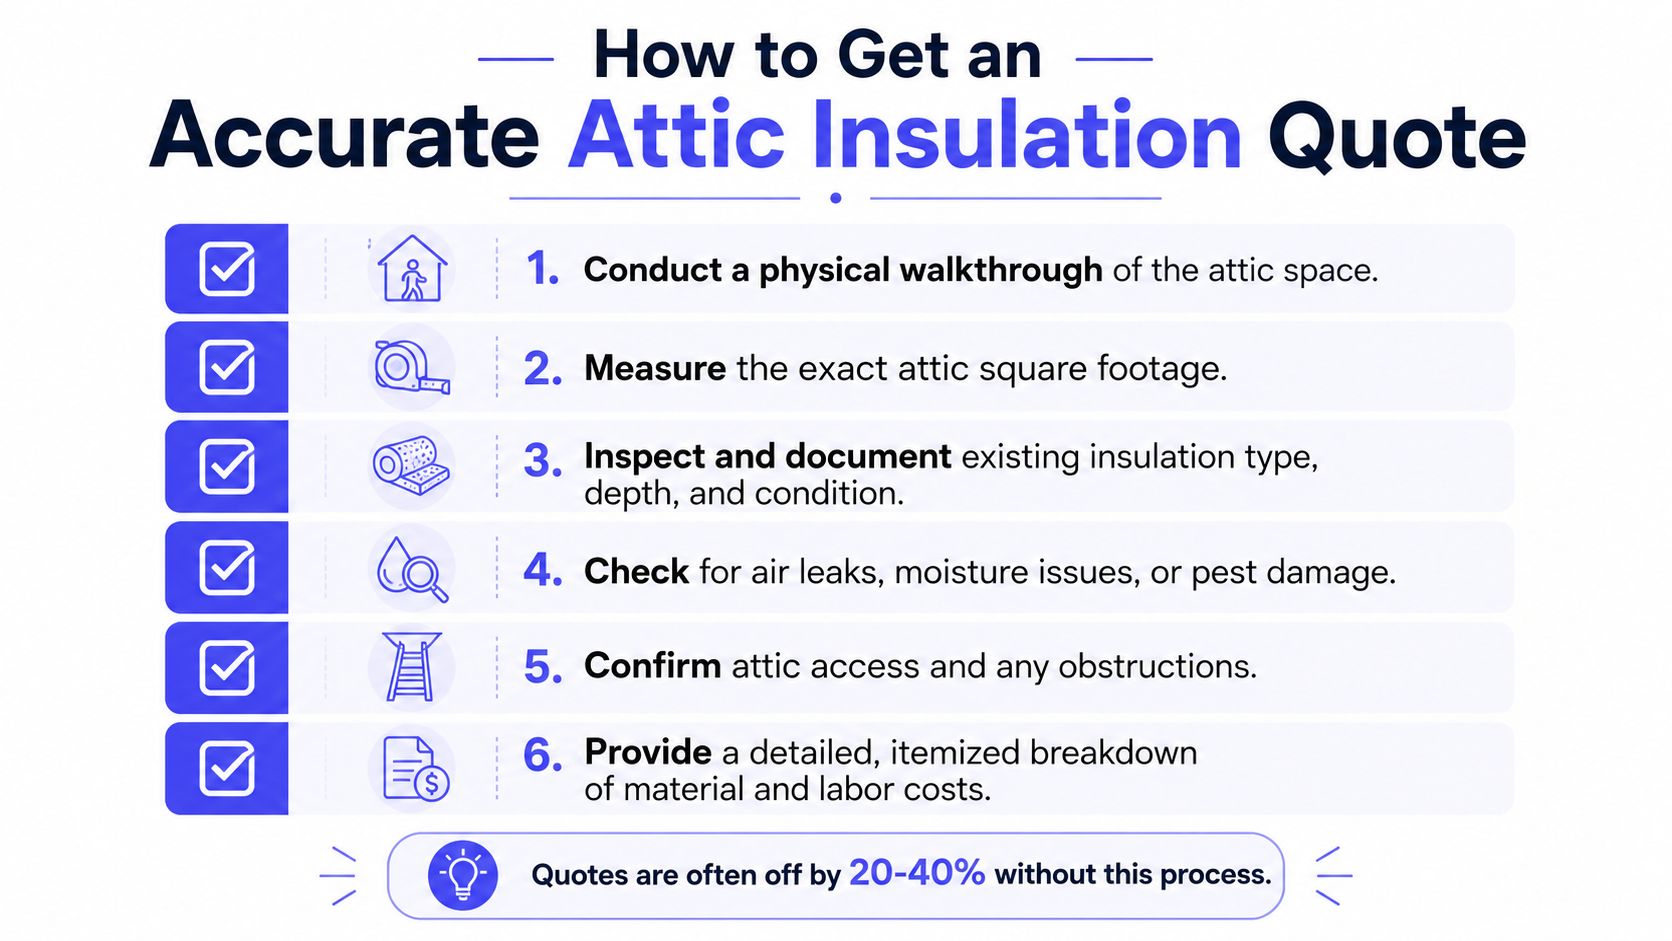
Use this checklist before accepting a proposal:
- Demand a physical walkthrough. The estimator needs to see access conditions, framing, obstructions, wiring, moisture, and ventilation.
- Confirm the measured square footage. Don't let the quote rely on the home's conditioned floor area.
- Document existing insulation. The proposal should identify its type, approximate depth, and condition.
- Ask about leakage and moisture. Penetrations, roof leaks, bathroom exhaust, and pest damage can change the work plan.
- Verify attic access. A difficult hatch or blocked path can affect labor and preparation.
- Require itemized pricing. Materials, labor, air sealing, baffles, removal, disposal, and cleanup should appear as separate line items.
The quote should also state the target R-value, exact product or material category, expected coverage, and whether a vapor retarder is included. If the contractor can't explain how many bags, rolls, or inches are required, you can't verify the result.
Read the practical project scoping questions before the walkthrough. They help you ask about fixed pricing versus time-and-materials, workmanship warranties, material warranties, licensing, insurance, and references from comparable attic projects in your climate.
A professional quote is a work plan with a price attached. If it lists only “insulate attic” and a total, it isn't detailed enough to compare.
Rebates, Tax Credits, and Payback Reality
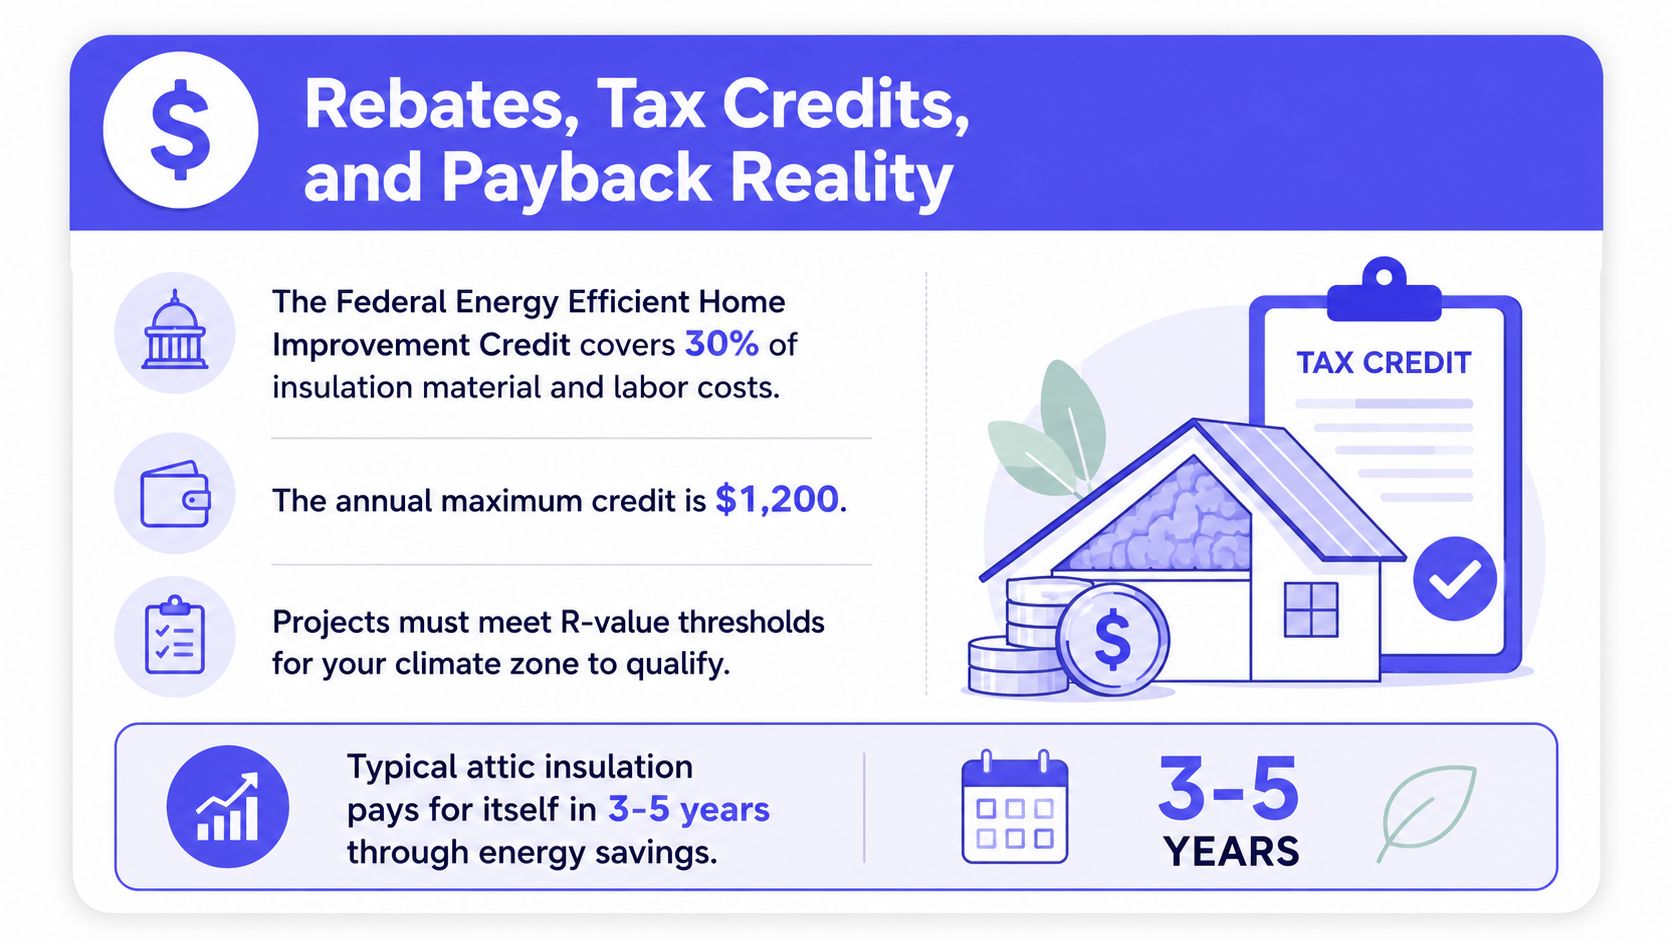
The financial case improves when the project qualifies for incentives, but verify eligibility before work begins. The federal Energy Efficient Home Improvement Credit covers 30% of qualifying insulation material and labor costs, up to $1,200 annually, provided the project meets the applicable R-value thresholds for the home's climate zone, according to the supplied 2026 program guidance.
Utility programs may add rebates of approximately $0.10 to $0.50 per square foot, particularly when insulation is paired with air sealing. State programs can add further support in places such as Massachusetts, New York, California, and several Midwest states, with some programs covering another 10% to 25% of project cost, according to the provided data.
Treat savings as a range
The supplied guidance estimates that many households save 10% to 20% on heating and cooling, translating to approximately $200 to $500 per year on a typical home. At the $2,100 average project cost, that implies a payback of about four to ten years, before incentives, as reflected in the provided cost and savings data.
The math can improve considerably when you combine a federal credit, utility support, and energy savings. The supplied guidance says that stacking incentives can bring net cost below $1,000 in qualifying situations, with effective payback under three years. Don't treat that outcome as automatic. It depends on eligibility, local programs, project scope, and whether the contractor completes the required documentation.
Check current program rules with the utility and tax professional before signing. A contractor who knows the local process can help, but you should still confirm the qualifying R-value, eligible labor, application timing, and documentation requirements yourself.
For broader planning, review home improvement financing options only after you've reduced the project scope to a real, itemized estimate. Financing a vague quote makes it harder to judge the actual value.
When Hiring a Vetted Pro Is Worth It
Professional installation is the right call when the attic has technical risks rather than just inconvenient insulation. Blown-in cellulose or fiberglass over existing layers requires pneumatic equipment and accurate depth control. A cathedralized attic can combine tight soffit ventilation with roof-deck work, while knob-and-tube wiring, vermiculite, asbestos concerns, or serious moisture damage require specialized decisions before anyone adds insulation.
A contractor can use moisture readings, blower-door testing, thermal imaging, and coordination with a HERS rater when the project needs measured verification. Those tools help identify leakage paths and confirm whether the proposed insulation plan addresses the whole assembly rather than covering the attic floor.
Situations that justify professional work
- Old or questionable wiring: Recessed lights, GFCI equipment, and legacy wiring need safe clearances and proper treatment.
- Tight ventilation paths: Baffles must preserve airflow at soffits instead of allowing loose-fill insulation to block the roof edge.
- Roof-deck insulation: Spray foam changes the assembly and requires attention to moisture behavior, ignition barriers, and product thickness.
- Contaminated materials: Vermiculite or suspect asbestos should trigger assessment before disturbance.
- Insufficient framing depth: If the required R-value exceeds the available single-layer depth, the installer needs a design that avoids compression and missed coverage.
Get at least two written quotes, verify licensing and insurance, and ask each professional to state the insulation type, coverage, target R-value, and verification method. Confirm whether rebate paperwork is included, and use a contractor background check as one part of your screening process.
The right price isn't the lowest number. It's the lowest complete price for a safe assembly that reaches the required R-value, preserves ventilation, and handles the conditions already in your attic.
Hand Vetted Co. connects you with one verified professional for home improvement projects, including attic-related insulation, ventilation, and HVAC work. Visit Hand Vetted Co. to answer a few project questions and receive an exclusive match instead of sorting through competing contractor pitches.