Most residential water damage restoration projects take about 2 weeks from the first response to the final walkthrough. Minor incidents can finish in 24 to 48 hours, while severe flooding with structural damage and mold issues can stretch to 3 to 6 months.
That range is wide because restoration isn't one cleanup task. It's a sequence of emergency response, extraction, structural drying, demolition, repairs, and final restoration. The visible puddle may disappear quickly, but moisture trapped behind drywall, under flooring, or inside framing determines when the property is usable again.
Table of Contents
- The Short Answer and Why It Depends
- The Four Phases of Restoration
- Timelines by Severity and Damage Class
- What Slows a Job Down or Speeds It Up
- From Dry to Livable
- Working With Your Insurance Company
- Why the Pro You Pick Changes the Timeline
- Your Next Steps and Quick Answers
The Short Answer and Why It Depends
The practical benchmark is about 2 weeks for an average residential project, according to major-market restoration timeline guidance. That estimate usually includes mitigation and ordinary repairs, not an unusually complex rebuild. A small supply-line leak on a tile floor may be resolved in a day or two. A sewage backup that saturates insulation, subfloors, and framing can continue for months.
The industry follows the ANSI/IICRC S500 standard, whose fifth edition was published in 2021 and describes procedures for restoring water damage in residential, commercial, and institutional buildings. The standard's practical message is simple. The timeline depends on the water category, damage class, affected materials, and response speed, not merely on how much water you can see. IICRC S500 guidance reflects that phased approach.
Three questions that predict the clock
- How much area is wet? A contained bathroom loss is easier to isolate than water moving through several rooms, a crawlspace, or a finished basement.
- What kind of water caused the damage? Clean supply-line water creates a different safety and removal plan than gray water or sewage-contaminated water.
- What materials absorbed it? Tile and exposed concrete may dry relatively efficiently. Hardwood, plaster, insulation, wall cavities, and layered subfloors hold moisture longer.
A burst dishwasher hose on a nonporous kitchen floor isn't the same job as that hose emptying into cabinets, drywall, and the subfloor. The right question isn't only, “How many days until the water is gone?” Ask, “How long until every affected assembly is dry, repaired, and safe to use?”
Practical rule: If the estimate only describes extraction or drying, it isn't a complete habitability timeline.
The Four Phases of Restoration
A restoration crew does not just remove water and leave. The job moves through four phases, each with its own finish line, and the property is not ready for normal use until the final phase is complete.
Phase one is emergency mitigation
The first response stops the source, extracts standing water, maps affected areas, removes unsalvageable materials, and applies appropriate cleaning or antimicrobial treatments. Emergency extraction often takes 2 to 8 hours, while initial mitigation decisions usually occur within the first 24 to 72 hours, depending on the loss. Angi's residential water-damage timeline guidance places extraction in that early emergency window.
Expect controlled demolition when assemblies conceal moisture. Technicians may remove baseboards, cut inspection openings in drywall, or pull wet insulation. Those actions expose hidden damage and create paths for air movement. Delaying them can extend drying and reconstruction.
Phase two is structural drying
Air movers and dehumidifiers run while technicians monitor moisture in wood, drywall, flooring, and subfloors. Drying commonly takes 3 to 7 days, but dense materials and deeper saturation can extend the schedule. Restoration process guidance separates drying from reconstruction and emphasizes that moisture readings, not elapsed time, determine completion.
A dry-feeling surface proves very little. Moisture can remain inside a wall cavity or beneath flooring, so technicians should document readings until affected materials reach their appropriate dry goals. These water damage restoration steps provide a practical checklist covering inspection, mitigation, drying, and repair.
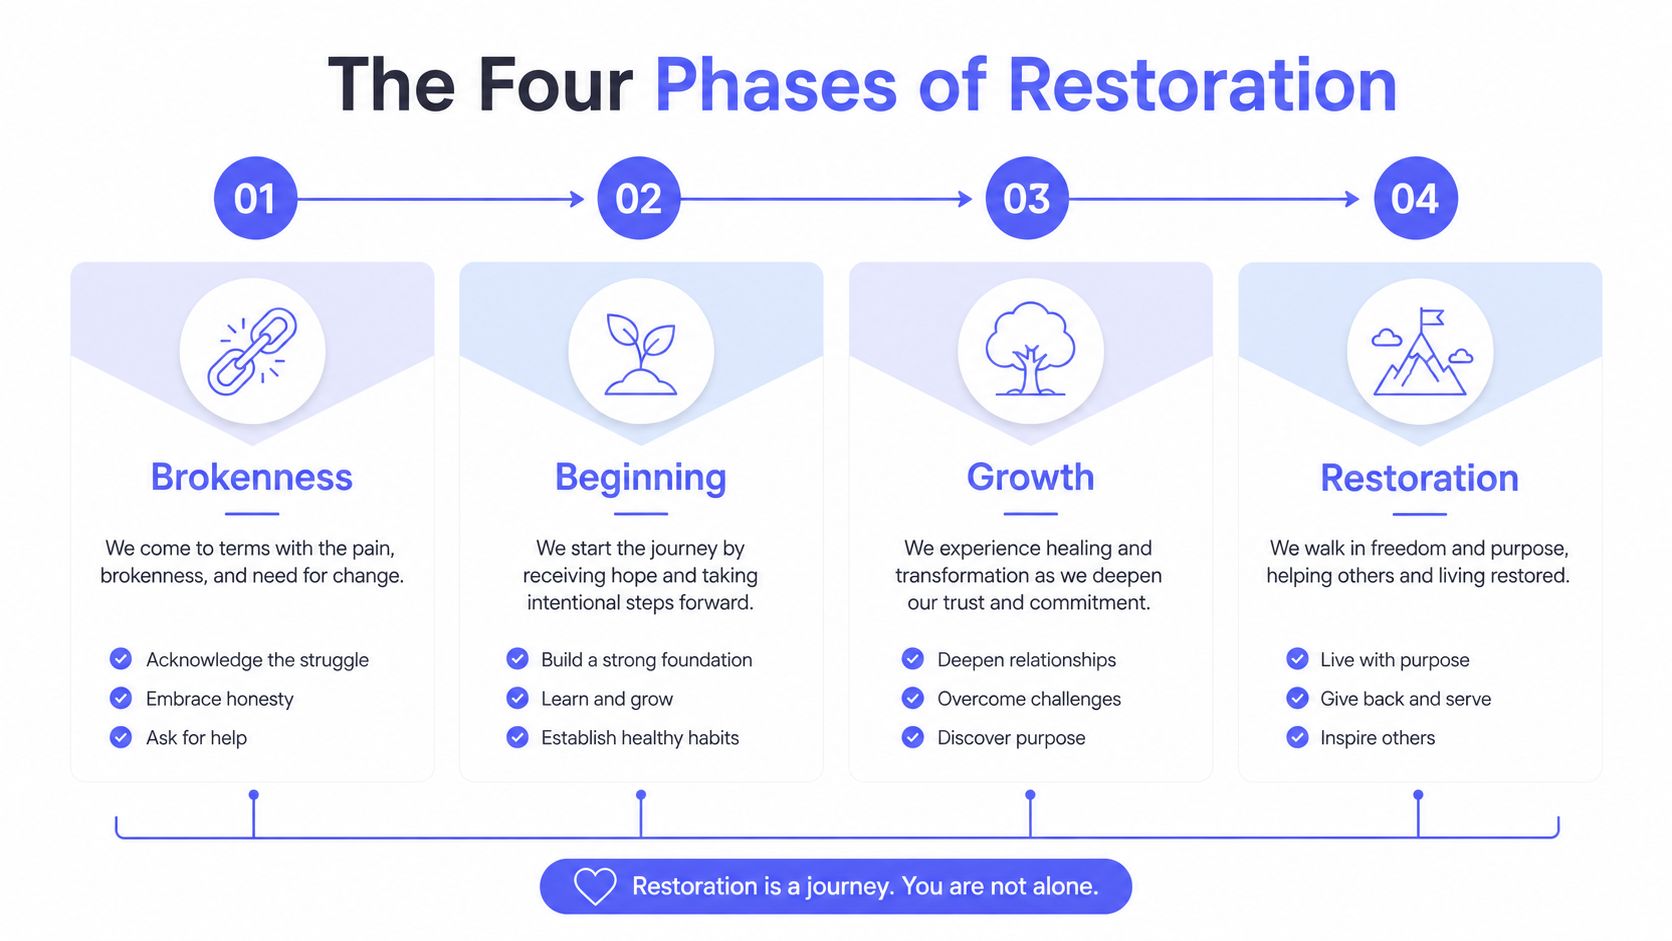
Phases three and four rebuild the property
Repairs address framing, drywall, flooring, trim, cabinets, and related building components. A complete residential project often takes 1 to 4 weeks when reconstruction is required, according to residential restoration timeline guidance.
Final restoration covers painting, cabinet work, fixtures, and finish details. Some tasks overlap, but many follow a fixed sequence. Drywall must be installed before finishing and painting. Flooring needs a prepared, dry surface. A “three-day drying estimate” is not a “three-day move-back estimate.” Marketing timelines often describe mitigation, while habitability depends on dry materials, completed repairs, and safe finishes.
Timelines by Severity and Damage Class
Class measures how water has affected building materials. Category measures contamination. A reliable schedule needs both, because a small clean-water loss can finish sooner than a larger loss involving concealed moisture or contaminated materials.
The ranges below describe drying, not move-back dates. A Class 1 loss usually has limited absorption and a small affected area. A Class 4 loss holds moisture in hardwood, plaster, concrete, or similar materials, so surface drying alone will not finish the work. IICRC damage-class and water-category classification guidance places Class 1 drying around 2 to 3 days, Class 2 and Class 3 around 3 to 5 days, and Class 4 at 7 to 14 days or longer.
| Class | Water Category Example | Drying Time | Total Project Time |
|---|---|---|---|
| Class 1 | Category 1 clean water affecting a limited area | 2 to 3 days | Often under 1 week |
| Class 2 | Category 1 or 2 water affecting drywall, carpet, and padding | 3 to 5 days | Often 1 to 3 weeks |
| Class 3 | Category 2 or 3 water saturating walls, ceilings, insulation, or subfloors | 5 to 10 days or longer | Commonly several weeks |
| Class 4 | Any category affecting hardwood, plaster, concrete, or other low-permeability materials | 7 to 14 days or longer | Can extend well beyond ordinary repair windows |
Category can change the job after the water is removed
Category 1 comes from a sanitary source, such as a supply line. Category 2 contains more contamination, while Category 3 includes sewage or other highly contaminated water. Category determines which materials technicians can clean, which they must remove, and whether containment or sanitation is required.
Clean water can shift from Category 1 to Category 2 within 48 to 72 hours after intrusion. That change raises contamination risk and can expand the removal scope. Water category guidance explains why delayed extraction can turn a straightforward drying job into demolition and sanitation.
Use this table to question an estimate, not to justify waiting. A professional must inspect hidden moisture, material absorption, and contamination before setting a dependable schedule. Marketing may quote the drying window. Habitability also requires completed repairs, safe finishes, and approval to occupy the space.
What Slows a Job Down or Speeds It Up
The visible size of a spill is a poor schedule. Material type and water category often control the timeline more than square footage. A small hardwood loss can take longer than a larger spill on exposed concrete because hardwood and layered assemblies hold moisture differently.
A clean-water leak handled promptly may stay an extraction and drying job. If water remains in place, contamination risk rises, and wet organic materials can support mold growth within 24 to 48 hours. Rapid-response restoration guidance correctly treats the first response as an hourly problem, not a next-week task.
The hidden moisture problem
A room can look clean while moisture remains behind baseboards, inside wall cavities, beneath flooring, or under subfloors. Technicians check these areas with penetrating and non-penetrating moisture meters, thermal imaging, controlled openings, air movers, and dehumidifiers. Equipment must reach the wet assembly, not merely circulate air through the room.
| Factor | Speeds the Job | Delays the Job |
|---|---|---|
| Response time | Extraction starts promptly | Water remains in materials |
| Water category | Clean water is identified early | Gray or black water requires more removal and sanitation |
| Materials | Exposed, low-absorption surfaces | Hardwood, plaster, concrete, insulation, and layered flooring |
| Equipment | Adequate air movers and dehumidifiers for the space | Too little equipment or poor placement |
| Access | Clear access to walls, floors, and utilities | Furniture, cabinets, and sealed cavities block airflow |
| Project coordination | Fast documentation and an available rebuild crew | Adjuster disputes, permits, or trade scheduling gaps |
A small leak can outlast a large-looking spill if it enters a wall or subfloor. Material and water-category guidance explains why standing-water volume alone cannot set the schedule.
Insurance and reconstruction coordination can add days even after drying equipment is working. Require prompt documentation, clear moisture readings, and a written scope so disputes do not stall demolition or repairs. For an active loss, contact an emergency water damage repair service instead of waiting for concealed damage to become visible.
From Dry to Livable
Dry and livable mark different finish lines.
Drying ends when moisture readings confirm that affected materials meet their required goals. Moisture-based drying guidance makes the point clearly: a calendar estimate cannot replace instrument readings. Keep the equipment in place until the crew verifies conditions and records the results.
Livable means the space functions safely again. That may require working HVAC, usable kitchens and bathrooms, safe electrical systems, completed flooring, installed drywall and trim, finished paint, and removal of equipment and unsuitable odors. A room with dry framing, exposed studs, missing cabinets, or unfinished floors is not ready for normal use.
The gap after equipment leaves
A minor clean-water loss can have a short gap between drying and occupancy. Once the structure passes moisture checks, limited repairs may finish quickly. Larger losses require reconstruction trades to work in sequence, with replacement of cabinets, flooring, drywall, electrical components, or structural elements.
Drying often takes 3 to 5 days. Repairs can add 1 to 8 weeks or more, based on material replacement, contamination, and reconstruction scope. Guidance on drying versus habitability separates the advertised drying timeline from the time needed to make the property usable again.
Mold remediation can add work before reconstruction starts. Ask the project manager for two dates in writing: the expected drying-completion date and the expected habitability date. Those dates give you a clearer measure of the job than the day equipment leaves.
Working With Your Insurance Company
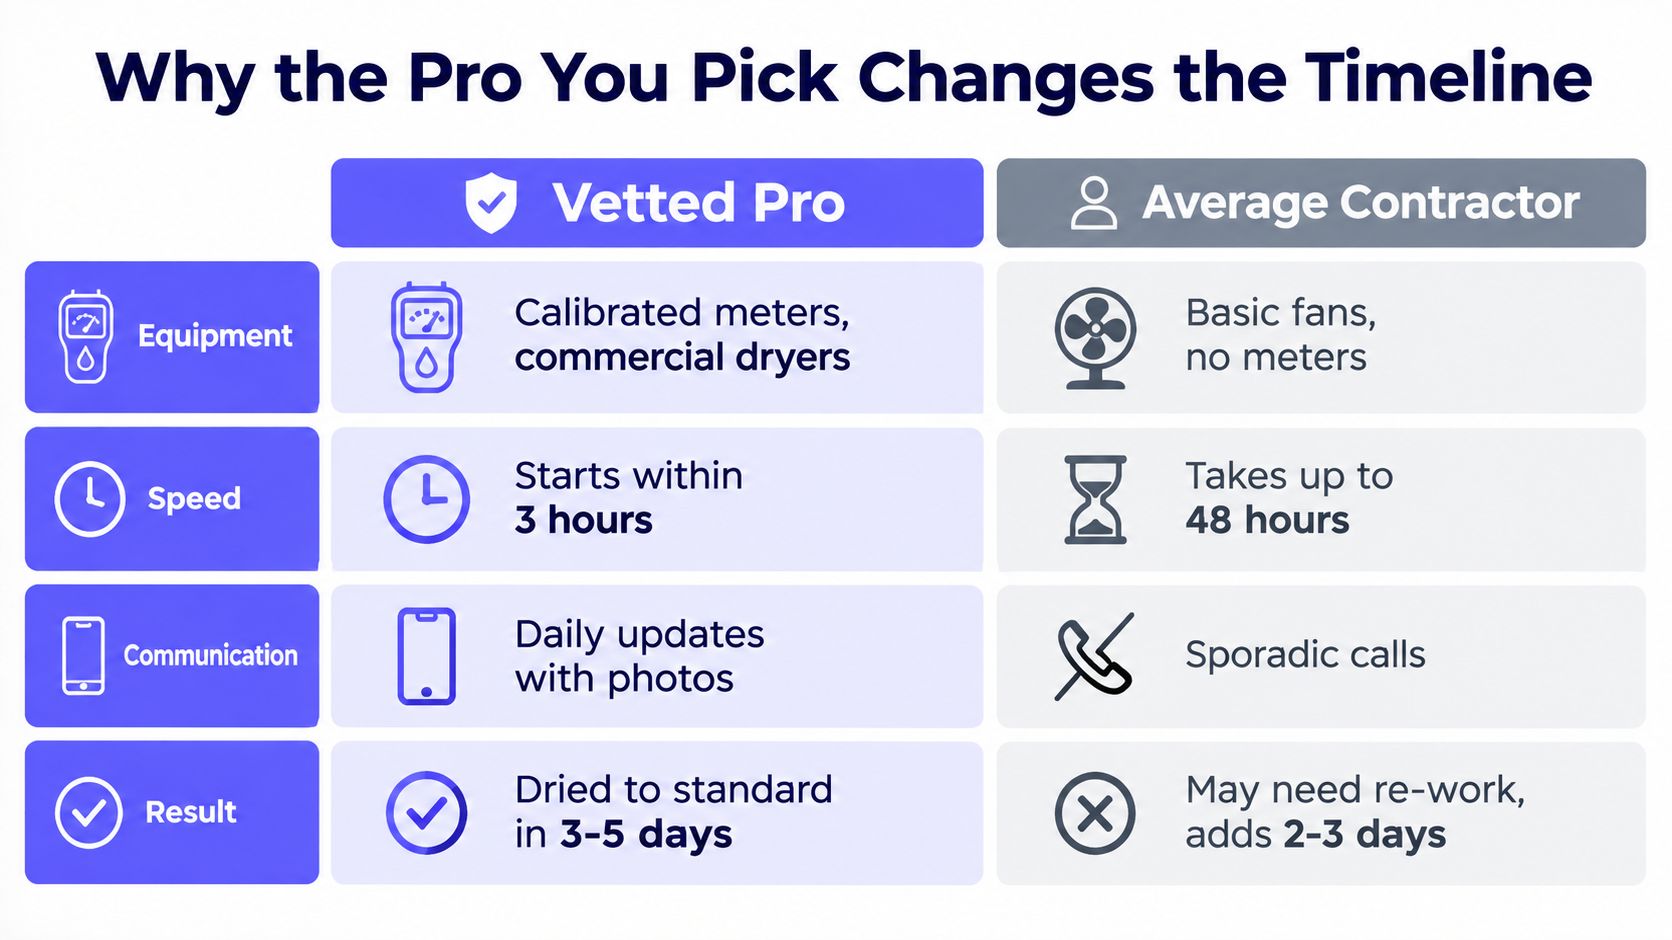
Insurance paperwork can run alongside mitigation, but poor documentation can stall the rebuild. Call the carrier the day mitigation starts, open the claim, obtain the claim number, and ask for the assigned adjuster's direct contact information.
Before cleanup changes the scene, photograph and video every affected room. Capture damaged flooring, walls, ceilings, cabinets, appliances, and personal belongings. Keep samples of removed materials when practical, and maintain a dated record of calls, emails, approvals, and decisions.
Protect the claim while protecting the building
Most homeowners policies distinguish sudden and accidental water damage from flood damage or gradual leaks. Confirm coverage with the carrier before authorizing extensive tear-out, but don't ignore an active leak while waiting for an adjuster. Reasonable steps to prevent further damage are usually part of responsible loss handling.
Give the adjuster the contractor's scope, photos, invoices, equipment records, and moisture logs. The contractor should document readings and drying progress, not merely report that fans were running.
Before reconstruction begins, ask for the agreed scope in writing. If the adjuster and contractor disagree about cabinets, flooring, drywall removal, or structural work, resolve that gap before trades are scheduled. Change orders after work starts are a common reason the physical project and the settlement process drift apart.
Use this homeowner insurance claims guidance to keep your records organized. The objective is simple: let mitigation continue while the claim receives the evidence needed for a timely decision.
Why the Pro You Pick Changes the Timeline
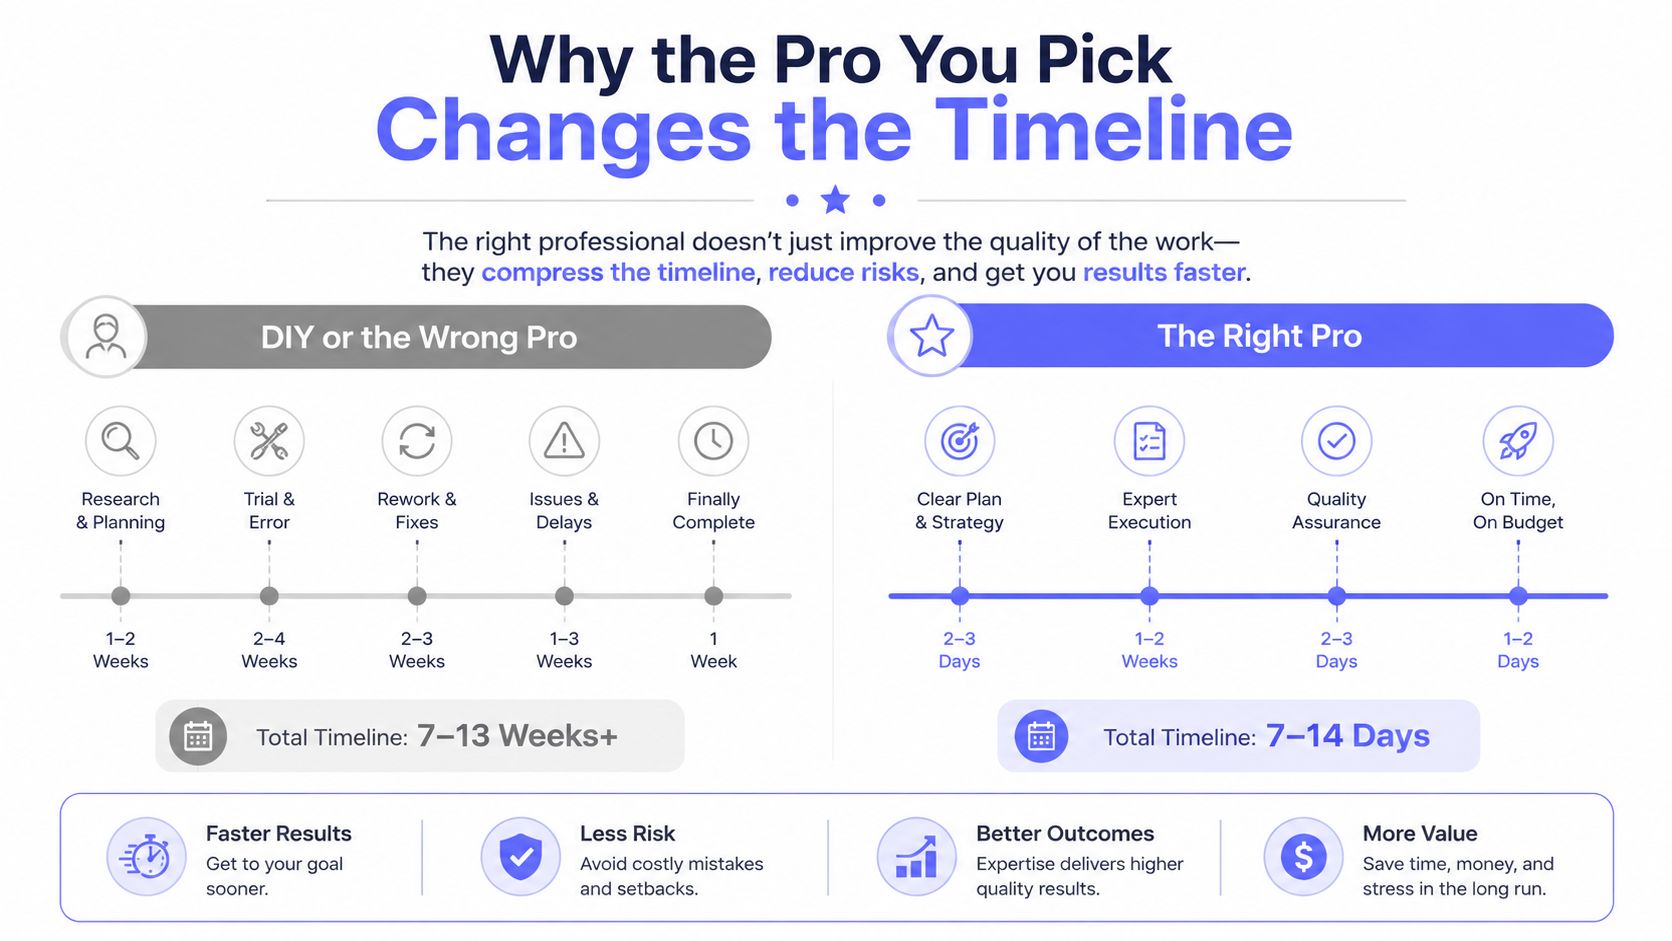
The right contractor can shorten the project before equipment reaches the house. Correct diagnosis on day one does. A qualified restoration professional identifies the water category, maps affected materials, checks for hidden moisture, sets drying targets, and records readings throughout the job. Those steps separate a genuine drying timeline from a marketing estimate.
Look for an active license where required, relevant IICRC certification, emergency availability, commercial dehumidifiers, air movers, moisture meters, and written daily records. Ask whether the company can coordinate reconstruction after drying. A connected mitigation and rebuild team can reduce handoff delays, especially when cabinets, flooring, or drywall require replacement.
Avoid the false economy of guesswork
DIY cleanup may suit a small, isolated surface spill. It becomes risky once water reaches drywall, insulation, subfloors, electrical systems, or contaminated materials. A handyman with rented fans can remove visible water while leaving wall cavities and flooring layers wet. That shortcut often turns a short mitigation job into rework, demolition, or mold remediation.
Lead marketplaces create another timing problem. Several calls do not prove that a provider has verified licensing, background screening, equipment, ratings, or restoration experience. The missing checks show up later when a wet area is overlooked or incomplete records slow claim decisions.
Hand Vetted Co. connects a homeowner with one verified professional for a water damage project. Its screening model checks licensing, background information, recent ratings, and human review. The request stays exclusive rather than being distributed to competing businesses, which can simplify the first hiring decision while standing water continues to affect the property.
Ask each candidate three direct questions:
- What will you measure? Expect moisture readings, not only a visual inspection.
- What will you document? Require photos, scope notes, equipment records, and drying logs.
- Who handles reconstruction? Confirm whether the same company coordinates the rebuild or transfers you to another contractor.
Your Next Steps and Quick Answers
The first day affects the final timeline. Use this order:
- Stop the source: Shut off the supply, address the appliance or plumbing failure, and stay clear of electrical hazards.
- Document before cleanup: Photograph and record every affected room, material, and damaged belonging.
- Call a qualified restoration company within 24 hours: Early extraction reduces the time materials remain saturated.
- Notify your insurer: Open the claim, request the claim number, and keep every email and receipt.
- Ask for moisture documentation: The crew should record readings during drying and explain the dry standard.
- Schedule a follow-up reading: A check around day 7 can show whether materials are drying as expected. Monitoring must continue until the required goals are met.
Can you stay in the property during restoration?
Sometimes. Staying may be reasonable when the affected area is isolated, the water is clean, utilities are safe, and drying equipment does not disrupt the living space. Contaminated water, structural damage, electrical concerns, extensive demolition, or mold work can make temporary relocation safer.
Ask the contractor when the structure will be dry and when the room will be usable. Those dates may be close for a small loss, but a contaminated or reconstruction-heavy project can keep the room out of service for weeks or months after mitigation ends.
When does mold become a concern?
Treat mold risk as immediate. Wet organic materials can support growth within 24 to 48 hours, so do not wait for visible spotting. Start extraction and drying promptly, then have a professional assess odors, staining, and concealed assemblies.
How long do contents take to clean?
Contents timing depends on the material, contamination, and the cleaning or drying required. Salvageable hard goods can often be cleaned while structural drying continues. Upholstery, paper goods, electronics, and porous belongings may require specialized handling, off-site cleaning, or replacement decisions before the room is restored.
What if the adjuster undervalues the loss?
Request the scope and valuation in writing. Compare them with the contractor's findings, photographs, moisture records, and itemized estimate. Ask the adjuster to identify each disputed item. If the disagreement continues, review your policy's appraisal, mediation, complaint, or professional representation options before signing a final settlement.
If water damage has already started, do not spend the next day comparing unverified listings. Hand Vetted Co. can connect you with one screened restoration professional, with licensing, background information, ratings, and human review checked before the match.